Making decisions can be difficult. Yet, some people have a harder time than others. Such fear of commitment can affect multiple areas of life – including business.
In particular, the process of building a website is rife with important decisions to be made. Because of that, a commitment-phobic client may become overwhelmed. Having to make choices on a color scheme, features and functionality could potentially bring about anxiety.
If not managed effectively, it might also lead to a stalled project. When clients can’t make the necessary decisions regarding their website, there’s very little a designer can accomplish. Thus, we sit and wait for things to resolve themselves.
Not so fast! While fear of commitment and web design go together like oil and water, you don’t have to settle for such a quagmire. The following are some ways to help even the most skittish of clients move forward.
Share Research and Data
A modern website is going to require commitments to various tools and applications. For instance, a content management system (CMS) is usually a key component. From there, you’ll have to talk about plugins, themes, or any necessary custom code. And let’s not forget about web hosting and other third-party service providers.
It’s a lot to consider – especially for a client who isn’t well-versed in these subjects. Frankly, it’s no wonder that the process can stress people out.
One way to ease a client’s mind is to back your suggestions up with data. This helps to establish trust and proves that you do indeed know what you’re talking about. It also shows that they’re not alone in utilizing a particular tool or technology.
There are many useful tidbits to mention. Market share can be an important factor when it comes to a platform like WordPress. But so are examples of organizations using similar setups. Demonstrating a product’s longevity and history can also boost the comfort level.
The main idea is to show that the items chosen were done so with care and logic. That may be enough to convince a client that they’re on the right path.

Discuss the Importance of Stakeholder Buy-In
You may run into instances where a client is hesitant to provide input. They simply want you to pick out website technologies and run with them. Sometimes this is a result of having full trust in you as an expert – that’s great. But it can also be a sign of someone who doesn’t have the confidence to commit.
For smaller projects that don’t need a lot of advanced functionality, that may be fine. But passing the buck this way on a large website can be problematic.
Stakeholders should be aware of and approve of the tools powering their website. It’s not that they need to know every last detail. Rather, a basic grasp of what items are being used and why they are in place is often enough.
Why is this important? It’s all about commitment. A client who hasn’t bought into their project’s roadmap is less likely to fully understand the capabilities and limitations involved. This can lead to short-sighted decision-making that hurts the outcome.
By attaining a working knowledge of the various pieces in play, clients can better see things rationally. This makes things easier for everyone involved.
Identify Key Concerns
Sometimes having relevant data and a broad view of a project isn’t enough. A client may still have a difficult time making big decisions. They may not even understand why.
If you still find that a project is going nowhere fast, it’s time to take a different approach. It starts by identifying the pain points and starting a conversation. You don’t have to do anything dramatic – just a friendly email or phone call can get the ball rolling.
Mention that you’ve noticed some hesitancy regarding the website. Offer to answer any questions your client may have. Let them know that you’re happy to hear out their concerns.
The process of talking through such roadblocks can work wonders. Like any other problem, getting your thoughts out there tends to bring a feeling of relief. Once that kicks in, your client may be in a better place to start making decisions.
Stay Patient and Kind
Projects don’t always move as quickly as we’d like. And when a client is unable to commit to a particular path, it can be highly frustrating. We’ve all been there.
But it’s still important to maintain a calm demeanor. Passing your stress onto someone else is not conducive to getting things done.
Instead, aim to stay patient, kind, and helpful. Provide the kinds of data and background information that will bring comfort and confidence to stakeholders. Look for clues as to why a certain decision may be problematic and offer your assistance.
The good news is that this approach can pay off. Once a client begins making the required commitments, they start to fall like dominoes. Before you know it, the project is finished off – and with a successful outcome.
From there, you can sit back with a beverage and pat yourself on the back for a job well done!
The post How to Help Your Clients Overcome Fear of Commitment appeared first on Speckyboy Design Magazine.
Longtime users of WordPress have seen lots of UI changes over the years. It’s become sleeker, more accessible, and consistent. You can see the difference on virtually every screen.
Yet, one area that had seen surprisingly little change in recent years is the Widgets screen. That’s not necessarily a bad thing, as its drag-and-drop functionality was probably ahead of its time. And there’s some comfort in knowing what to expect, even as other UI elements evolve.
Well, the time has finally come for a change – and it’s a big one. As of WordPress 5.8, the Widgets screen will take on the same look as the Gutenberg block editor. But even that brings a feeling of familiarity to anyone who uses the newfangled editor.
Here’s a quick look at the new world of block-based widgets.
Blurring the Line between Blocks and Widgets
The first thing you’ll encounter on the revamped Widgets screen is a short onboarding carousel. This is very similar to the one used to introduce users to Gutenberg.
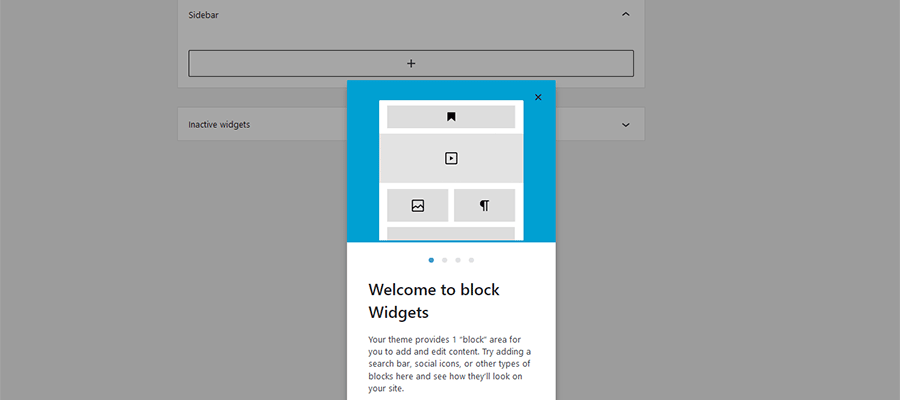
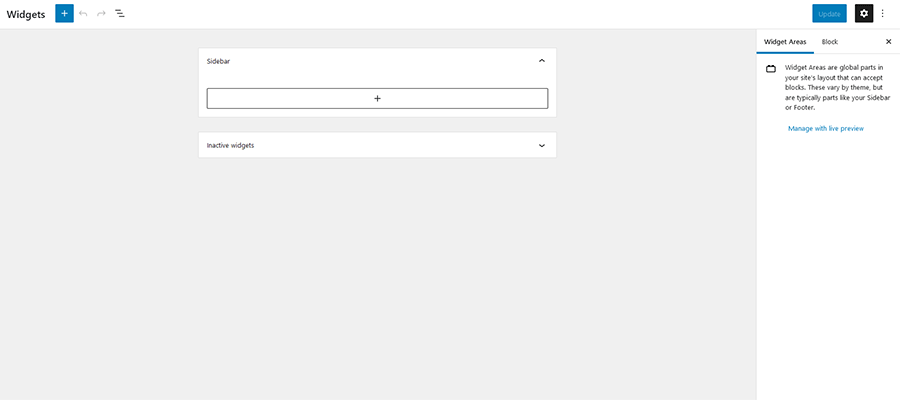
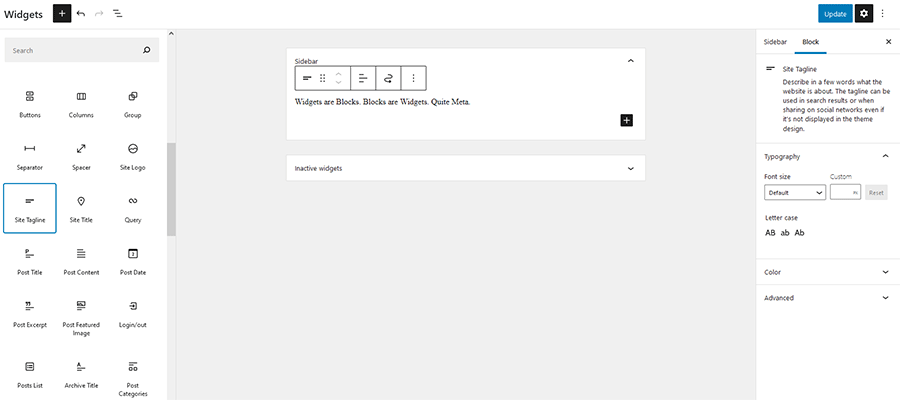
Once you get past the introductions, you’ll find a very minimal UI. Your theme’s defined widget areas (our example has just one) take center stage, while a large “plus” icon dominates the upper left of the screen.
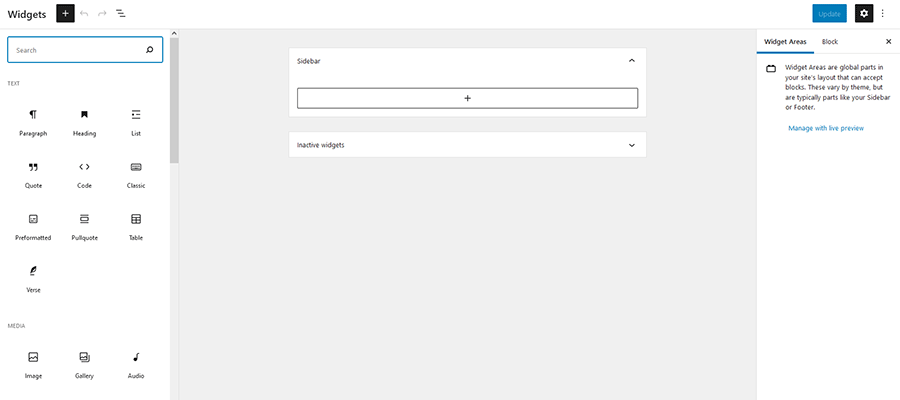
Just as with the block editor, clicking the icon opens up a listing of all the blocks installed on your website. You’ll find the basics like images and headings, along with the ability to embed media from outside sources such as YouTube. In practice, anything you can add to a page can also be added as a widget.
This brings a lot of flexibility to the traditional sidebar. In the past, the types of content that could be added via widgets was somewhat limited – at least without the help of widget plugins. Now, pretty much everything is fair game.
New Blocks to Enhance Your Sidebar and More
Looking beyond the revamped UI of the Widgets screen, there are also some new blocks to experiment with. They combine the functionality you’d expect of a widget with the convenience of a block.
Among the new selections, you’ll find:
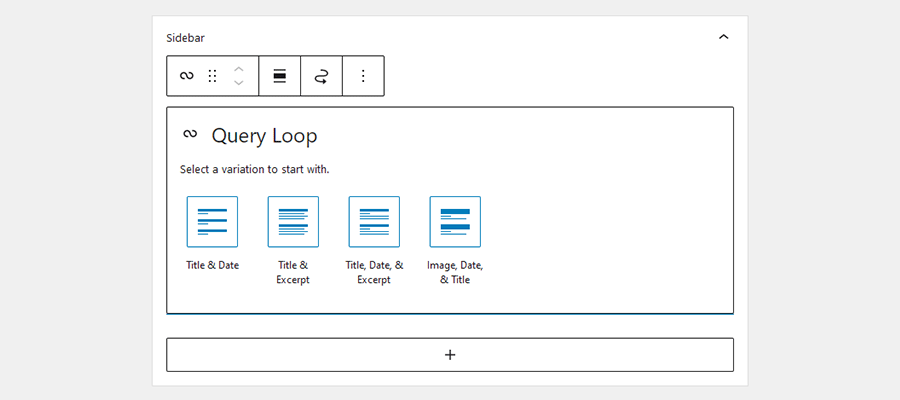
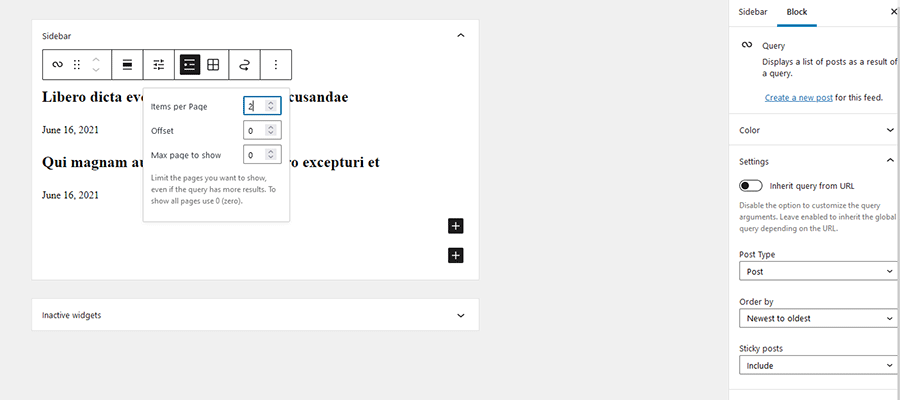
Query Loop
The Query Loop block allows you to craft a customized post listing. Choose your preferred layout and filter the results to meet your needs. Settings can be tweaked in a couple of places: the Settings panel on the right of the screen and by clicking the Display Settings button right above the block itself.
Note that this block is also intended to work with the new Template Editor, part of the Full Site Editing (FSE) feature.
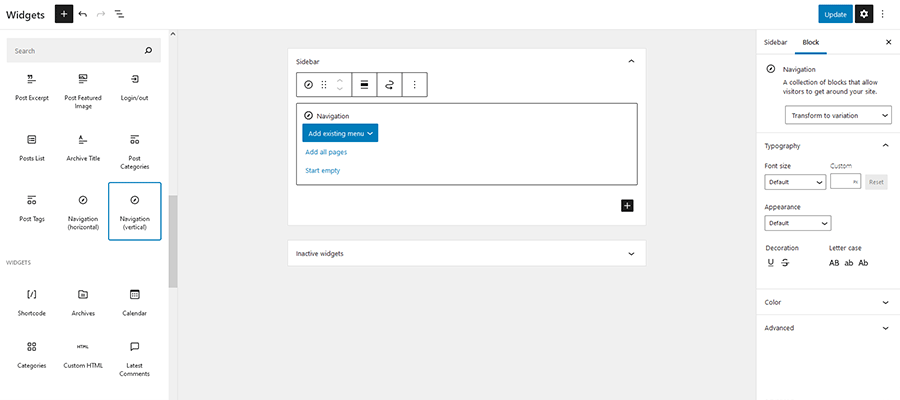
Navigation (vertical)
Adding a menu is a breeze with the Navigation (vertical) block. This is great for situations where you want to display a primary or secondary menu in a sidebar. Menus can be lightly styled and even set to be responsive.
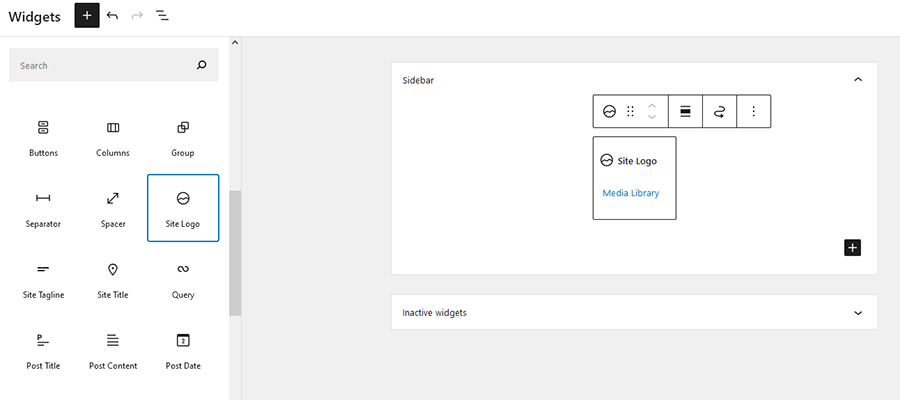
Site Logo
While basic in premise, the Site Logo block allows you to define and place a logo anywhere. This is especially handy for themes that support FSE. But it could benefit anyone who wants to use their logo in multiple spots without having to search for it in the Media Library each time.
Site Title / Site Tagline
Much like the Site Logo block, these new selections allow you to reuse predefined data in multiple places. If, for example, you’d like to place your site’s tagline (defined in Settings > General) within your sidebar, all it takes is placing the block in the desired location. In addition, you can also style these items to match your site.
Don’t Forget Existing Blocks
There are plenty of existing blocks that are a perfect fit for your sidebar. Among them are the Image, Posts List, Post Categories, Post Tags and Login/out blocks. Each one mimics or expands upon legacy widgets included with WordPress core.
You Can Still Use Your Old Widgets
It’s also important to point out that any existing custom widgets you have installed will still work. The Legacy Widgets block lets you place a widget that isn’t native to the new block-based setup. Add the block to your sidebar and select the desired widget from the dropdown menu.

Answering the question of how long these old-school widgets will be supported isn’t so clear. Much like the fate of WordPress Shortcodes, their fate is up in the air.
The software is clearly moving on from these items. However, WordPress tends to favor backward compatibility. Therefore, it’s likely that legacy widgets will keep on working as long as people continue to utilize them – no need to panic just yet.
Go Back to the Classic Widgets Screen
We get it – this new Widgets screen isn’t for everyone. Particularly those who eschew Gutenberg in favor of the Classic Editor.
Thankfully, the WordPress core team has provided an alternative. If you like things the way they were, install and activate the Classic Widgets plugin. You’ll immediately have the cherished UI back on your website.
Redefining the WordPress Sidebar
As the Gutenberg block editor continues to worm its way into other areas of the WordPress back end, we’re seeing the end of an era. A lot of the features we’ve come to take for granted are becoming vastly different.
On the one hand, it’s understandable why users may mourn the loss. The Widgets screen is but one example of a comfortable workflow. It was something you didn’t need to worry about – it just worked.
But there are plenty of positives to this change. For one, a unified UI is going to make WordPress much easier for new users to navigate. Having separate, bolted-on interfaces for different screens was more about necessity than solid design.
And the expanded functionality of blocks means that sidebars are no longer restrained to a few types of content. It allows us to express our creativity and serve users without a lot of custom work.
The result is that adding widgets will be a more streamlined and customizable experience. That’s a big step in the right direction.
The post The WordPress Widgets Screen Joins the Gutenberg Era appeared first on Speckyboy Design Magazine.
Is a mechanical keyboard essential to your workflow? Probably not. You can get your typing tasks done with any old keyboard. But if you’re looking for a comfortable, precise, and satisfying typing experience, read on to discover the 10 best mechanical keyboards.
Why Use a Mechanical Keyboard For Work?
If you have a job that demands a ton of time typing — web development, web design, IT, and journalism are some professions that fit the bill — investing in a high-quality keyboard can lead to a more productive and enjoyable work experience.
I’ve used many keyboards in the past: Generic $9.99 replacement keyboards, stock keyboards that come free with a new desktop PC, high-end gaming keyboards, laptop keyboards, ultra-portable wireless keyboards, you name it. A mechanical keyboard has been my preference for the past three years. Here are some reasons why:
- Delight: Mechanical keyboards provide you with a fantastic typing experience. Each keystroke feels gratifying and authoritative, unlike on a common dome-switch keyboard, which feels mushy. I sit in front of the computer 10 to 12 hours a day, so putting money into my hardware goes a long way towards improved comfort and productivity.
- Speed and precision: Accentuating a key in a mechanical keyboard results in some form of tactile feedback, telling you that you’ve pressed the key successfully. Also, unlike dome-switch keyboards, you don’t need to press a key all the way down (called “bottoming out”) in order for your keystroke to register. This results in increased typing speed and fewer typos, especially when you’re touch-typing.
- Build quality: Good mechanical keyboards are sturdy and durable, being able to bear the brunt of your keystrokes for years without any degradation to your typing experience. With dome-switch keyboards, which rely on a soft rubber or silicone membrane, the typing experience may gradually change the older the keyboard gets.
Once you start using a mechanical keyboard, it will be hard to switch back to an ordinary keyboard. I use a laptop as my main work machine, but I have a mechanical keyboard hooked up to it 99% of the time. Also, after three years of hard use, my go-to mechanical keyboard still looks and feels exactly the same as the day I got it.
Lifehacker has a good intro to mechanical keyboards that you should read if you’re new to keyboard technology.
Drawbacks of Using a Mechanical Keyboard
Mechanical keyboards aren’t perfect. Here are some reasons that might make you think twice about using one:
- Cost: A good mechanical keyboard will set you back $80 to $300, making them a great deal more expensive than your run-of-the-mill keyboards. Many recommendations in this article are in the $100 to $160 range, and three of them are over $200.
- Noise: You have to be careful about which type of mechanical keyboard switch you go with if you’re concerned about noise. Mechanical keyboards are notorious for making a racket. The noise level will be a key factor for you if you work in an open office space. Watch this video on the Techquickie YouTube channel to help you make an informed choice about what keyboard will best suit your work environment. For a more detailed guide, see the Keyboard Switch guides on Reddit.
- Bulk: Mechanical keyboards are hefty. They’re generally bigger and heavier compared to normal keyboards.
- Wires: Most of the good mechanical keyboards in the market are wired. Only one mechanical keyboard on this list is wireless.
- Not designed for portability: Because of the size, weight, and wires of a typical mechanical keyboard, they’re not easy to lug around. You won’t be able to chuck them into your laptop bag as easily as portable wireless keyboards. If you’re always on the go, often working in coffee shops with tiny tables, a mechanical keyboard may not be the best option for you.
The Best Mechanical Keyboards for Work
The technology in mechanical keyboards is old. It resurged in popularity because of computer gaming. Mechanical keyboards offer gamers better keystroke precision and speed, and the durability required to withstand the wear-and-tear that comes with marathon gaming sessions.
But modern mechanical keyboards aren’t just for gamers. They’re also great tools for coders, IT professionals, designers, writers, journalists, and others who do copious amounts of computer work.
After a ton of research — hitting up review sites and tech publications, mechanical keyboard forums, articles, and so forth — I managed to find ten mechanical keyboards that are highly regarded by the Internet community. Originally, I did this research for myself because I’ve been desiring to add another mechanical keyboard to my collection. I figured I might as well share my findings, in the hopes that doing so might help someone out.
Aesthetically, my picks are fitting in professional environments, so don’t expect any multi-colored/rainbow backlighting, LED displays, and special keys for your macros. My mechanical keyboard recommendations are elegantly simple, reflecting my personal preference for simple, functional aesthetics and my needs as a Web professional.
Note: Some of the links below use our Amazon Associate links. This means we’ll get a small commission if you buy a product through those links. Also, the prices stated below are based off the current prices around the time this article was published. Actual prices may be different from what’s stated in this article.
Without further ado, here are what I consider to be the best mechanical keyboards for professionals:
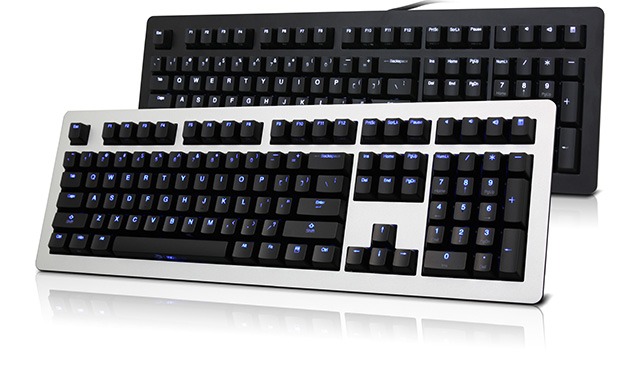
1. Best All-Around Mechanical Keyboard: Das Keyboard
![Das Keyboard]() Source of photo: daskeyboard.com
Source of photo: daskeyboard.com
The Das Keyboard is probably the most recognizable mechanical keyboard on the market.
Years ago, they received a lot of press from tech publications such as Tom’s Hardware (with an article titled Possibly One of the Best Keyboards Ever), TechCrunch, and CNET partly because of the novelty of the Das Keyboard Ultimate models, which don’t have any labeling on their keycaps:
![Das keyboard ultimate]() Source of photo: daskeyboard.com
Source of photo: daskeyboard.com
The mechanical keyboards are designed by Metadot Corporation, a Texas-based open source software company. The creators of the keyboard claim that the gold-plated mechanical switches in the Das Keyboard can handle up to 50 million keystrokes!
Das Keyboard 4C Professional
$116 on Amazon
![CODE Mechanical Keyboard]() Source of photo: wasdkeyboards.com
Source of photo: wasdkeyboards.com
The CODE keyboard is a series of mechanical keyboards designed with programmers and developers in mind. It sports a clean, minimalist design. The pleasant (and adjustable) white LED backlighting is great for those of us who often find ourselves in dark, low-light work environments (such as server rooms). In addition, the keyboard can switch between three keyboard arrangements: QWERTY (the most common), Dvorak, or Colemak.
The CODE keyboard was designed by WASD Keyboards (producers of customizable mechanical keyboards) and Jeff Atwood. You might know Jeff Atwood as the founder of Stack Overflow, the Stack Exchange network, and as the author of the programming blog, Coding Horror. Read his blog post about the CODE keyboard to get an insider’s perspective on the keyboard’s inception.
(Side note: This is the next mechanical keyboard I’ll be buying!)
CODE Mechanical Keyboard (Cherry MX Clear)
$150 on Amazon
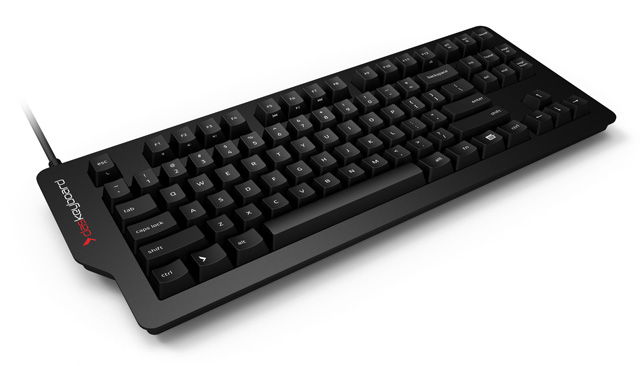
3. Best Tenkeyless Mechanical Keyboard: KUL ES-87 Tenkeyless Mechanical Keyboard
![KUL ES-87 Tenkeyless Mechanical Keyboard]() Source of photo: keyeduplabs.com
Source of photo: keyeduplabs.com
Keyed Up Labs (KUL) is a top-notch company that creates a range of well-regarded mechanical keyboards.
KUL specializes in tenkeyless keyboards, which don’t have the number pad that’s often located on the right side of full-size keyboards.
Many of us never use the number pad. Except for accountants, cashiers, statisticians, and those who frequently key-in numbers into their machine, most people can live without the number pad.
The advantage of removing the redundant keys found in the number pad is that it will create more room on your desk and it will reduce the distance your right hand needs to travel when reaching for your mouse.
KUL ES-87 Mechanical Keyboard (Cherry MX Green)
$149 on Amazon
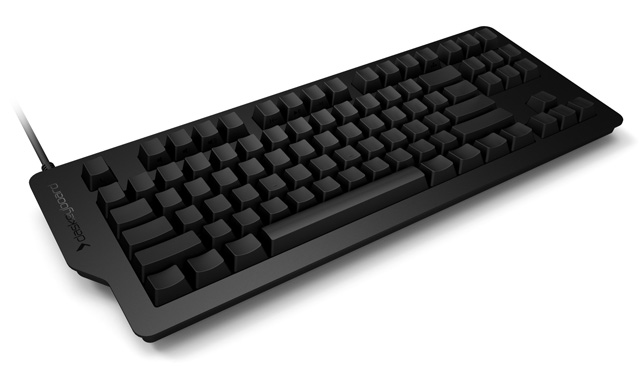
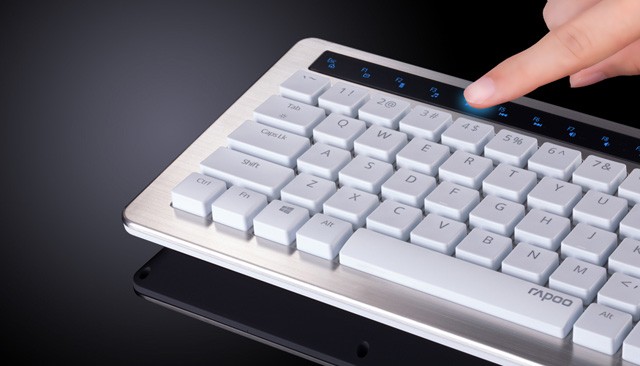
4. Best Wireless Mechanical Keyboard: Rapoo KX Wireless Mechanical Keyboard
![Rapoo KX Wireless Mechanical Keyboard]() Source of photo: rapoo.com
Source of photo: rapoo.com
Mechanical keyboards are typically wired devices. Not the Rapoo KX though.
Besides the obvious benefit of being able to eliminate wire clutter, the Rapoo KX is also one of the least expensive mechanical keyboards I’ve come across, at $85. It’s also smaller than most mechanical keyboards, which makes the Rapoo KX potentially portable.
For a more detailed look at the Rapoo KX, watch the video review named Wireless + Mechanical – Is This Real Life? on the YouTube channel Unbox Therapy (which has over 2.6 million subscribers). Also, see the list of wireless mechanical keyboards on Reddit for more sans-wire alternatives.
Mactrem Rapoo KX (Black)
$85 on Amazon
5. Best Mechanical Keyboard For Office: Ducky Legend
![Ducky Legend]() Source of photo: duckychannel.com.tw
Source of photo: duckychannel.com.tw
Taiwan-based company DuckyChannel has a collection of mechanical keyboards for gaming and work.
The Ducky Legend is the model I feel best suits work environments. This keyboard has a stylish aluminum case and adjustable backlighting. It blends into most professional settings with a low-profile design, which makes it an excellent office mechanical keyboard.
Ducky Legend (Silver)
$141 on Amazon
6. Best Minimalist Mechanical Keyboard: Happy Hacking Keyboard (HHKB)
![Happy Hacking Keyboard (HHKB)]() Source of photo: pfusystems.com
Source of photo: pfusystems.com
The Happy Hacking Keyboard is geared towards professionals and heavy computer users. It was first introduced in 1996 by Japanese IT company, PFU Limited. Since then, the keyboard has managed to gain a loyal fan base.
In the quest to make a small-form-factor keyboard, the designers of the HHKB removed the arrow keys, function keys, and several other keys such as Caps Lock, Backspace, and Insert. Instead, these keys are coupled together with other frequently used keys. For example, the Backspace key shares the same key as the Delete key, and Caps Lock is combined with the Tab key. You can use the “missing” keys by pressing the Fn key along with the key that it shares.
The Happy Hacking Keyboard’s design results in an ultra compact 60-key keyboard, often referred to as a 60% keyboard (because a full-sized keyboard has 104 keys).
This mechanical keyboard has a cult following, as well as its fair share of critics. The biggest disadvantage is that if you use arrow keys, print screen, insert, etc. frequently, then this would not be an efficient keyboard for you.
In my case, as a web developer and writer, I have become accustomed to keyboard shortcuts that rely on several keys that the HHKB decided to drop, such as the Up/Down Arrow keys for jumping to lines of code, Ctrl+Left Arrow/ Right Arrow to move to the previous/next word in a sentence, Ctrl+Page Up/Page Down to scroll web pages, and so forth.
But if desk space and minimalism are things that matter most to you, then this mechanical keyboard is definitely something to check out. As for me, a tenkeyless keyboard is the perfect balance between minimalism, size, and functionality.
Happy Hacking Keyboard Professional 2
$229 on Amazon
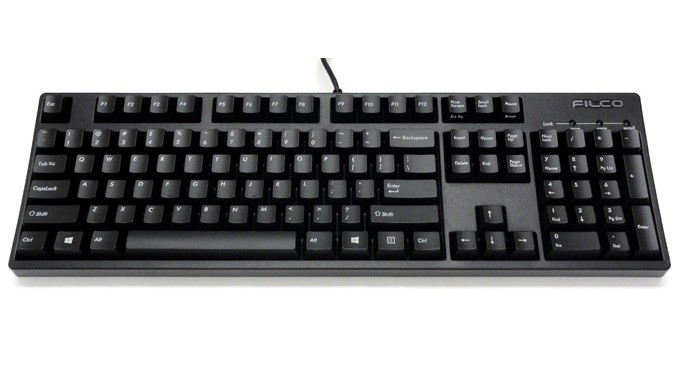
![Filco Majestouch 2]() Source of photo: diatec.co.jp
Source of photo: diatec.co.jp
The mechanical keyboard community holds the Filco Majestouch 2, often referred to as the MJ2, in high regard. It has a rep for having a solidly sturdy build quality.
Filco products are by a Japanese company called Diatec Corp. The company has been around since 1982, and they specialize in PC peripherals and mobile devices.
Reddit’s mechanical keyboard buying guide wiki says that the MJ2 is “The big boss of Cherry MX keyboards.”
Filco Majestouch 2
$154 on Amazon
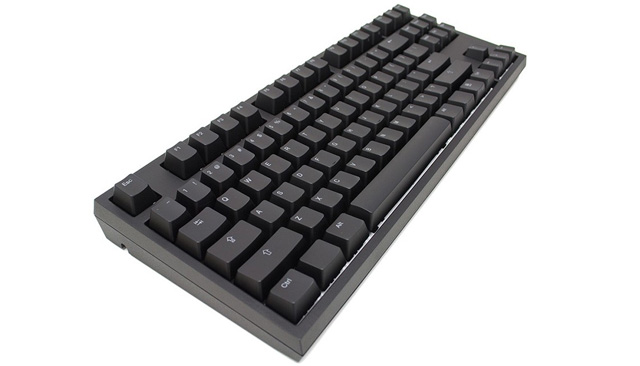
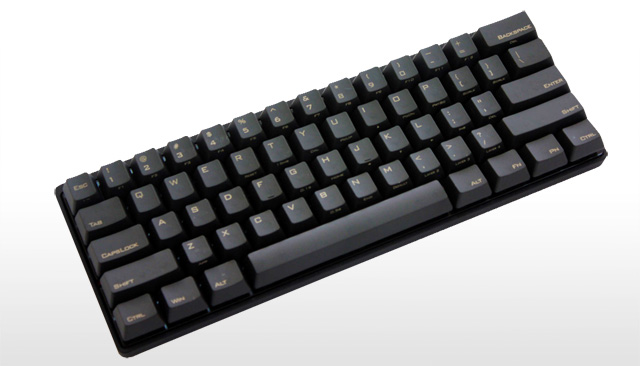
8. Best Customizable Mechanical Keyboard: Vortex POK3R
![Vortex POK3R]() Source of photo: vortexgear.tw
Source of photo: vortexgear.tw
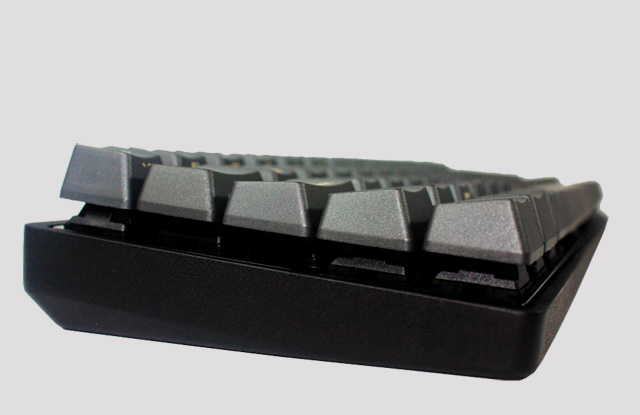
The Vortex POK3R mechanical keyboard, sometimes called the Poker3, is a range of compact and customizable mechanical keyboards. Besides its interesting appearance and small size, another notable feature is that the keyboard is programmable. (You can find more info about POK3R’s programmability via its user manual.)
The POK3R keyboard has an atypical design. When viewed on the side, you’ll notice that the keycaps and switches are mounted on top of the keyboard tray, a blackplate, rather than being embedded into it. This design contributes to the keyboard’s compact dimensions and distinct aesthetics.
![Side view of the Vortex POK3R keyboard]() Side view of the Vortex POK3R keyboard. Source of photo: vortexgear.tw
Side view of the Vortex POK3R keyboard. Source of photo: vortexgear.tw
Check out the in-depth POK3R keyboard video review at the Rhinofeed YouTube channel.
Vortex POK3R 3 (Cherry MX Clear)
$140 on Amazon
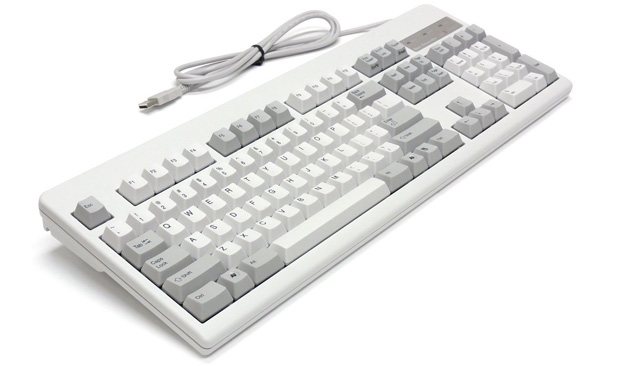
9. Best Topre Switch Mechanical Keyboard: Topre REALFORCE 104U
![Topre REALFORCE 104U]() Source of photo: amazon.com
Source of photo: amazon.com
Cherry MX is the series of switches that you’ll often find in popular mechanical keyboards such as the Das Keyboard. But they’re not the only players on the block. Topre switches are another type of mechanical keyboard switch.
The Topre REALFORCE is the pricy, flagship mechanical keyboard by Japan-based Topre Corp, makers of electronic equipment. For an alternative that’s notably less expensive, the Topre Type Heaven, at $155, is a well-regarded alternative.
Topre Realforce 104U (White)
$270 on Amazon
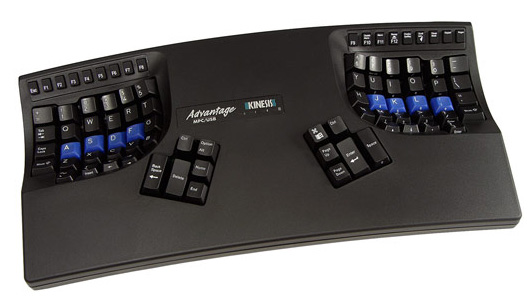
10. Best Ergonomic Mechanical Keyboard: Kinesis Advantage
![Kinesis Advantage]() Source of photo: kinesis-ergo.com
Source of photo: kinesis-ergo.com
The Kinesis Advantage is a long-standing, ergonomically-designed keyboard that vastly veers off from the keyboard designs we’re all used to. This keyboard is popular amongst software engineers, IT professionals, and web developers — people who spend a ton of time typing on their keyboards, and using keyboard shortcuts and command-line interfaces.
![Kinesis Advantage Contoured Advantage Pro in front of a three-monitor workstation.]() Source of photo: wikipedia.org
Source of photo: wikipedia.org
The ergonomics of the Kinesis Advantage can help lower the impact of the repetitive strain your hands endure when you’re typing for long hours. Its keys are separated and angled to complement your hands’ natural positions. The keyboard has concave key wells that minimize the distance your fingers need to travel to reach a key.
Jarred Walton, over at the hardware review site AnandTech, wrote that out of three ergonomic mechanical keyboards he reviewed, the Kinesis Advantage is his favorite.
The Kinesis Advantage may not be everybody’s cup of tea. The keyboard’s layout will take time to get used to. And once you get accustomed to it, it will be hard to use traditional keyboard layouts. On the other hand, a top Amazon reviewer that goes by the handle of Ed said that it only took two weeks to get used to the keyboard and that if you’re patient “it will not only pay off with better ergonomics, but speed.”
The $270 price is quite steep. But if you’re suffering from wrist- and hand-related injuries like carpal tunnel syndrome from typing too much at work, or if you want to prevent them from happening, the Kinesis Advantage keyboard might be deserving of your hard-earned dineros.
Kinesis Advantage (Black)
$270 on Amazon
Further Reading
Mechanical keyboards are expensive. They’re meant to be used for years. Choosing which one to buy is a decision that shouldn’t be taken lightly. Here are some resources that will help you learn more about the technology:
- The MechanicalKeyboards subreddit is a large community of keyboard enthusiasts with over 86,000 subscribers. Check out their wiki, which will inform you of everything you need to know about mechanical keyboards. This subreddit was instrumental in helping me discover the mechanical keyboards on this list.
- Tested, a site by the stars of the TV show MythBusters, Jamie Hyneman and Adam Savage, has an explainer on why you should use a mechanical keyboard.
- Das Keyboard has a slightly technical mechanical keyboard guide that gives you a great overview of the technology.
- Overclock.net has a detailed guide covering mechanical keyboard terminologies, popular types of switches, keyboard maintenance, keycap shapes/materials/printing methods, and more.
Read Next
5 Good Habits That Will Make You a Better Coder
12 Excellent Free Text Editors for Coders
A New Breed of Free Source Code Editors
![]() Jacob Gube is the founder of Six Revisions. He’s a front-end developer. Connect with him on Twitter.
Jacob Gube is the founder of Six Revisions. He’s a front-end developer. Connect with him on Twitter.
The post The 10 Best Mechanical Keyboards for Professionals appeared first on WebFX Blog.


#/media/File:Xmonad-screen-triplehead-dons.png)