The Secret to Building Large Websites: Website Architecture
When I started writing about website architecture, the idea of a skyscraper construction project came to mind.
I thought of a huge skyscraper with restaurants, retail stores, offices, gyms, and residential spaces — a large self-contained, compact community all by itself.
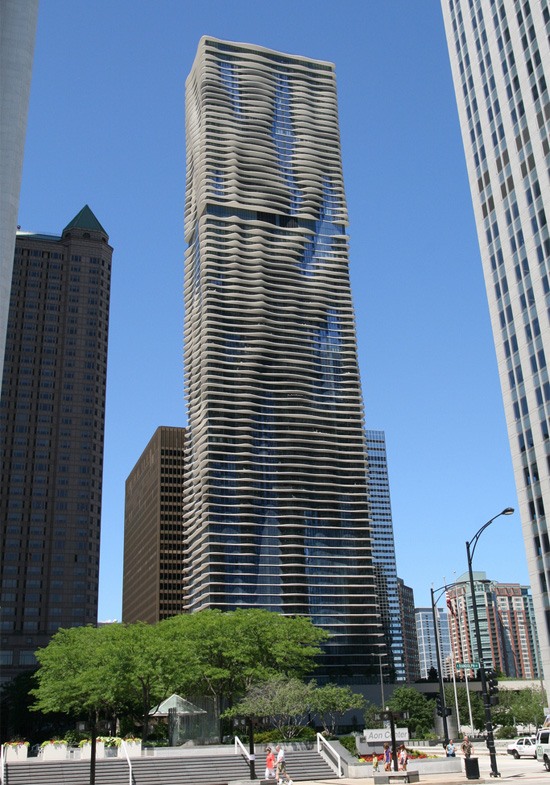 Source: Bernt Rostad
No one would ever start the construction process of a skyscraper like that until everything is properly planned and drawn out.
 Source: Steve Newfield
I’m not a building architect or construction contractor, but I can still see the innumerable requirements you need to draw out before proceeding to construction. Room planning details, sourcing of good construction materials, managing the different teams involved in the building’s construction, zoning permits, funding allocation, natural disaster planning in case of earthquakes, the list goes on.
Everybody considers design as an important component of things; whether it’s the design of a skyscraper or the tires of your car.
Design is about not only bringing convenience, innovation, and comfort into people’s lives, but also in many cases such as skyscrapers and your car tires, people’s lives and safety becomes dependent on it.
I’m not an architect.
I’m an IT person. I’m a concept designer to be more exact.
For years, I’ve been designing strategies and conducting research for very large, ambitious website projects.
Concept design is the foundation of a robust website architecture. Like in the construction of a skyscraper, you need to have a sound blueprint for building large-scale websites.
In this article, I’ll share our company’s process for architecting large websites.
The website architect
Let’s first figure out whose role it is to do this thing called website architecture.
To me, this job is carried out by a website architect.
I deliberately avoid mentioning UI/UX designers and the IA guys here because website architecture goes beyond — or rather encompasses — the user interface, user experience, and information architecture of the site.
The website architect needs to have a solid understanding of usability, in-depth knowledge of web development tools, online marketing technologies, and everything else involved in the construction and maintenance of a website.
Just like an architect of a skyscraper or a residential home, she must be well-versed with the tools, materials, and processes of construction in order to plan the product efficiently and effectively.
This person, our website architect, should possess strong logical thinking, has an analytical mind, is smart with commercial aspects of websites, and be attentive to details.
Of course, for a guaranteed quality product, the architect can/should consult other specialists: designers, developers, etc.
As you see, the ideal web architect in my mind should be a broad specialist, because, as you’ll soon see below, there’s no getting away from that.
Overview of the website architecture process
I’ll give you just a general overview of my company’s website architecture process.
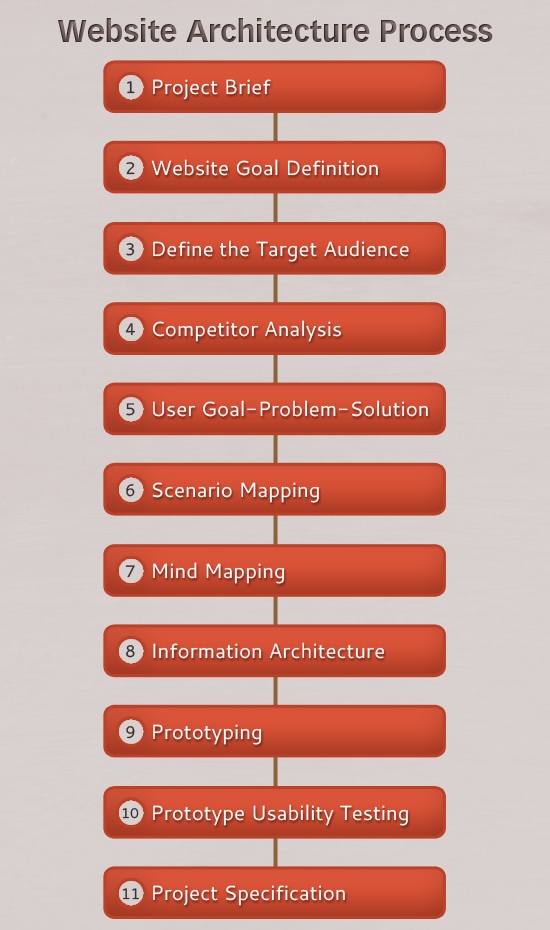
The process is divided into these 11 stages:
- Project brief
- Website goal definition
- Define the target audience
- Competitor analysis
- User goal-problem-solution
- Scenario mapping
- Mind mapping
- Information architecture
- Prototyping
- Prototype usability testing
- Project specification
As you can see, all these stages are related to each other, and we’ve organized them in a sequential manner.
Let’s discuss each stage.
Stage 1: Project brief
Gathering the needed data from the client and your team can usually take 2 days. Though you should be as thorough as possible, also keep in mind that there’s always room for elaboration and additional data-gathering in the other stages of the website architecture process, so don’t get too off-track if some pieces of information haven’t been transmitted to you.
Determine goals and expected outcomes
What is the client’s goals and expected outcomes of this project, and how does she envision the end result of the project?
You should be clear about the evaluation criteria of these goals and expected outcomes to make sure you’re both on the same page.
You have to be as specific as possible; goals and outcomes should be quantifiable and measurable.
Brainstorm with the client
Ask the client to tell you everything he has on his mind. Listen to what he says patiently and thoughtfully. Take notes. Focus on what they’re saying and resist the urge to chime in. Your ideas and remarks can wait.
If the client is passionate about his ideas for the project, he can spend hours talking about it, which is completely normal.
When the client is really into the project, he’s a great help and pleasure to work with.
Client idea summary
At the end of your brainstorming session, you should ask the client to sum everything up — if he succeeds in boiling his idea down to one sentence, then the idea is clear. If not, you will need better clarity and focus.
Determine the target audience
Who is the client’s target audience? Who’s going to use this site, and how might they benefit from the site?
The client should have a clear idea of who the end-user is so that we can produce a website for them. Otherwise, it’s like playing darts with your eyes closed: You know where the target is, but it’s going to be nearly impossible to hit it.
You can also start discussing what the client already knows about their target demographic: gender, age, location, etc.
Determine competitors
Who are the website’s direct and indirect competitors? The client and the website architect should be aware of the existing competitive environment.
There are always competitors. Even if the website’s idea is completely unique, there are at least indirect competitors.
Meet the decision-makers
Meet with the people who make decisions. Discuss the deadlines, the budget limit, resource availabilities, and so forth.
Organizational matters, matter.
Results and deliverables
Some of your other questions will need to wait to be answered later on in the website architecture process. What you get out of the project briefing stage will be basic data and just to get a general feel of what your client already knows about his project.
It’s crucial to understand the client’s needs and expectations at this early stage, and to choose the right direction for the project right at the starting line. The price you pay for not giving enough time to this simple but critical first stage exponentially grows as the web architecture process and website production progresses.
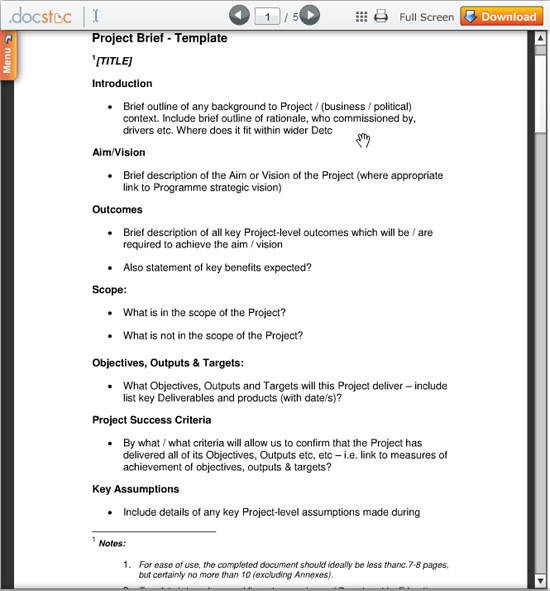 A project brief template. Source: docstoc.com
The deliverable of the briefing stage is a written document with detailed information given to you by the client and the decision-makers. This document should be approved and verified by the client. It can be in the form of a design brief.
Stage 2: Website goal definition
A website needs goals. The client’s goals might be these: to monetize the site, to increase the offline market share through online marketing, to better engage customers online, and so forth.
The goals define the direction of the entire website production process.
Besides determining the website’s goals, you also need to define success criteria according to the client.
A good way to establish goals is by using the SMART criteria. That is, each goal should be:
- Specific
- Measurable
- Attainable
- Relevant
- Time-bound
For example:
- Generate $50,000 income within 5 years through ads, information products like e-books and paid subscription plans
- Assist users in making a choice of what pet to own
- Provide users with advice on pet issues
- Create a marketing platform for pet products
Results and deliverables
As a result, you will have a document containing 2 lists:
- A list of project goals
- A list of the client’s goals
This document needs sign-off by the client/decision-makers.
Stage 3: Define the target audience
This stage involves researching the target audience. We need to identify what types of users will go to the site, and also define the needs of each group.
Gather characteristics data
We need to create a common persona for each group. The user interface design depends greatly on the results of this stage. To get started with this, we first need to define what our audiences’ common characteristics are.
Define socio-demographic characteristics: We should figure out the sex, age, education level, and occupation of our target audience. Targeting teenagers (15-18) is going to differ from a site meant for people over 60.
Define psychological characteristics: We should determine the lifestyle, personality, temperament, motivation, value system, philosophies, etc. of our target audience. This information is even more important than socio-demographic characteristics in terms of user interface design. If, for example, our users are early adopters, the user interface and pre-launch strategy will be different than other websites.
Define wants/needs characteristics: We should figure out why our user would want to sign up to our website, what problems they’re looking to solve with our site, etc. We define their pain points and aim to solve it with our website.
This information is vital, though it’s hard to find. If you’re working on a website redesign project, the client may already have this information if they have user feedback tools in place.
Sometimes the competitor can have it (but good luck getting them to share it with you). In this case, you need to perform user research studies and conduct surveys.
Geographic location characteristics: Country, city, region, continent — these are all helpful information. Being online does not completely eliminate the location factor.
Sometimes geotargeting is the first thing to think of when creating a national site, government website, or any location-dependent website.
Moreover, website content and website copywriting is heavily determined by the audience’s location.
You will need this when you’re in the information architecture (IA) stage.
Create user personas
When the target audience portrait is well-defined, we can then create personas.
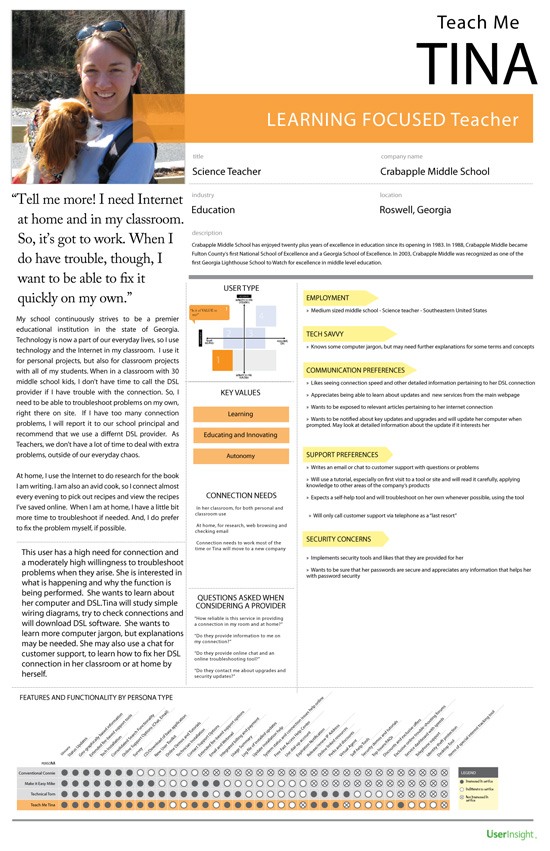 Example of a persona. Source: uxmag.com
The main goal of the web architect here is to determine all the possible groups of users, starting from the largest (core) group, and ending with the smallest one.
Then we create a persona for each group.
Each of the personas you develop should have a:
- First and Last name (Don’t use the names of real people to avoid distortion of the story)
- Photo
- Age
- Location
- Occupation
- Marital status
- Hobby
- Skills
- Problems they need to solve
- Personal and professional experience
To get a better image of your target audience you can interview potential users. This is about marketing research at this point.
Results and deliverables
After finishing this stage, you should now have two things:
- A document presenting the general characteristics of the target audience
- Personas

Stage 4: Competitor analysis
To ensure the success of the project, you need to know your competitors and have good ideas on how to get ahead of them. You should discover their strong points and weak points.
There are several methodologies involved in conducting competitor analysis research, including market participant polling, and Internet and print media research.
If you’re creating a local website, don’t limit yourself only to your country. Look through international websites that are doing similar things. Most likely, there are similar or analogous projects up and running somewhere in the world. Some of these projects can be rather inspiring.
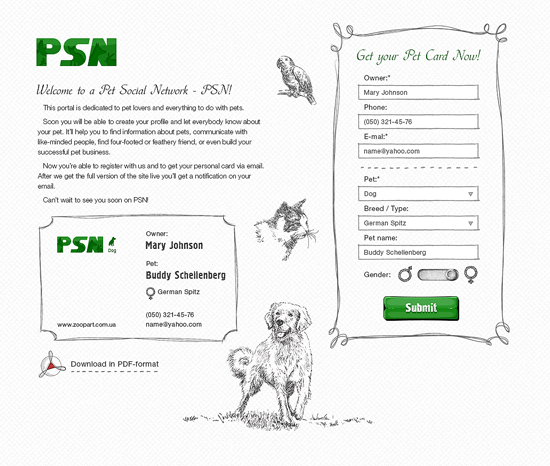
For example, we’ve been working on a social networking site for pet lovers for a client in Russia. We didn’t find direct competitors in the local market. However, there are several foreign sites and indirect local competitors. They are:
| Competitor | Characteristics |
|---|---|
| www.dogster.com | international, popular, quality |
| www.dogster.ru | Russian project, quite popular, satisfying quality |
| www.catster.com | international, popular, quality |
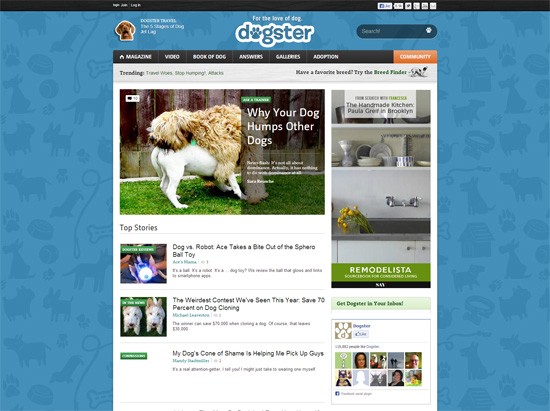
Your website’s competitors can be direct competitors or indirect competitors.
- Direct competitors can be defined as any website operating for the same user base and who offer analogous products. For example, a direct competitor of Microsoft Windows is Apple Mac OS.
- Indirect competitors are competitors who offer similar products, but only partially satisfy the target audience’s needs.
SWOT analysis
There are different approaches towards competitor identification and analysis. I like SWOT analysis the best.
SWOT — which stands for Strengths, Weaknesses, Opportunities, and Threats — helps indicate the strong points and weak points of your competitors, and more importantly, aids you in figuring out project opportunities.
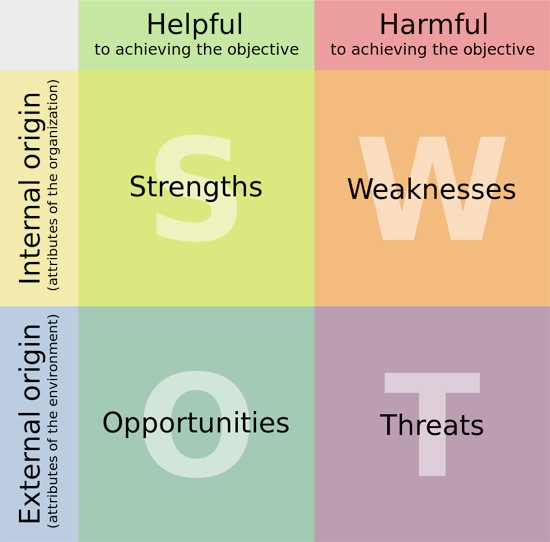 SWOT matrix. Source: wikipedia.org
While analyzing competitors, you can discover useful site features and ideas worth adapting onto your own website — general, universal site features like commenting systems, web forms, etc. There’s no need to reinvent the wheel in these cases.
All good ideas you end up with during the competitor analysis stage will be needed for the mind mapping stage (which we’ll discuss later on).
Results and deliverables
You should now have:
- A list of direct and indirect competitors
- A SWOT analysis for each competitor
- Research summaries (ideas generated, market opportunities, etc.)
Stage 5: User goal-problem-solution
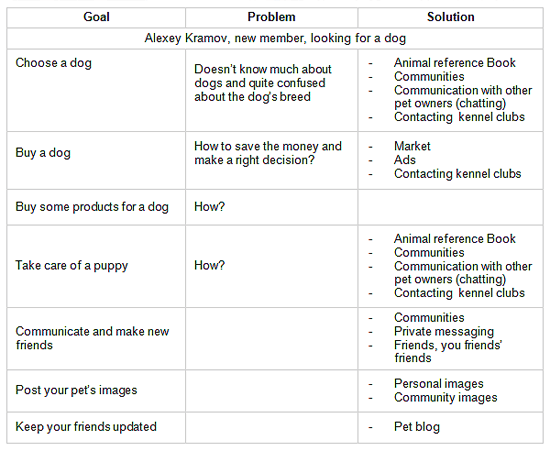
Proceeding from the personas we’ve developed, we can start working on goal-problem-solution.
User goals
Every person has short-term and long-term goals.
There can also be sub-goals. For example, a person might desire to improve his career, but first he needs to find a job. The sub-goal is finding a job to reach the goal of improving his career.
For our website project, we identify a person’s goals, problems, and we look towards providing solutions for them.
All goals should be designed well. Fuzzy goals won’t help, as it’s impossible to solve all problems within one site. Focus on primary goals and keep the list of goals short.
Some clients think if users listen to music online, their site should also provide such a service, even if their website isn’t looking to solve this problem. The more features we add, the more diluted our core objectives become.
User problems
When we have a list of concrete goals, we can determine concrete problems.
For example, a user goal on our website might be to find a contractor that can build his construction project. That goal is more complex than it seems: How do we locate the right contractor for the user’s specific construction project? Is it important that the contractor is located close to where the construction project is? How do we allow them to quickly evaluate many candidates? Due to questions like these, you’ll generate ideas easily.
Our solutions
When we’re done identifying goals and problems, it’s time to design and develop solutions for them through website architecture design.
This process brings great fulfillment to the website architect because she’s looking to solve pain points that her users have.
Results and deliverables
As the result, we’ll have a goal-problem-solution matrix designed for each persona we’ve developed for our website.
Stage 6: Scenario mapping
Scenario mapping is the stage dedicated to revealing possible user flows.
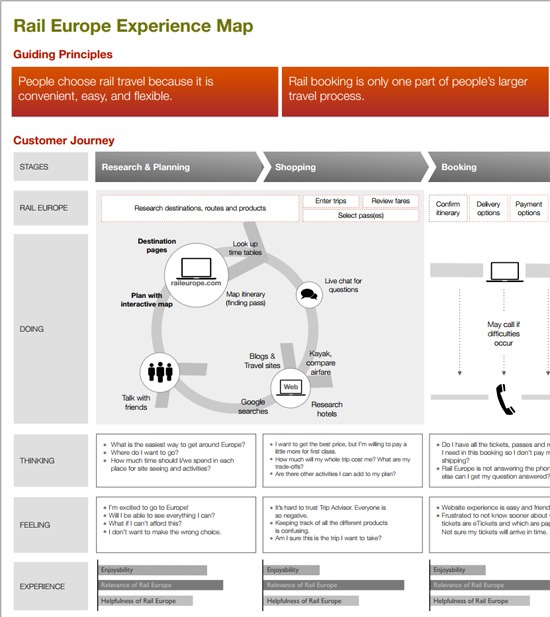 User experience mapping. Source: adaptivepath.com
Once again, we need to think like an end user and create probable scenarios of his actions on our website.
Every goal of every persona has his/her own set of scenario maps.
These scenarios help reveal weak points in our existing ideas and knowledge. Scenarios also help the website architect develop good user flows later on.
Results and deliverables
We should have scenarios mapped out for critical site goals that we’ve established in the previous stage.
Here’s an example of a scenario:
User goal:
Choose a dog
Scenario:
- Go to main page
- Go to “Zoopedia” section of the site
- In “Zoopedia” section, find topics and discussions about dog breeds
- Read topics and discussions of interest
- Go to the Read Also section, located at the end of the topic because there’s more information there
- Choose 3 preferred dog breeds
- Return to “Zoopedia” top-level web page
- Read some more
- Find links to people selling dogs of these breeds
- Make an informed, final decision
- Go to a pet store to purchase a pet
When we wrote out this scenario, we ended up adding these site features:
- “Zoopedia” rubricator
- “Read Also” widgets
- Links to pet stores and dog sellers on the breed information pages
As you can see, scenarios help us find opportunities for improvement.
See also:
Stage 7: Mind mapping
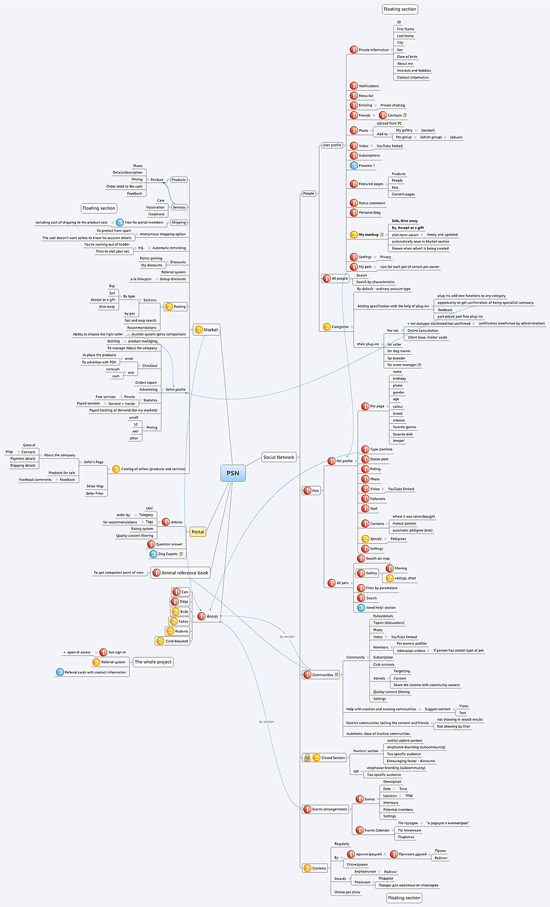
When we have a bunch of ideas, it becomes helpful when we start visualizing and interconnecting them.
The mind mapping stage is dedicated to creating a solid system of logically connected ideas and also helps us cut out unnecessary things. It’s a popular design conceptualization tool.
To create mind maps, we should use Xmind.
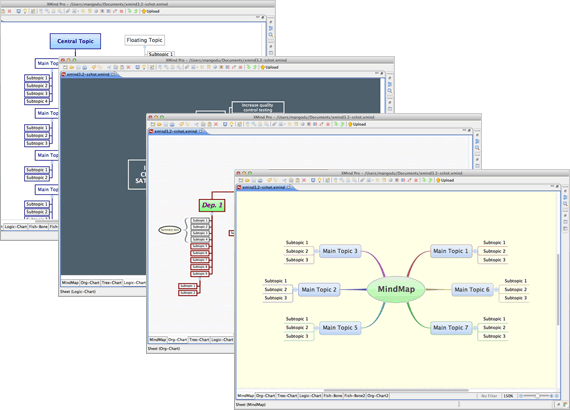
Find your list of ideas and divide them into logical categories. For example, let’s say we’re working on a real estate website. The real estate website’s sections might be:
- Property Catalog
- Community Forums
- Articles/News
- Information Center
Map all of your ideas into one of these categories.
If an idea fits in more than one category, choose the best fit for it.
Brainstorming will help sift out the useless and unneeded features, web pages, etc.
Each website section should be planned logically. Don’t forget about section-dependent features (such as the user being able to rate each property, in our example). Mark this connection with an arrow to remember the dependence (in our example, it would go to the Property Catalog).
You can design your own symbols to indicate different functional sections. If the web architect, for example, is undecided in terms of which section a certain site feature belongs to, she can mark it with a question mark. These symbols are really important if the project is large.
Results and deliverables
As a result, we have a bird’s-eye view of the interconnections of site features and sections.
Stage 8: Information architecture
Now that we have a detailed mind map of our website, we can start working on the website’s information structure, which will be the foundation of the website’s prototype.
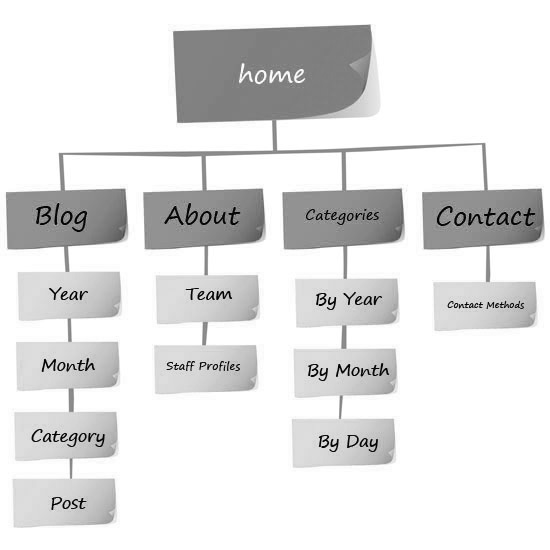
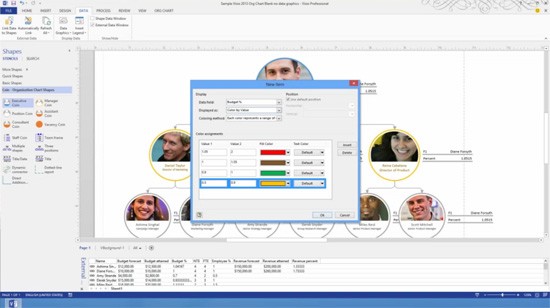
The website’s IA can be created with the help of flowcharting software like Visio.
Results and deliverables
You should end up with an information architecture (IA) design after this stage.
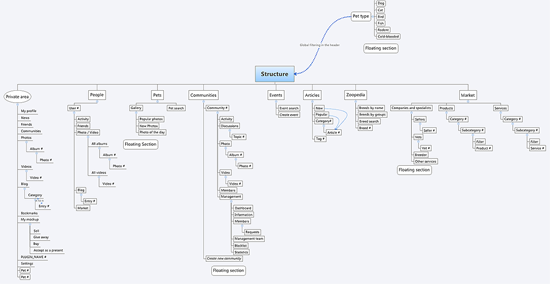
See also:
- Information Architecture 101: Techniques and Best Practices
- How to Create Content Maps for Planning Your Website’s Content
Stage 9: Prototyping/Wireframing
You will need prototyping software for this stage. I recommend Axure, though there are a number of other similar programs.
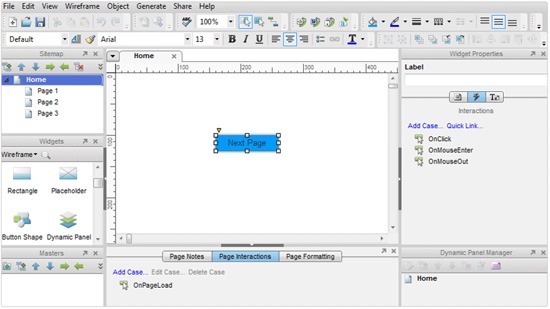
The home page prototype doesn’t necessary have to be prototyped first. For example, in the case of an online shop or a blog, the product page or blog post page should come first, because these are critical pages, and will typically be the landing pages of most users on the site.
The website architect is going to lean on the mind map and information architecture diagrams to develop this prototype.
When creating each web page prototype, you should focus on how the user can achieve his/her goals. Before prototyping, you should refresh your knowledge of your target audience using the previous stages in the site architecture process.
Prototype the primary navigation menu
The primary navigation menu is the first to create. We need to figure out the number of menu items and the number of drop-down menus.
Prototype the header section
Then we design the header section that typically contains these items:
- The primary navigation menu
- Search form
- Contact information
- Website logo
Prototype contextual areas
Now we start designing contextual areas, which will differ depending on the web page you’re prototyping. We will make content blocks, some of which are constant for every page, some of which won’t.
Prototype the website footer
The footer typically stays the same on each web page. Usually, the footer duplicates the main menu. It also contains auxiliary information such as the website’s privacy policy, links to social networks, contact information, copyright information, and so forth.
Client feedback
The first web page prototype should be shown to decision-makers, and the reason for the layout should be explained to them. The client might revise and suggest some adjustments. That’s OK, because having this done on a low-fidelity prototype is much easier than if we had a higher-fidelity prototype.
After the first page is approved, we can move to the next prototypes. All the ideas represented in our mind map should be found in these prototypes. It’s crucial not to forget about the smallest detail, as it can turn to hell in the long run if you do.
Test the prototypes against scenario maps
Our scenarios will help test the mockups to ensure the logical order of every action.
This is the most time-consuming component of this stage and requires a lot of patience and attentiveness. In the case of large websites, there could be over 100 unique interface prototypes.
Results and deliverables
The deliverables after this stage are low-fidelity prototypes/wireframes of all web page types.
Examples:
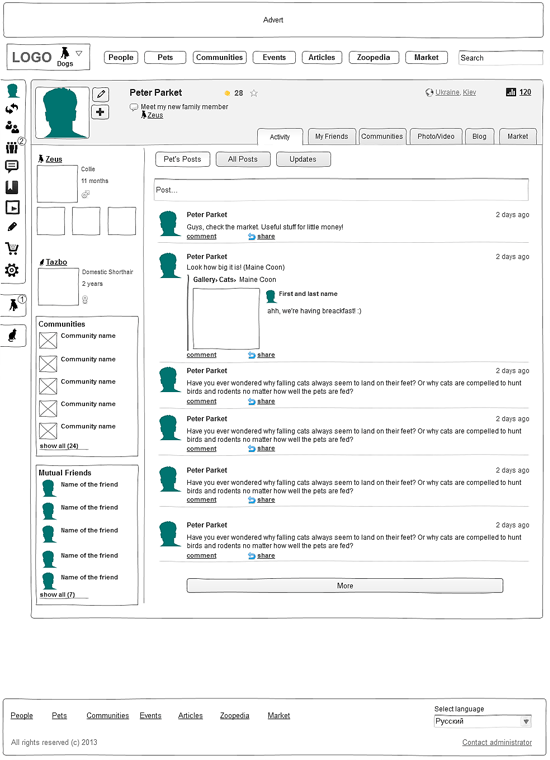
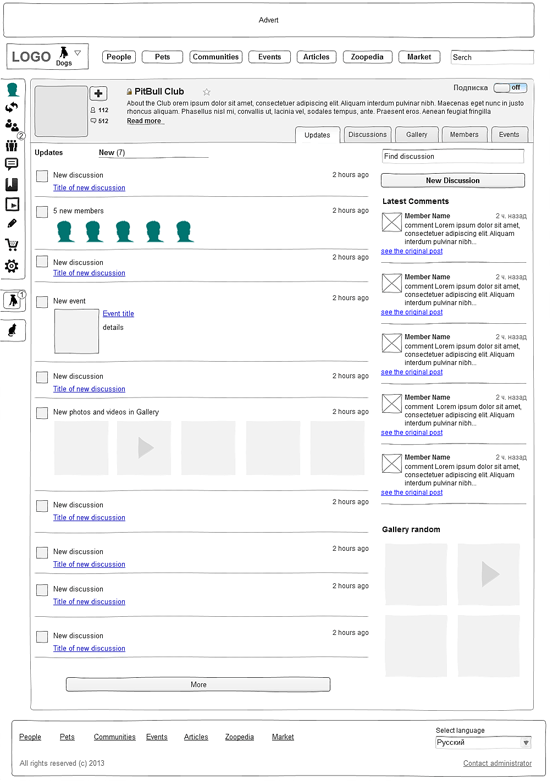
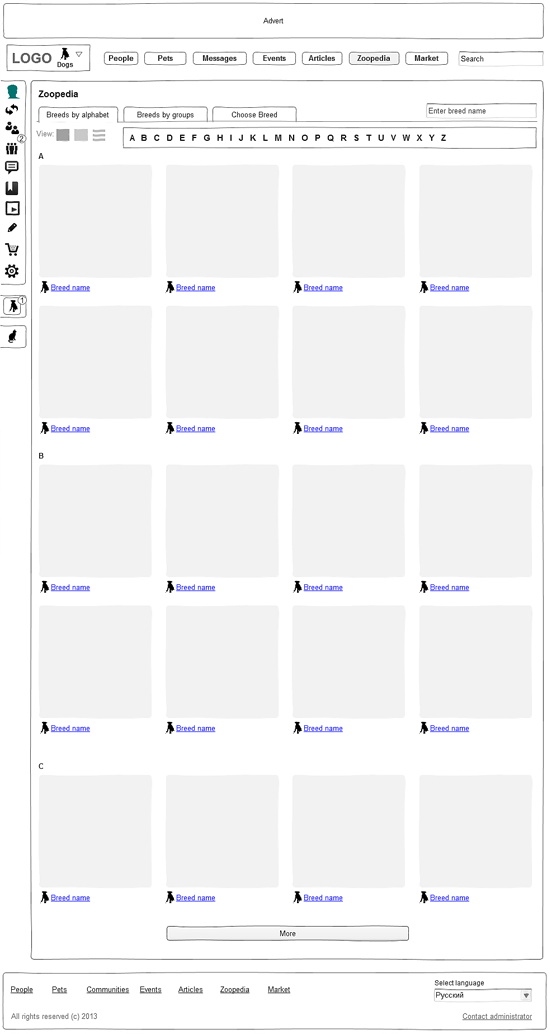
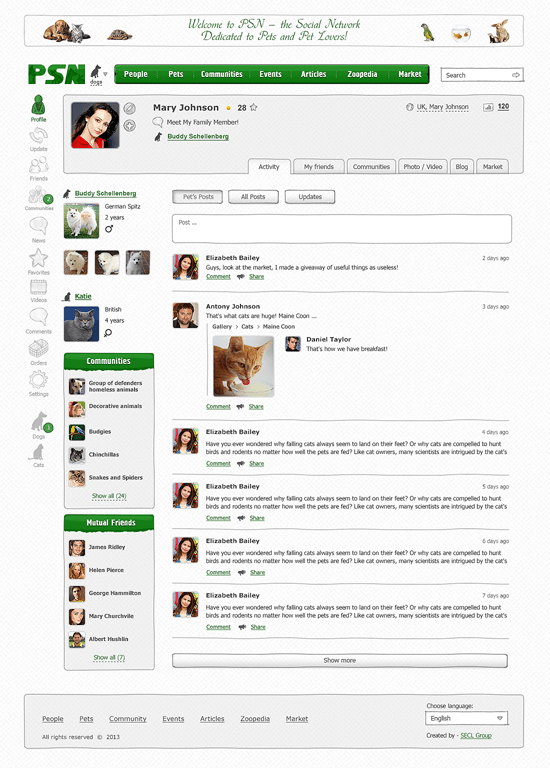
There are 90 some such prototypes for the example project above. As you can see, each prototype was broken down in detail. This way, no questions and uncertainty arose during the design of the functional prototypes and finished web designs.
Stage 10: Prototype usability testing
This is one of the best ways to quickly validate the effectiveness of the website architecture and make changes before things progress further.
Axure generates HTML from prototypes, which make them interactive and ready to test on users.
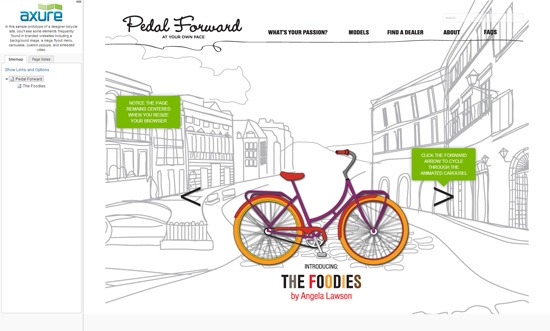
Usability testing at this stage will help you notice gaps and flaws in the architecture.
For testing purposes, we invite some representatives of the target audience and observe how they manage to reach certain pages and results within the site.
Then, the users can be interviewed regarding the site in general.
After usability testing, we make final corrections.
Results and deliverables
As the result, we will have validated and improved the user-friendliness of our web page prototypes and we get a better picture of how users would be interacting with the site.
Stage 11: Project specification
The final stage of the website architecture process is to create the project specification document. This should contain a detailed description of each stage of the site architecture process.
The project specification is the result of all the stages you’ve gone through. It typically will contain a detailed description of each prototype, user flows, and so forth.
The specs should be full and unequivocal. Be detailed and thorough, but also keep it as succinct and as concise as possible.
The project specification should contain all the information regarding software and web technologies required for the website.
Design requirements should be clear.
Once the project specification is approved, website development starts.
Related content
- Planning your E-Commerce Website
- Agile Web Development That Works
- How to Bake Content Strategy into Your Web Design Process
The post The Secret to Building Large Websites: Website Architecture appeared first on WebFX Blog.