Monthly Archiv: November, 2016

Making a Simple Credit Card Validation Form

credit-card-validation-form

In this quick tutorial we will show you how to create a simple credit card form. We’ll build the whole thing from scratch, with a little help from Bootstrap 3 for the interface, and Payform.js for client-side form validation.

Keep in mind that storing credit card data on your servers is serious business. You need to be PCI compliant and fulfill a vast number of requirements.
 
Unless you know what you’re doing, it is best to use the services of a third party payment processor like Stripe or PayPal that stores all payment information for you.

Project Overview

Here is a sneak-peak of what we will be building in this tutorial:

Credit Card Form Demo

Credit Card Form Demo

You can get the full code for this project from the Download button near the top of the article. An overview of the files can be seen below:

project-overview

There are two .css files and two .js files which we will need to include in our HTML. All other resources such as the Bootstrap framework, jQuery, and web fonts will be included externally via CDN.

index.html

<!DOCTYPE html>
<html>
<head>
    <meta charset="utf-8">
    <meta name="viewport" content="width=device-width, initial-scale=1">
    <title>Credit Card Validation Demo</title>

    <link href="https://fonts.googleapis.com/css?family=Open+Sans" rel="stylesheet">
    <link rel="stylesheet" href="http://maxcdn.bootstrapcdn.com/bootstrap/3.3.7/css/bootstrap.min.css">
    <link rel="stylesheet" type="text/css" href="assets/css/styles.css">
    <link rel="stylesheet" type="text/css" href="assets/css/demo.css">
</head>

<body>

    <!-- The HTML for our form will go here -->
    
    <script src="https://ajax.googleapis.com/ajax/libs/jquery/1.12.4/jquery.min.js"></script>
    <script src="assets/js/jquery.payform.min.js" charset="utf-8"></script>
    <script src="assets/js/script.js"></script>
</body>
</html>

Now that everything is set up, we can start building our credit card form. Let’s start with the HTML layout!

Layout

A credit card dialog needs to be simple, short, and straightforward.  Here are the four input fields that every credit card form needs to have:

  • Credit card owner name
  • Card number
  • Secret code (also known as CVV/CVC/CID)
  • Expiration Date

All we need to do is create a <form> and add all the required input fields. For the owner, card number, and CVV we will use simple text fields. For the expiration date we’ll put a combination of two selects with predefined options.

Besides that our form will have a heading, a submit button, and images for popular credit card vendors. Since we are working with Bootstrap there is a little extra markup, but it helps keep the code organized and the layout responsive.

<div class="creditCardForm">
    <div class="heading">
        <h1>Confirm Purchase</h1>
    </div>
    <div class="payment">
        <form>
            <div class="form-group owner">
                <label for="owner">Owner</label>
                <input type="text" class="form-control" id="owner">
            </div>
            <div class="form-group CVV">
                <label for="cvv">CVV</label>
                <input type="text" class="form-control" id="cvv">
            </div>
            <div class="form-group" id="card-number-field">
                <label for="cardNumber">Card Number</label>
                <input type="text" class="form-control" id="cardNumber">
            </div>
            <div class="form-group" id="expiration-date">
                <label>Expiration Date</label>
                <select>
                    <option value="01">January</option>
                    <option value="02">February </option>
                    <option value="03">March</option>
                    <option value="04">April</option>
                    <option value="05">May</option>
                    <option value="06">June</option>
                    <option value="07">July</option>
                    <option value="08">August</option>
                    <option value="09">September</option>
                    <option value="10">October</option>
                    <option value="11">November</option>
                    <option value="12">December</option>
                </select>
                <select>
                    <option value="16"> 2016</option>
                    <option value="17"> 2017</option>
                    <option value="18"> 2018</option>
                    <option value="19"> 2019</option>
                    <option value="20"> 2020</option>
                    <option value="21"> 2021</option>
                </select>
            </div>
            <div class="form-group" id="credit_cards">
                <img src="assets/images/visa.jpg" id="visa">
                <img src="assets/images/mastercard.jpg" id="mastercard">
                <img src="assets/images/amex.jpg" id="amex">
            </div>
            <div class="form-group" id="pay-now">
                <button type="submit" class="btn btn-default" id="confirm-purchase">Confirm</button>
            </div>
        </form>
    </div>
</div>

Now that we have the needed input fields, we can setup the validation rules.

Validation

All of the validation we will show here is client side and done exclusively in the JavaScript. If it is HTML validation that you are interested in, check out this article.

To kick things off we will define all the jQuery selectors we will need:

var owner = $('#owner'),
    cardNumber = $('#cardNumber'),
    cardNumberField = $('#card-number-field'),
    CVV = $("#cvv"),
    mastercard = $("#mastercard"),
    confirmButton = $('#confirm-purchase'),
    visa = $("#visa"),
    amex = $("#amex");

Then, using Payform.js, we will turn our basic input fields into specialized input for credit card data. We simply need to call the right function and the library will automatically handle text formatting and maximum string length for us:

cardNumber.payform('formatCardNumber');
CVV.payform('formatCardCVC');

Next, we want to be able to give real-time feedback to users while they are typing in their card number. To do so we will write a simple function that does two things:

  1. Check if the current text in the field is а valid card number or not. Add appropriate coloring to the text field.
  2. Depending on the present input characters, see if the card is either Visa, MasterCard, or American Express. This is done using the payform.parseCardType() method.

Since we want to execute the above actions every time a new character is typed in, we will use the jQuery keyup() event listener.

cardNumber.keyup(function() {
    amex.removeClass('transparent');
    visa.removeClass('transparent');
    mastercard.removeClass('transparent');

    if ($.payform.validateCardNumber(cardNumber.val()) == false) {
        cardNumberField.removeClass('has-success');
        cardNumberField.addClass('has-error');
    } else {
        cardNumberField.removeClass('has-error');
        cardNumberField.addClass('has-success');
    }

    if ($.payform.parseCardType(cardNumber.val()) == 'visa') {
        mastercard.addClass('transparent');
        amex.addClass('transparent');
    } else if ($.payform.parseCardType(cardNumber.val()) == 'amex') {
        mastercard.addClass('transparent');
        visa.addClass('transparent');
    } else if ($.payform.parseCardType(cardNumber.val()) == 'mastercard') {
        amex.addClass('transparent');
        visa.addClass('transparent');
    }
});

There is one more thing we have to do and that is is check if all the field are holding valid data when the user tries to submit the form.

Name validation can be quite tricky. To keep this tutorial light, we won’t be going into that subject, and we will only check if the input name is at least 5 characters long. Payform provides us with the needed methods for validating the rest of the form.

confirmButton.click(function(e) {
    e.preventDefault();

    var isCardValid = $.payform.validateCardNumber(cardNumber.val());
    var isCvvValid = $.payform.validateCardCVC(CVV.val());

    if(owner.val().length < 5){
        alert("Wrong owner name");
    } else if (!isCardValid) {
        alert("Wrong card number");
    } else if (!isCvvValid) {
        alert("Wrong CVV");
    } else {
        // Everything is correct. Add your form submission code here.
        alert("Everything is correct");
    }
});

The above validation is for educational purposes only and shouldn’t be used on commercial projects. Always include both client-side and server-side validation to your forms, especially when working with credit card data.

Styles

We are using Bootstrap, so most of the styling is done by the framework. Our CSS mostly covers the size of the input fields and various padding, margin and font tweaks.

styles.css

.creditCardForm {
    max-width: 700px;
    background-color: #fff;
    margin: 100px auto;
    overflow: hidden;
    padding: 25px;
    color: #4c4e56;
}
.creditCardForm label {
    width: 100%;
    margin-bottom: 10px;
}
.creditCardForm .heading h1 {
    text-align: center;
    font-family: 'Open Sans', sans-serif;
    color: #4c4e56;
}
.creditCardForm .payment {
    float: left;
    font-size: 18px;
    padding: 10px 25px;
    margin-top: 20px;
    position: relative;
}
.creditCardForm .payment .form-group {
    float: left;
    margin-bottom: 15px;
}
.creditCardForm .payment .form-control {
    line-height: 40px;
    height: auto;
    padding: 0 16px;
}
.creditCardForm .owner {
    width: 63%;
    margin-right: 10px;
}
.creditCardForm .CVV {
    width: 35%;
}
.creditCardForm #card-number-field {
    width: 100%;
}
.creditCardForm #expiration-date {
    width: 49%;
}
.creditCardForm #credit_cards {
    width: 50%;
    margin-top: 25px;
    text-align: right;
}
.creditCardForm #pay-now {
    width: 100%;
    margin-top: 25px;
}
.creditCardForm .payment .btn {
    width: 100%;
    margin-top: 3px;
    font-size: 24px;
    background-color: #2ec4a5;
    color: white;
}
.creditCardForm .payment select {
    padding: 10px;
    margin-right: 15px;
}
.transparent {
    opacity: 0.2;
}
@media(max-width: 650px) {
    .creditCardForm .owner,
    .creditCardForm .CVV,
    .creditCardForm #expiration-date,
    .creditCardForm #credit_cards {
        width: 100%;
    }
    .creditCardForm #credit_cards {
        text-align: left;
    }
}

With this our Credit Card Validation Form is complete!

Mimbla Geolib

Package:
Mimbla Geolib
Summary:
Get the user country given the IP using Mimbla API
Groups:
Geography, PHP 5, Web services
Author:
Reinaldo Acosta
Description:
This class can get the user country given the IP using Mimbla API...

Read more at http://www.phpclasses.org/package/10009-PHP-Get-the-user-country-given-the-IP-using-Mimbla-API.html#2016-11-03-07:43:50

Your Digital Pinball Machine

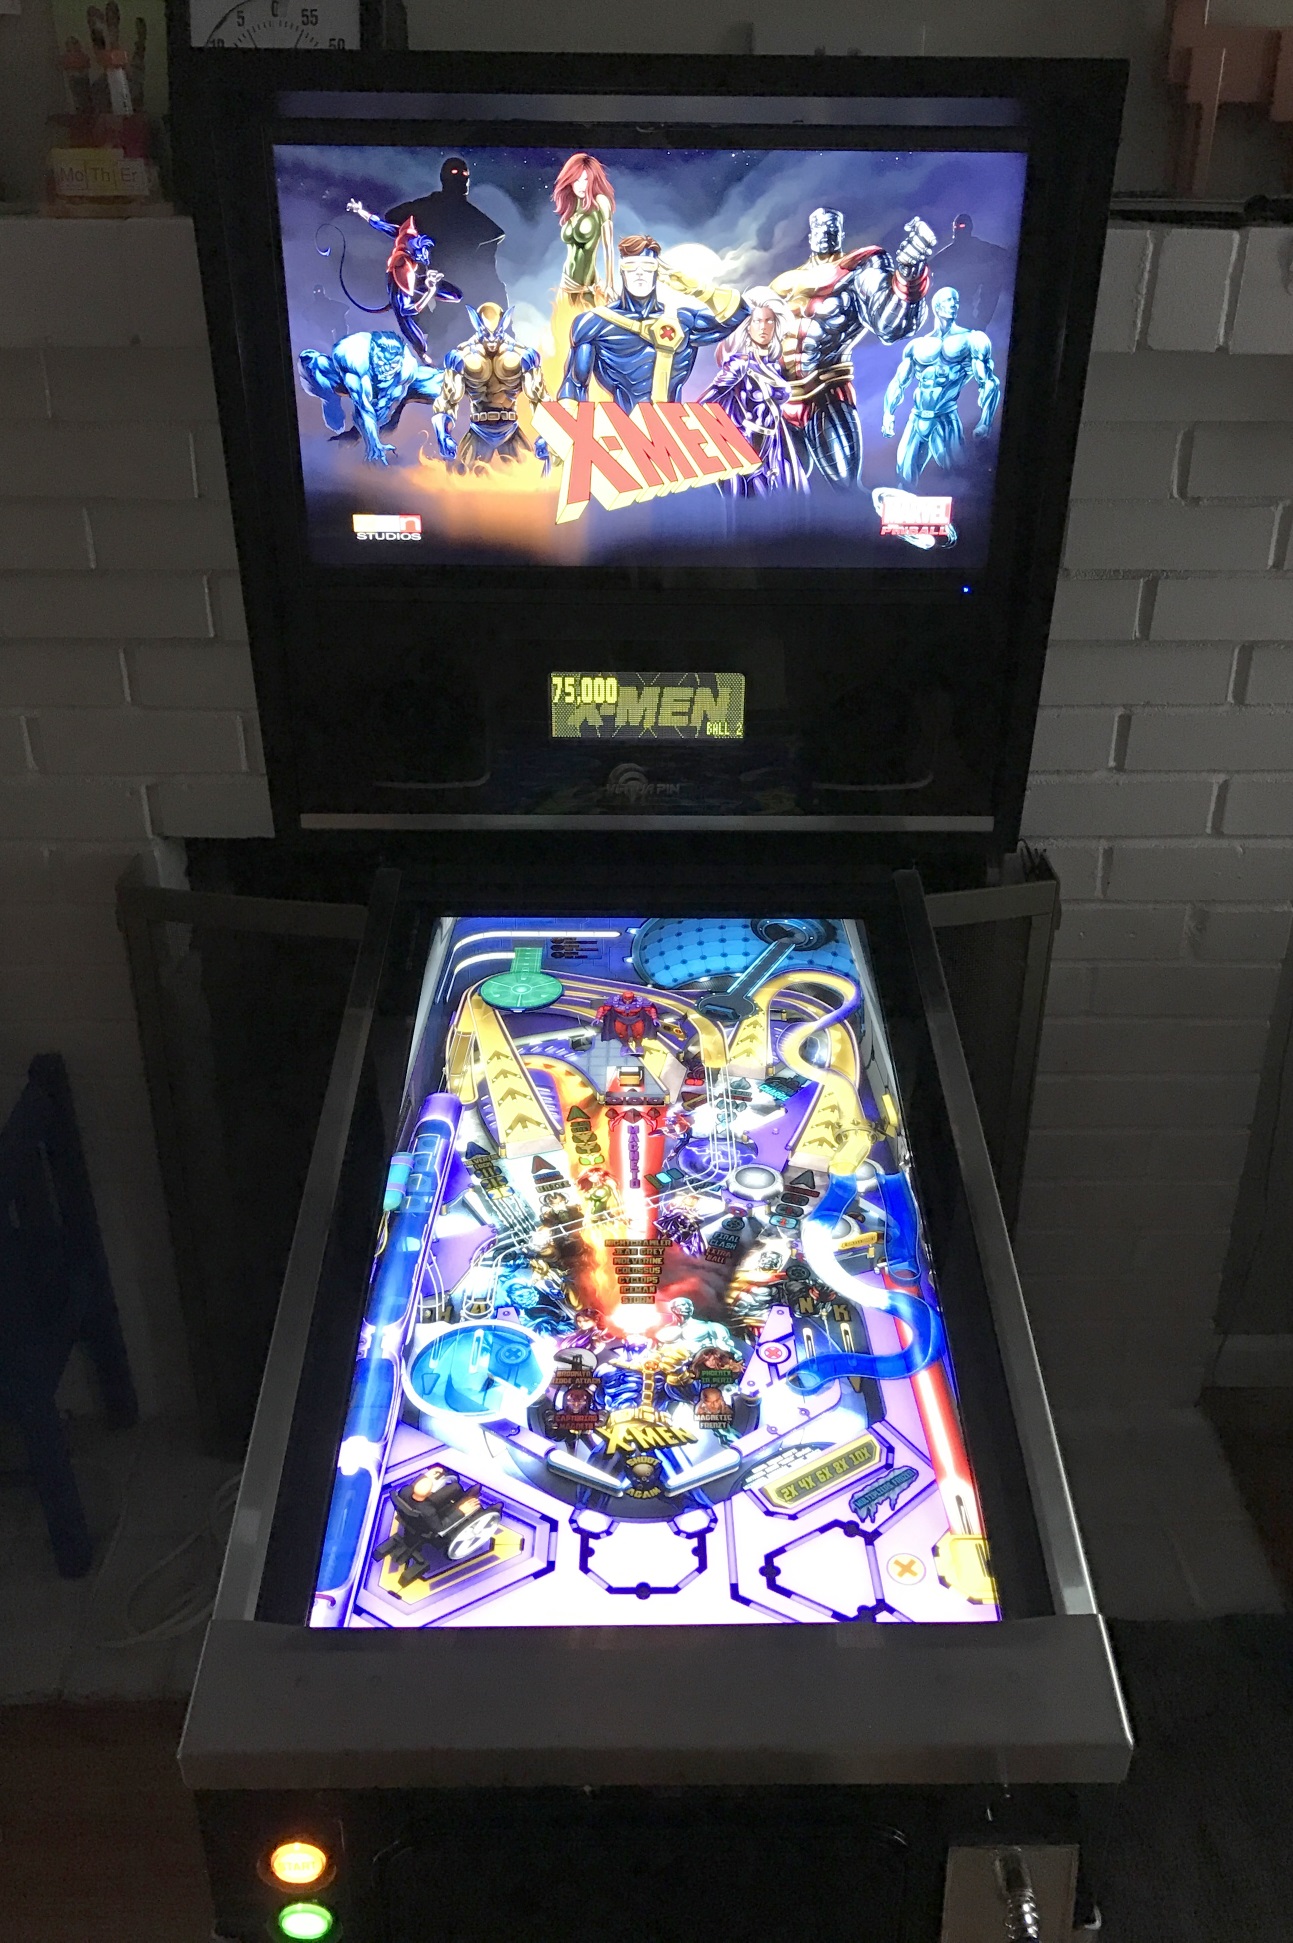
I've had something of an obsession with digital pinball for years now. That recently culminated in me buying a Virtuapin Mini.

OK, yes, it's an extravagance. There's no question. But in my defense, it is a minor extravagance relative to a real pinball machine.

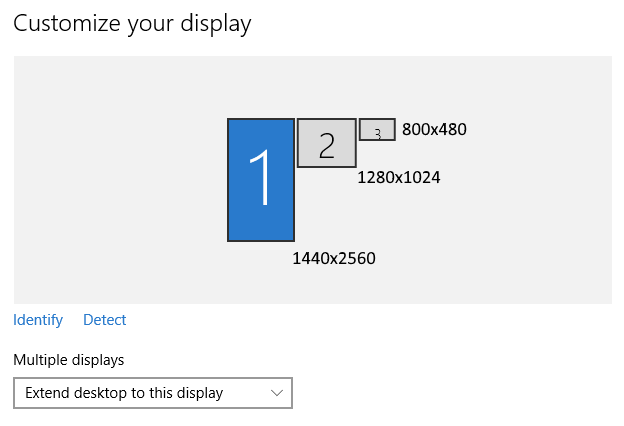
The mini is much smaller than a normal pinball machine, so it's easier to move around, takes up less space, and is less expensive. Plus you can emulate every pinball machine, ever! The Virtuapin Mini is a custom $3k build centered around three screens:

  • 27" main playfield (HDMI)
  • 23" backglass (DVI)
  • 8" digital matrix (USB LCD)

Most of the magic is in those screens, and whether the pinball sim in question allows you to arrange the three screens in its advanced settings, usually by enabling a "cabinet" mode.

Let me give you an internal tour. Open the front coin door and detach the two internal nuts for the front bolts, which are finger tight. Then remove the metal lockdown bar and slide the tempered glass out.

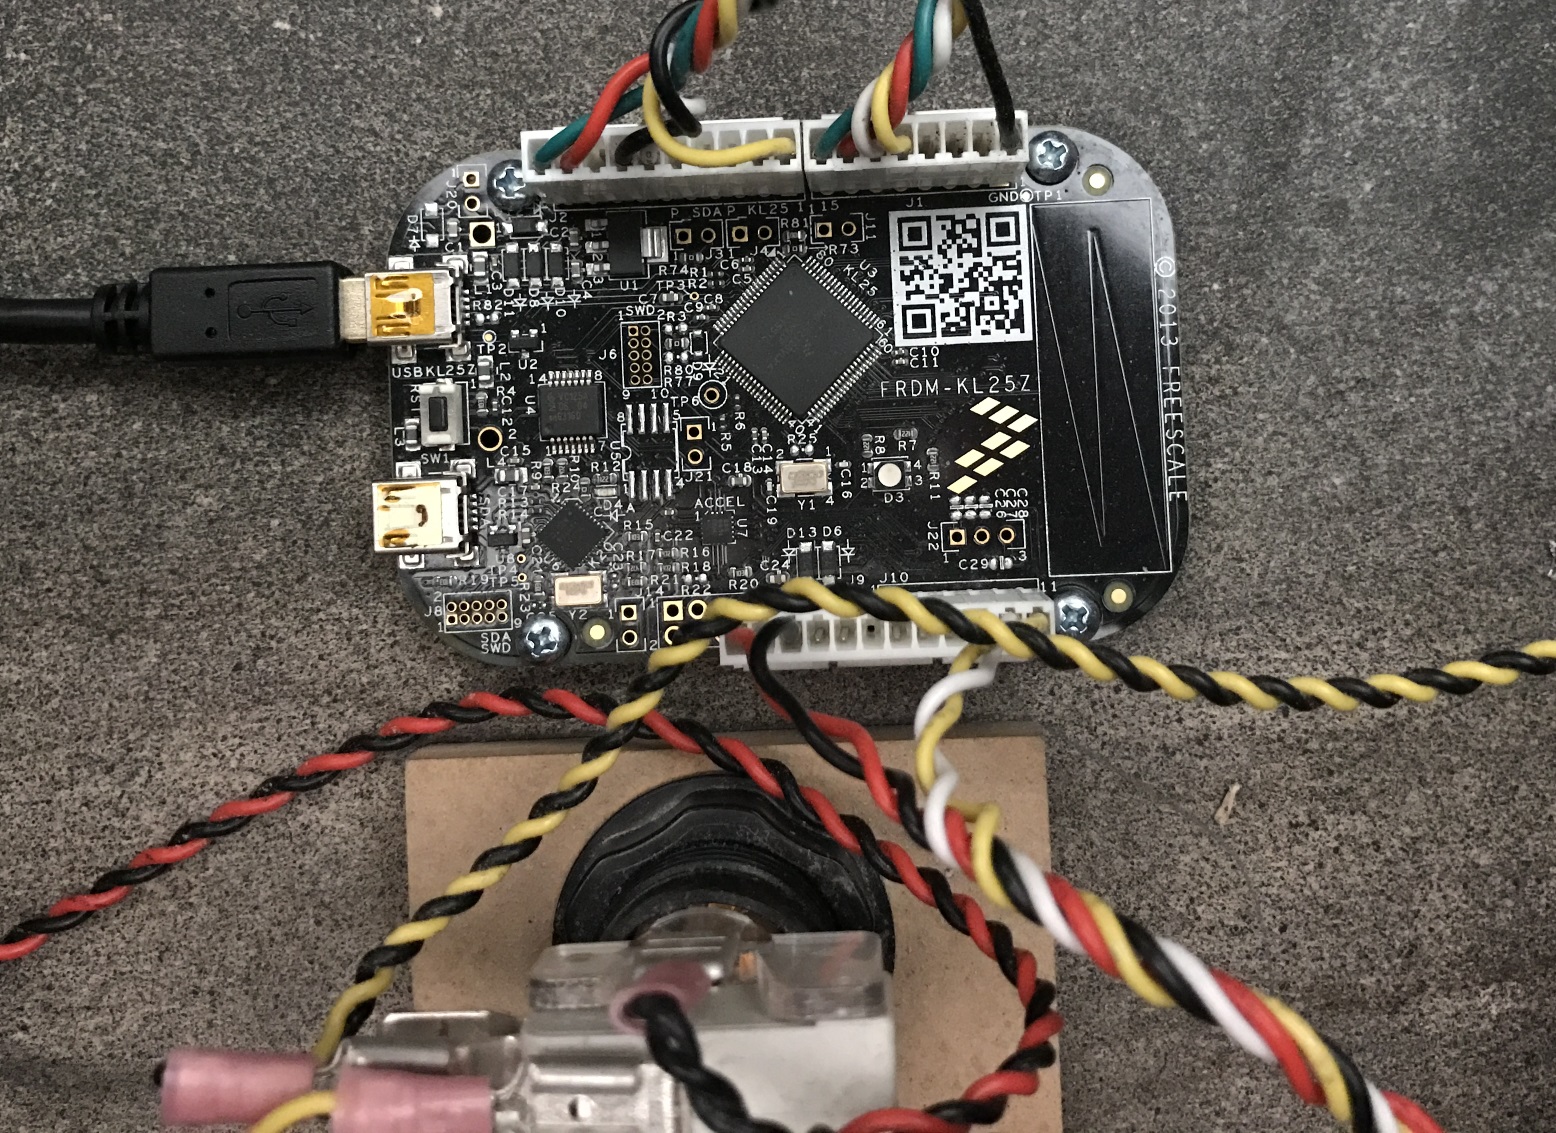
The most uniquely pinball item in the case is right at the front. This Digital Plunger Kit connects the 8 buttons (2 on each side, 3 on the front, 1 on the bottom) and includes an analog tilt sensor and analog plunger sensor. All of which shows up as a standard game controller in Windows.

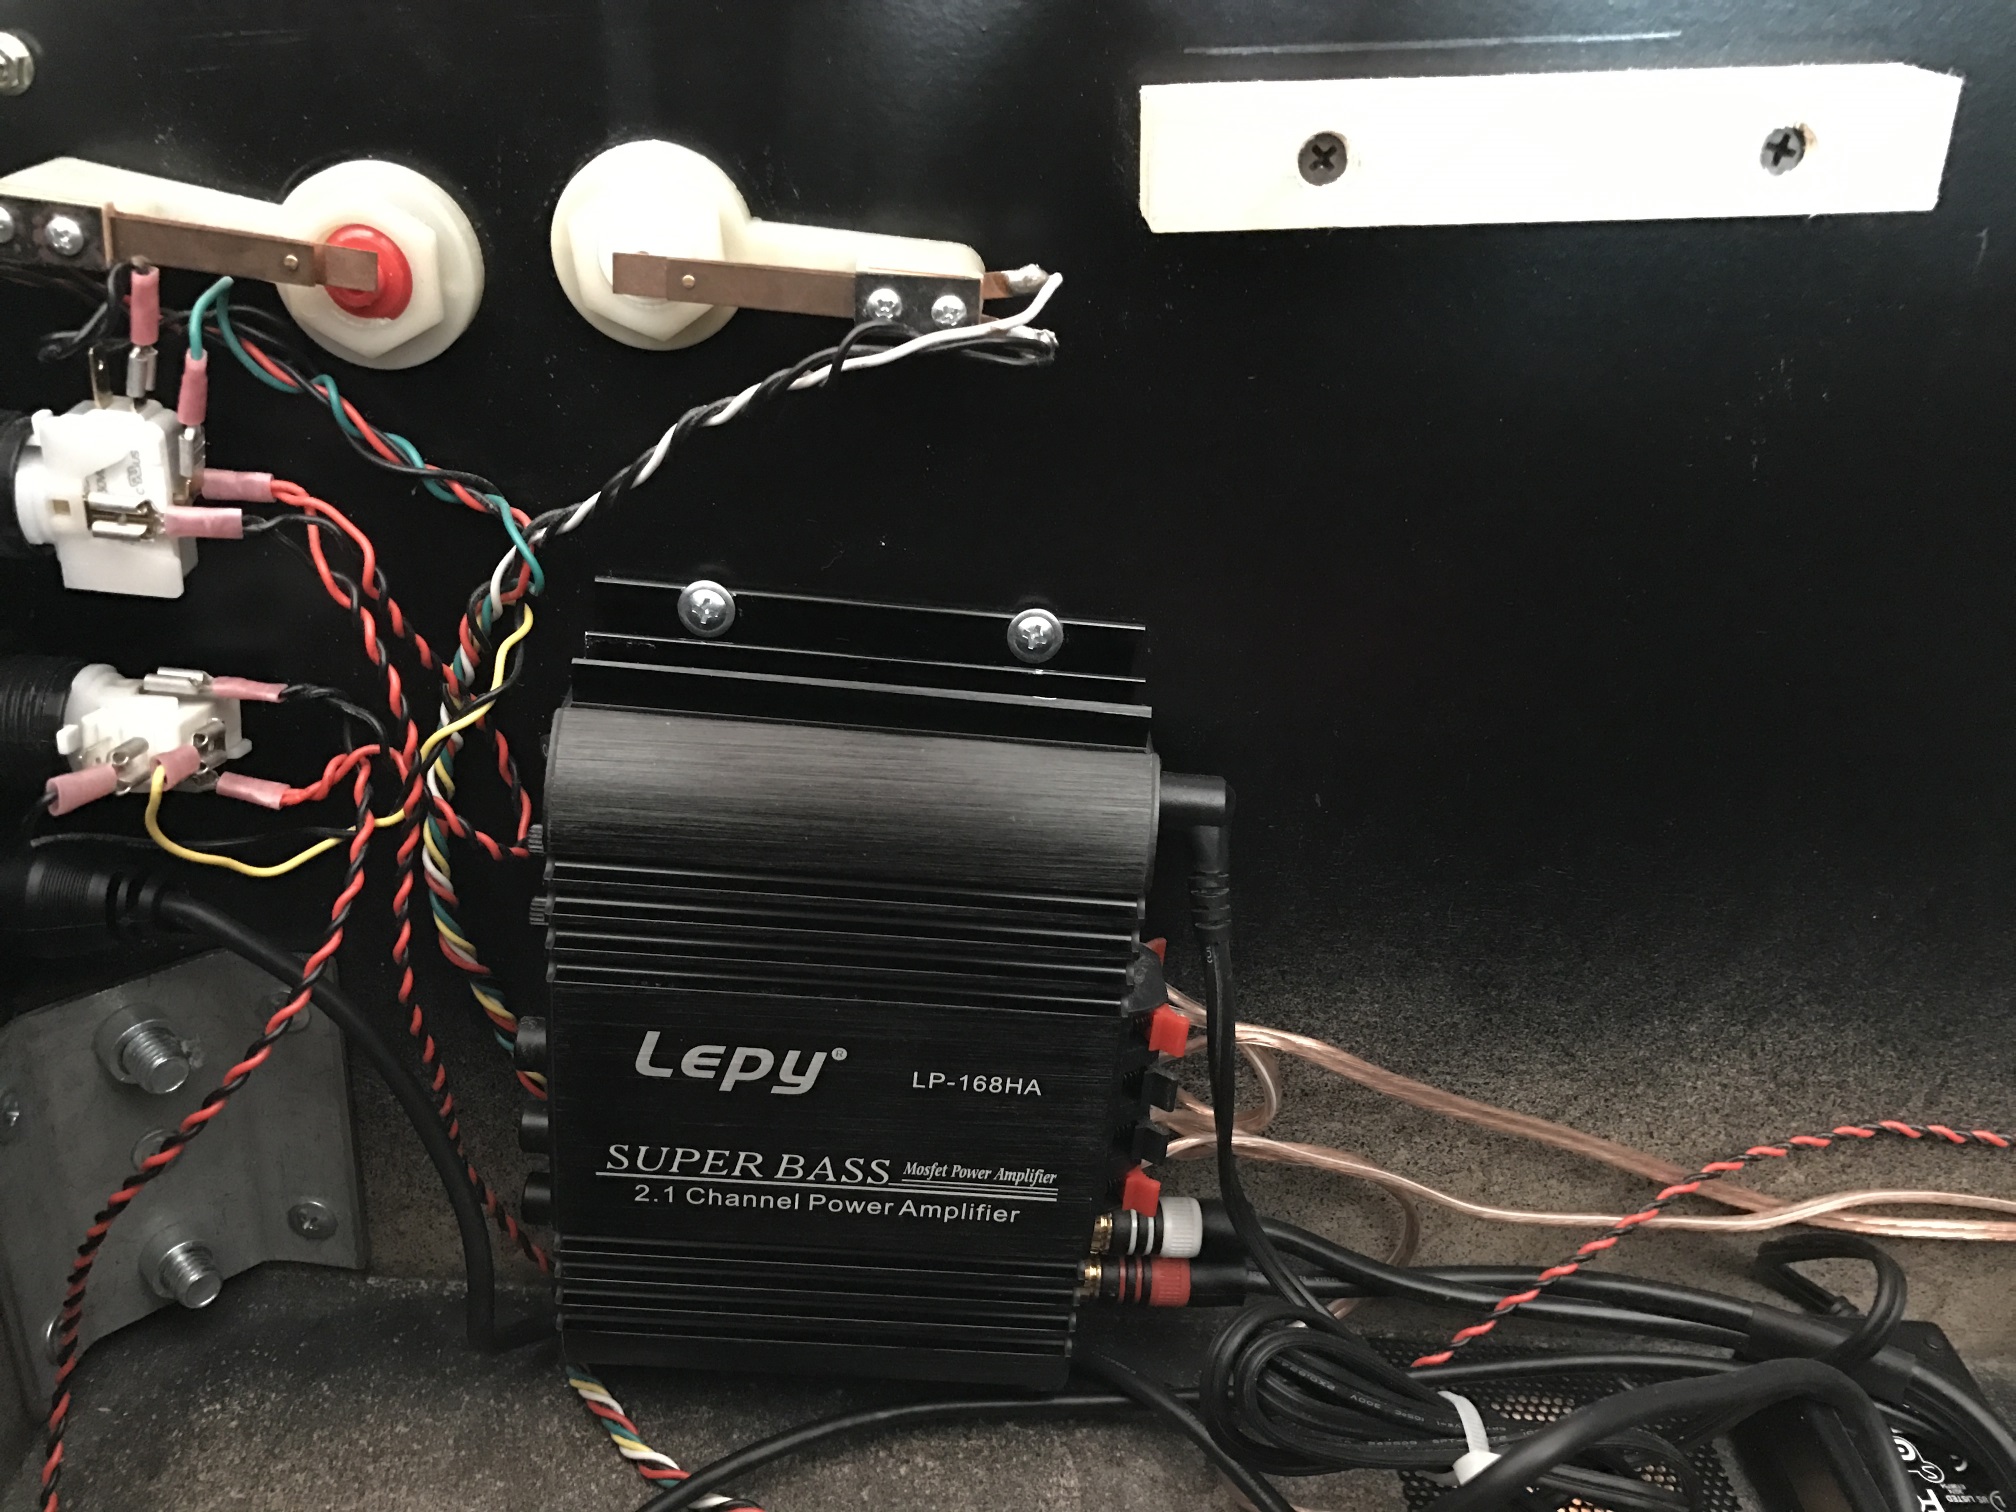
On the left front side, the audio amplifier and left buttons.

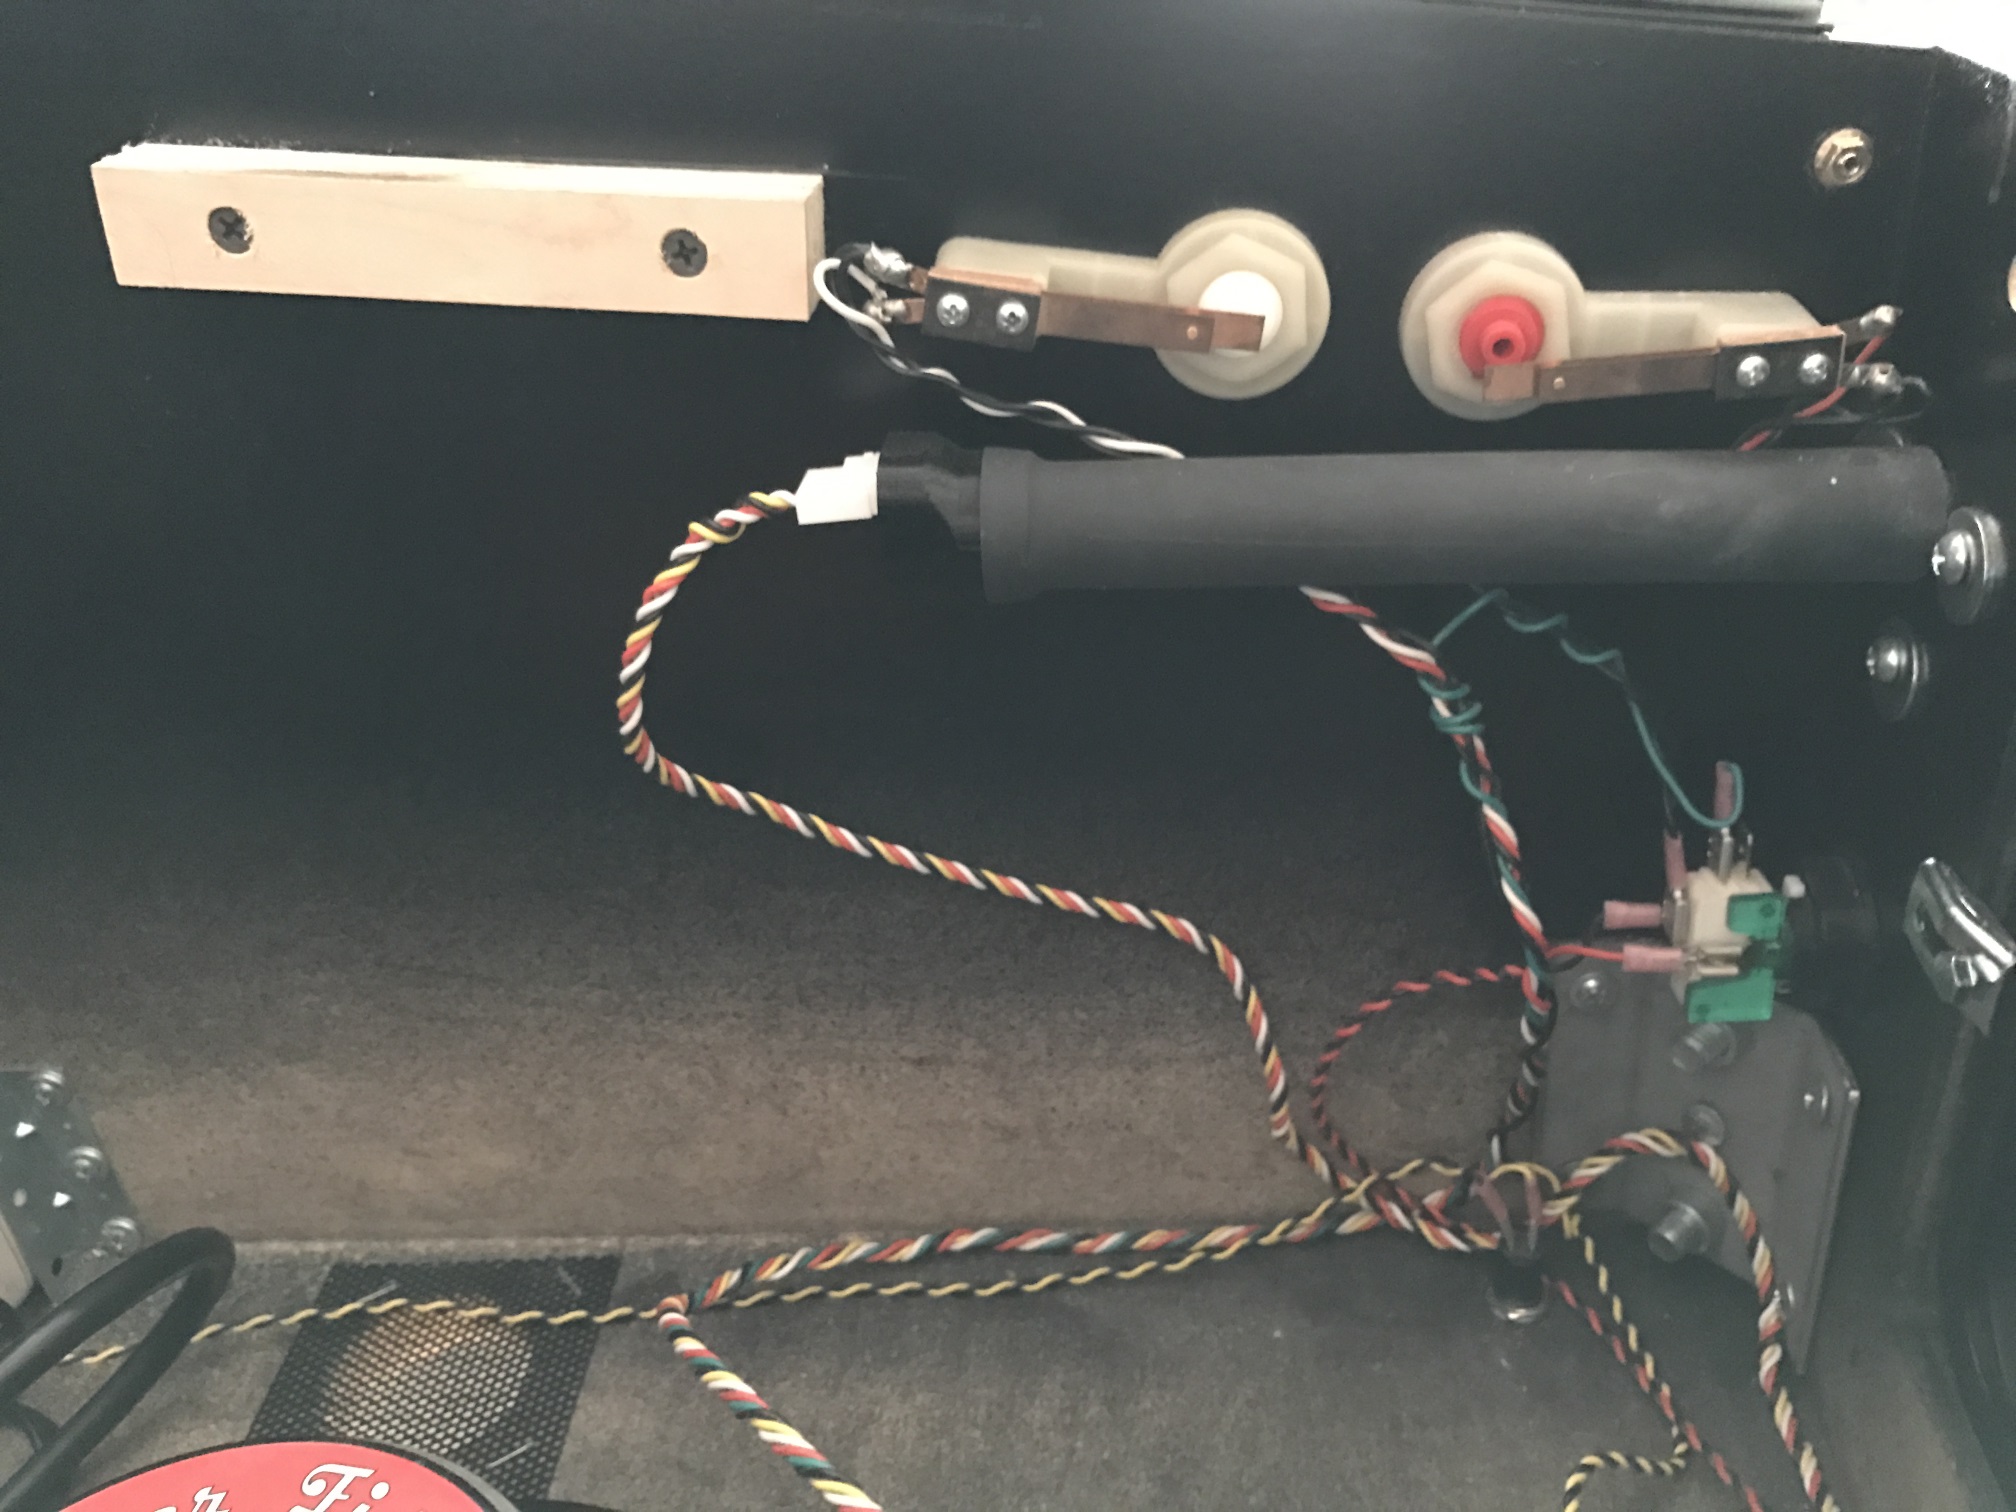
On the right front side, the digital plunger and right buttons.

The 27" playfield monitor is mounted using a clever rod assembly to the standard VESA mount on the back, so we can easily rotate it up to work on the inside as needed.

To remove the playfield, disconnect the power cord and the HDMI connector. Then lift it up and out, and you now have complete access to the interior.

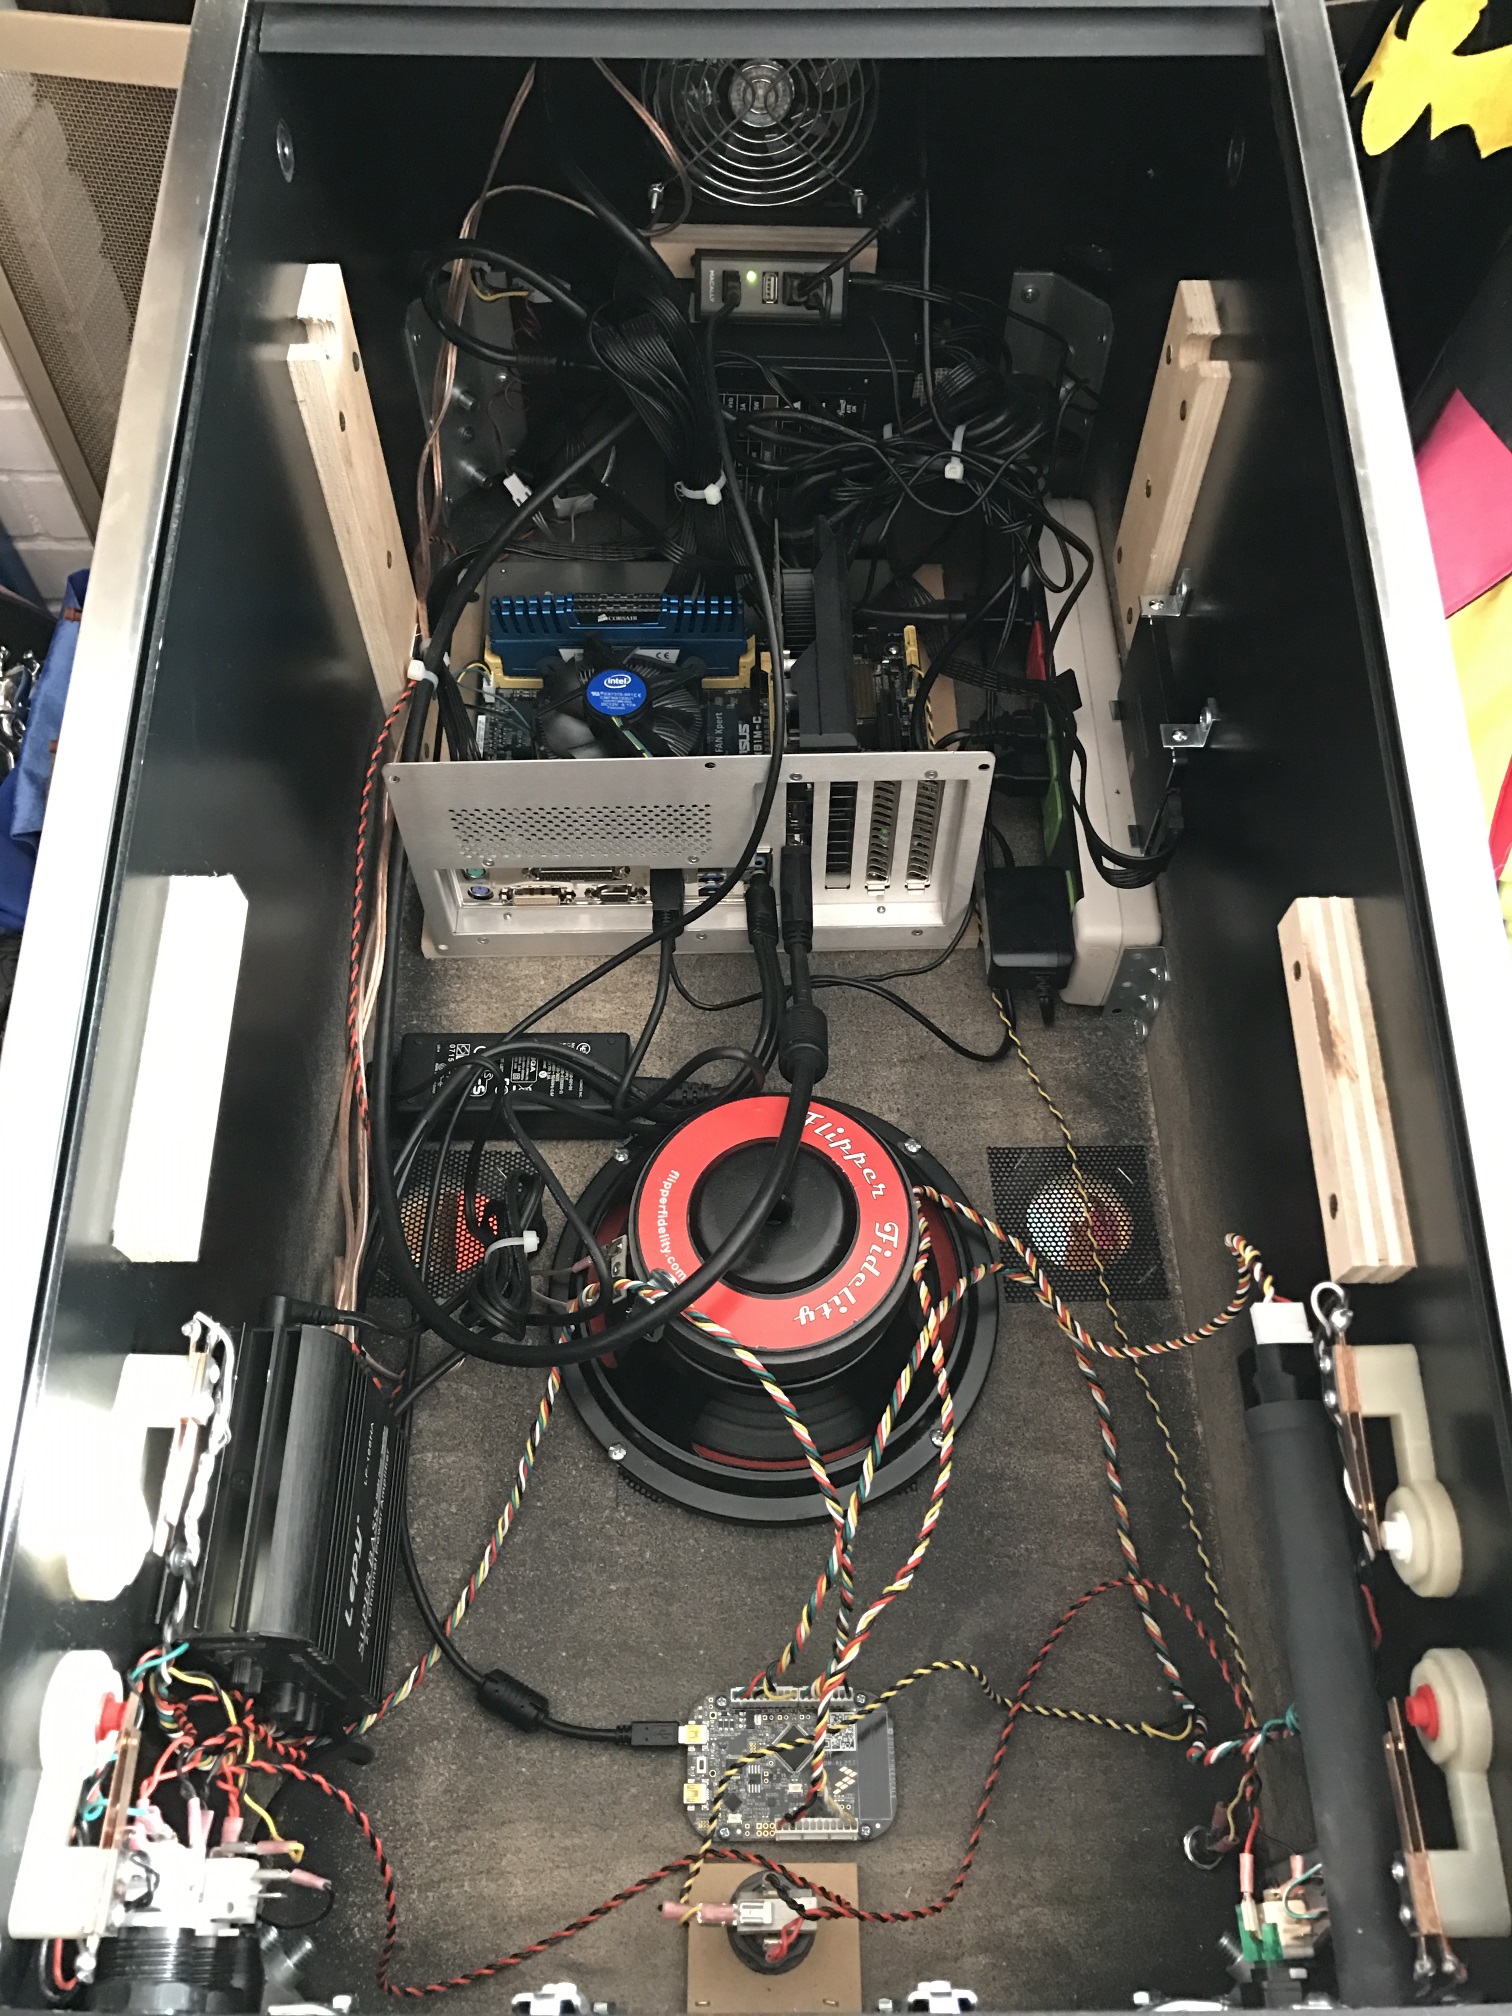
Notice the large down-firing subwoofer mounted in the middle of the body, as well as the ventilation holes. The PC "case" is just a back panel, and the power strip is the Smart Strip kind where it auto-powers everything based on the PC being powered on or off. The actual power switch is on the bottom front right of the case.

Powering it up and getting all three screens configured in the pinball sim of your choice results in … magic.

It is a thoroughly professional build, as you'd expect from a company that has been building these pinball rigs for the last decade. It uses real wood (not MDF), tempered glass, and authentic metal pinball parts throughout.

I was truly impressed by the build quality of this machine. Paul of Virtuapin said they're on roughly version four of the machine and it shows. It's over 100 pounds fully assembled and arrives on a shipping pallet. I can only imagine how heavy the full size version would be!

That said, I do have some tweaks I recommend:

  • Make absolutely sure you get an IPS panel as your 27" playfield monitor. As arrived, mine had a TN panel and while it was playable if you stood directly in front of the machine, playfield visibility was pretty dire outside that narrow range. I dropped in the BenQ GW2765HT to replace the GL2760H that was in there, and I was golden. If you plan to order, I would definitely talk to Paul at VirtuaPin and specify that you want this IPS display even if it costs a little more. The 23" backglass monitor is also TN but the viewing angles are reasonable-ish in that orientation and the backglass is mostly for decoration anyway.

  • The improved display has a 1440p resolution compared to the 1080p originally shipped, so you might want to upgrade from the GeForce 750 Ti video card to the just-released 1050 Ti. This is not strictly required, as I found the 750 Ti an excellent performer even at the higher resolution, but I plan to play only fully 3D pinball sims and the 1050 Ti gets excellent reviews for $140, so I went for it.

  • Internally everything is exceptionally well laid out, the only very minor improvement I'd recommend is connecting the rear exhaust fan to the motherboard header so its fan speed can be dynamically controlled by the computer rather than being at full power all the time.

  • On the Virtuapin website order form the PC they provide sounds quite outdated, but don't sweat it: I picked the lowest options thinking I would have to replace it all, and they shipped me a Haswell based quad-core PC with 8GB RAM and a 256GB SSD, even though those options weren't even on the order form.

I realize $3k (plus palletized shipping) is a lot of money, but I estimate it would cost you at least $1500 in parts to build this machine, plus a month of personal labor. Provided you get the IPS playfield monitor, this is a solidly constructed "real" pinball machine, and if you're into digital pinball like I am, it's an absolute joy to play and a good deal for what you actually get. As Ferris Bueller once said:

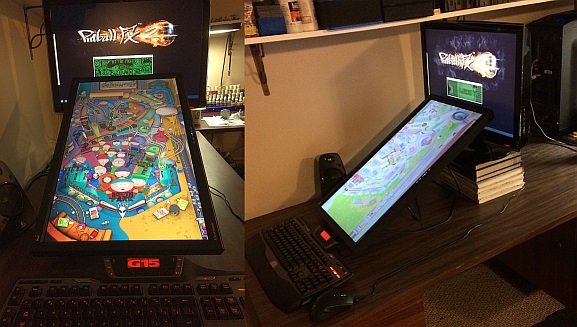
If you'd like to experiment with this and don't have three grand burning a hole in your pocket, 90% of digital pinball simulation is a widescreen display in portrait mode. Rotate one of your monitors, add another monitor if you're feeling extra fancy, and give it a go.

As for software, most people talk about Visual Pinball for these machines, and it works. But the combination of janky hacked-together 2D bitmap technology used in the gameplay, and the fact that all those designs are ripoffs that pay nothing in licensing back to the original pinball manufacturers really bothers me.

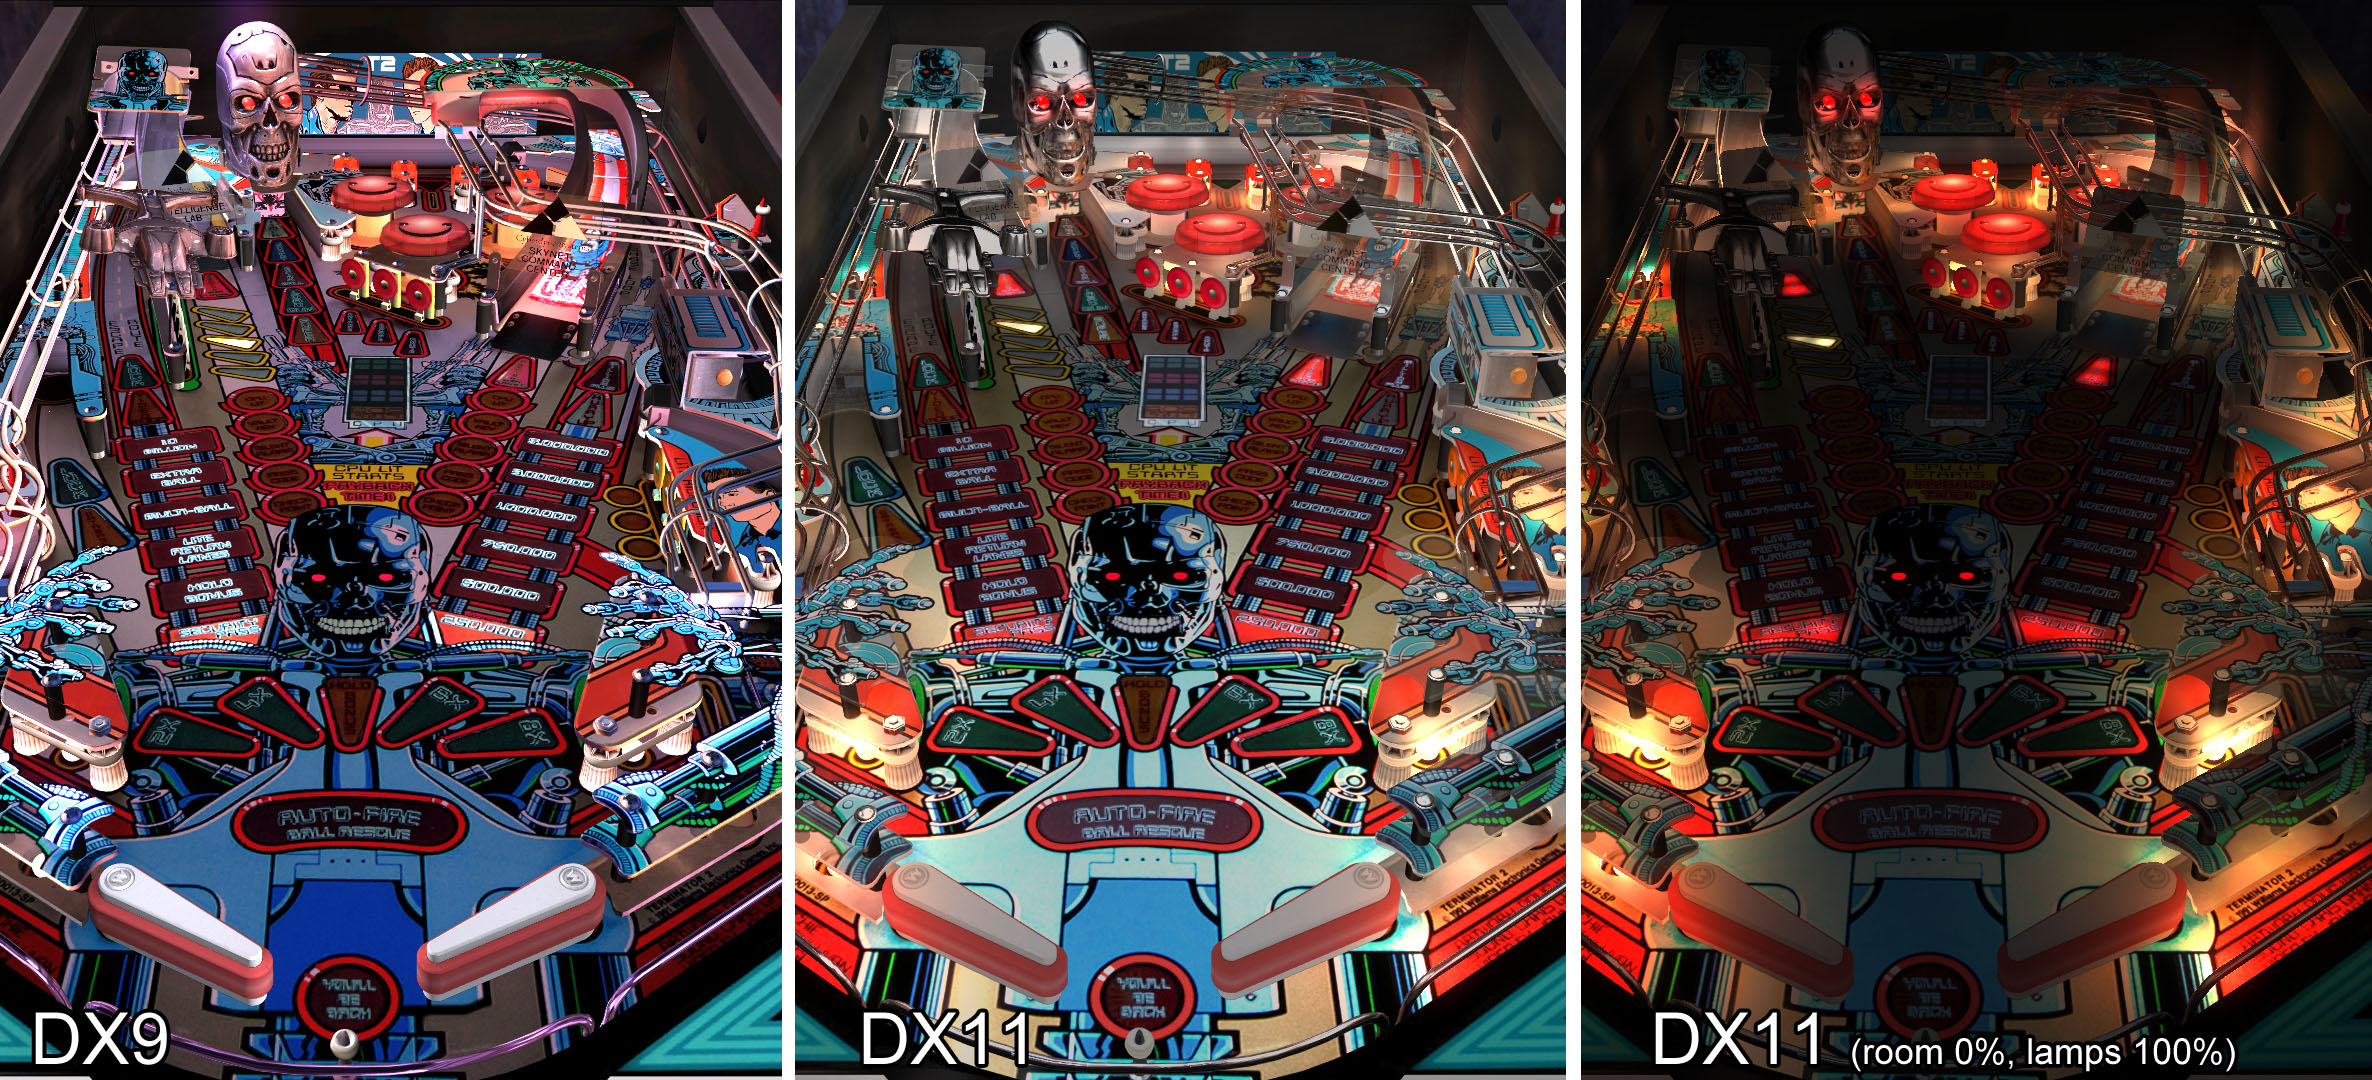
I prefer Pinball Arcade in DirectX 11 mode, which is downright beautiful, easily (and legally!) obtainable via Steam and offers a stable of 60+ incredible officially licensed classic pinball tables to choose from, all meticulously recreated in high resolution 3D with excellent physics.

As for getting pinball simulations running on your three monitor setup, if you're lucky the game will have a cabinet mode you can turn on. Unfortunately, this can be weird due to … licensing issues. Apparently building a pinball sim on the computer requires entirely different licensing than placing it inside a full-blown pinball cabinet.

Pinball Arcade has a nifty camera hack someone built that lets you position three cameras as needed to get the three displays. You will also need the excellent x360ce program to dynamically map joystick events and buttons to a simulated Xbox 360 controller.

Pinball FX2 added a cabinet mode about a year ago, but turning it on requires a special code and you have to send them a picture of your cabinet (!) to get that code. I did, and the cabinet mode works great; just enter your code, specify the coordinates of each screen in the settings and you are good to go. While these tables definitely have arcadey physics, I find them great fun and there are a ton to choose from.

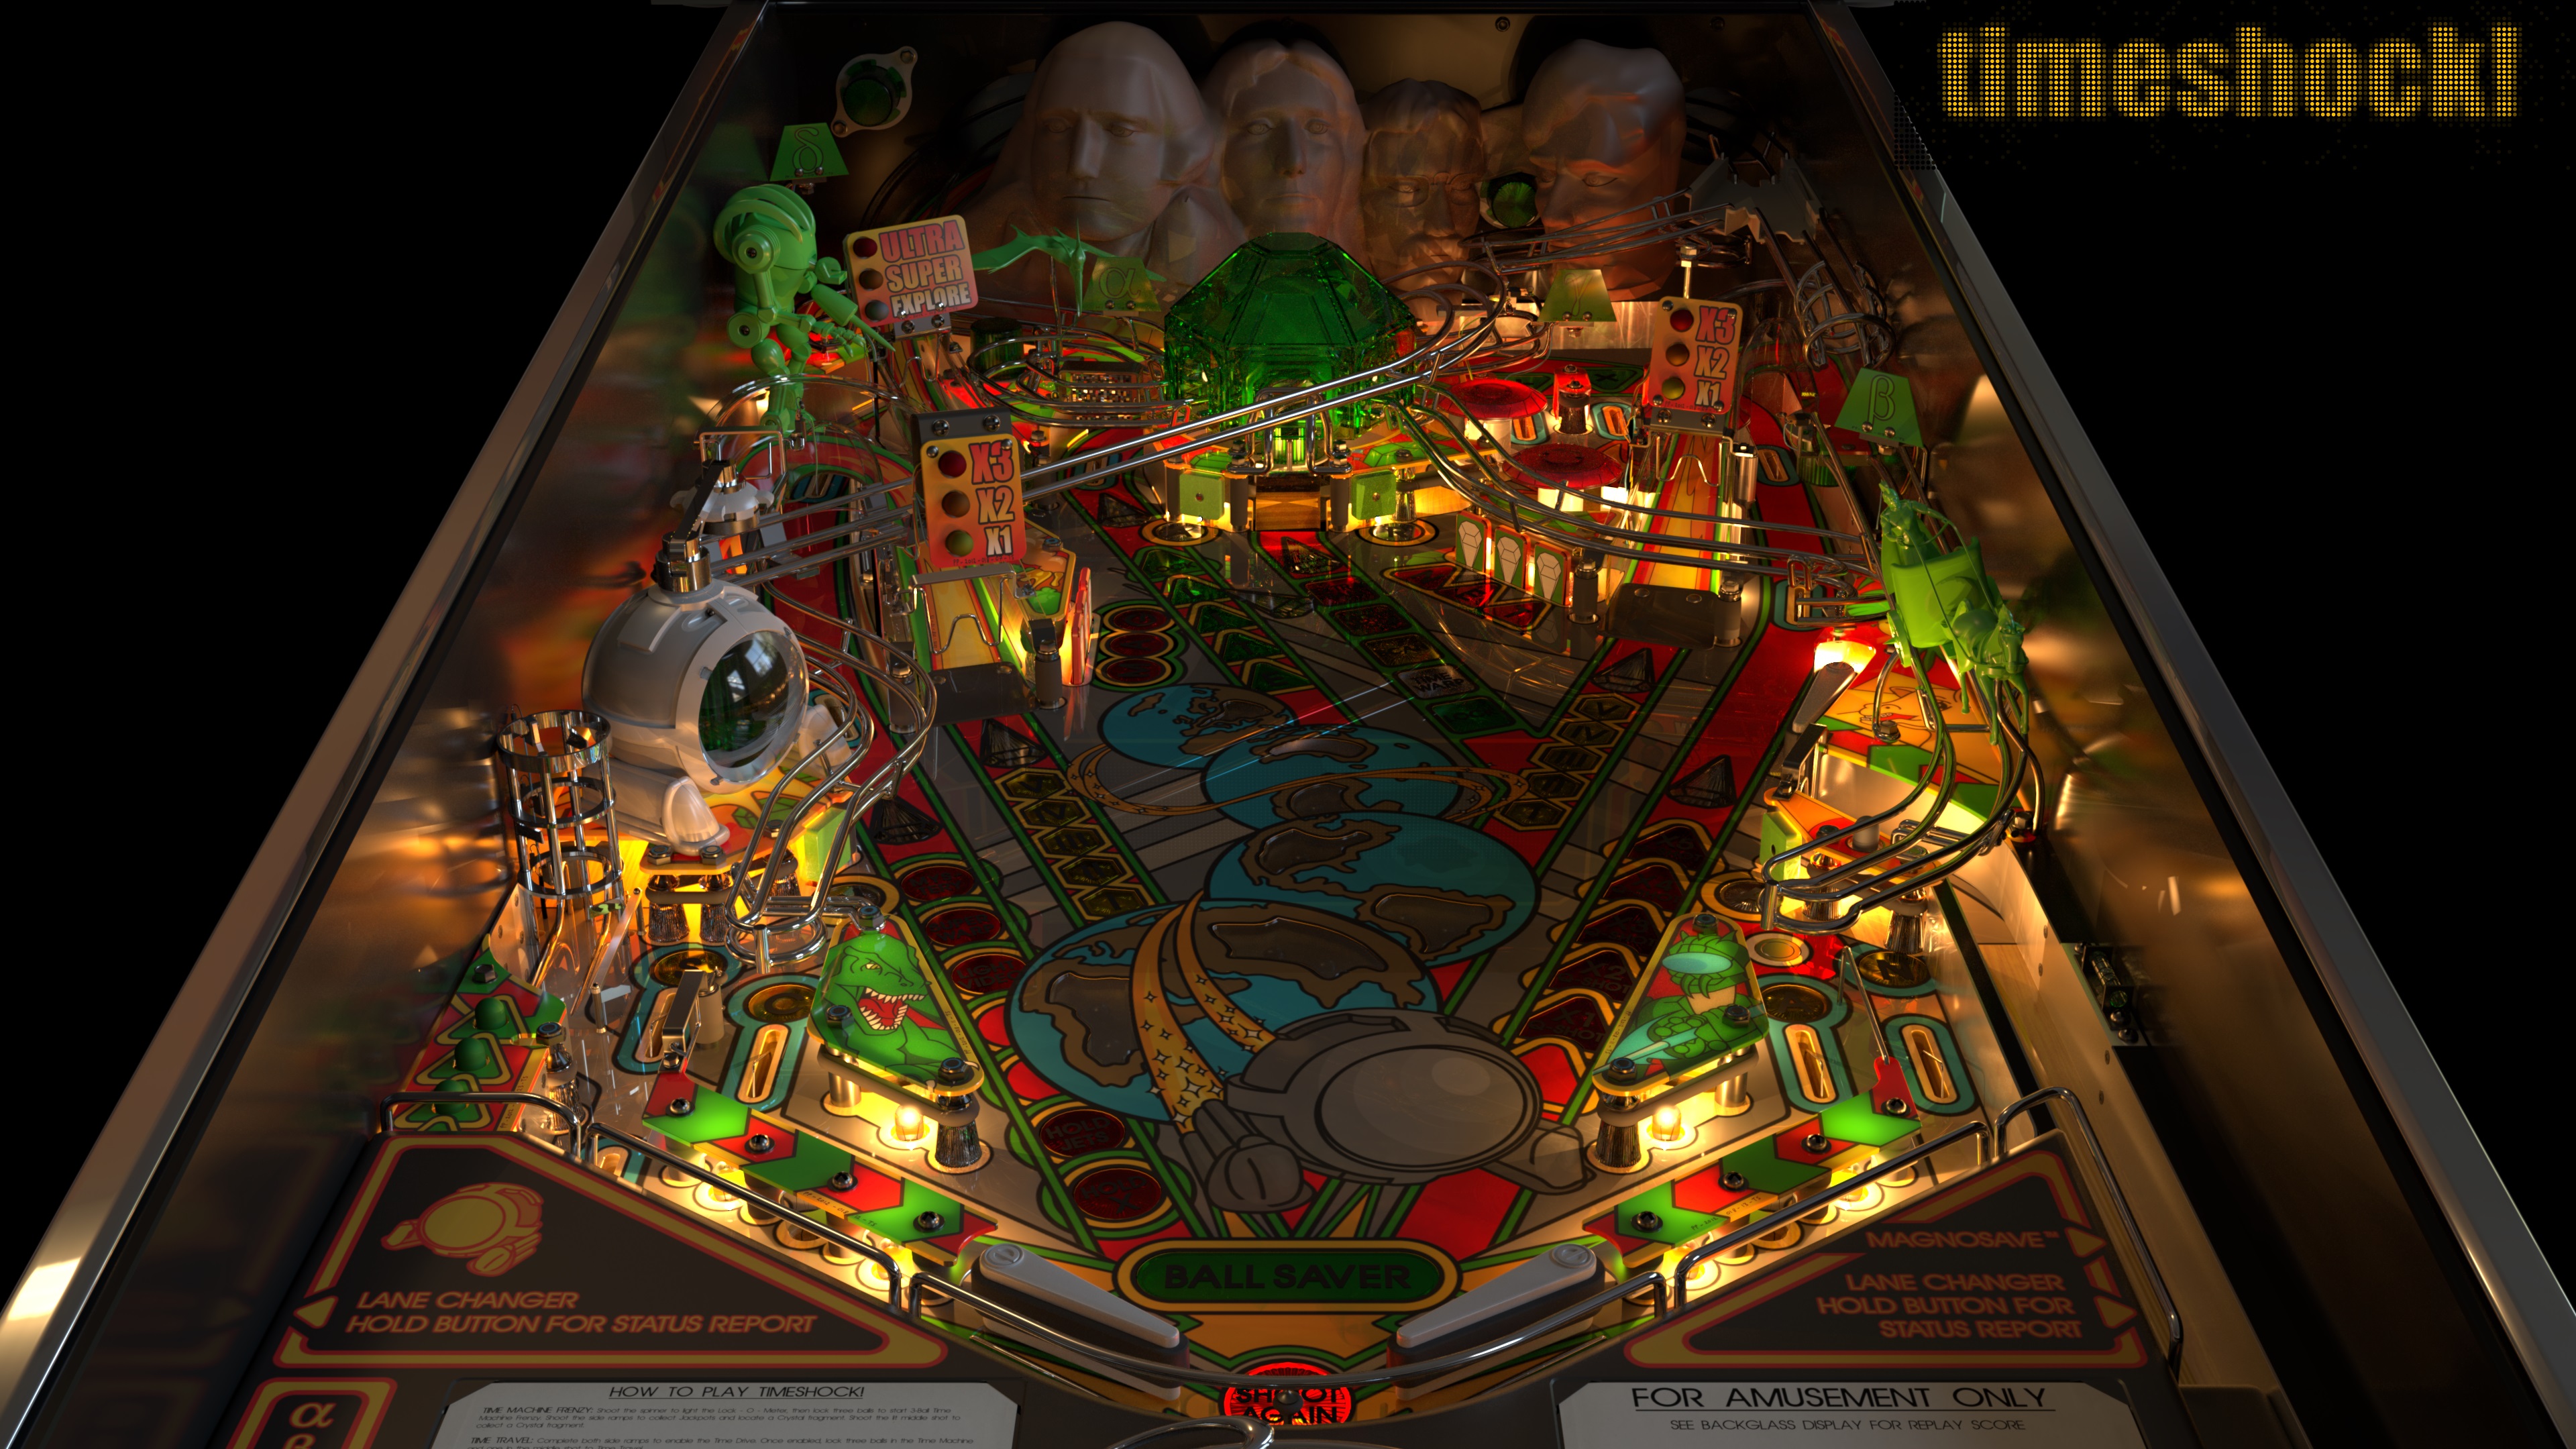
Pro Pinball Timeshock Ultra is unique because it's originally from 1997 and was one of the first "simulation" level pinball games. The current rebooted version is still pre-rendered graphics rather than 3D, but the client downloads the necessary gigabytes of pre-rendered content at your exact screen resolution and it looks amazing.

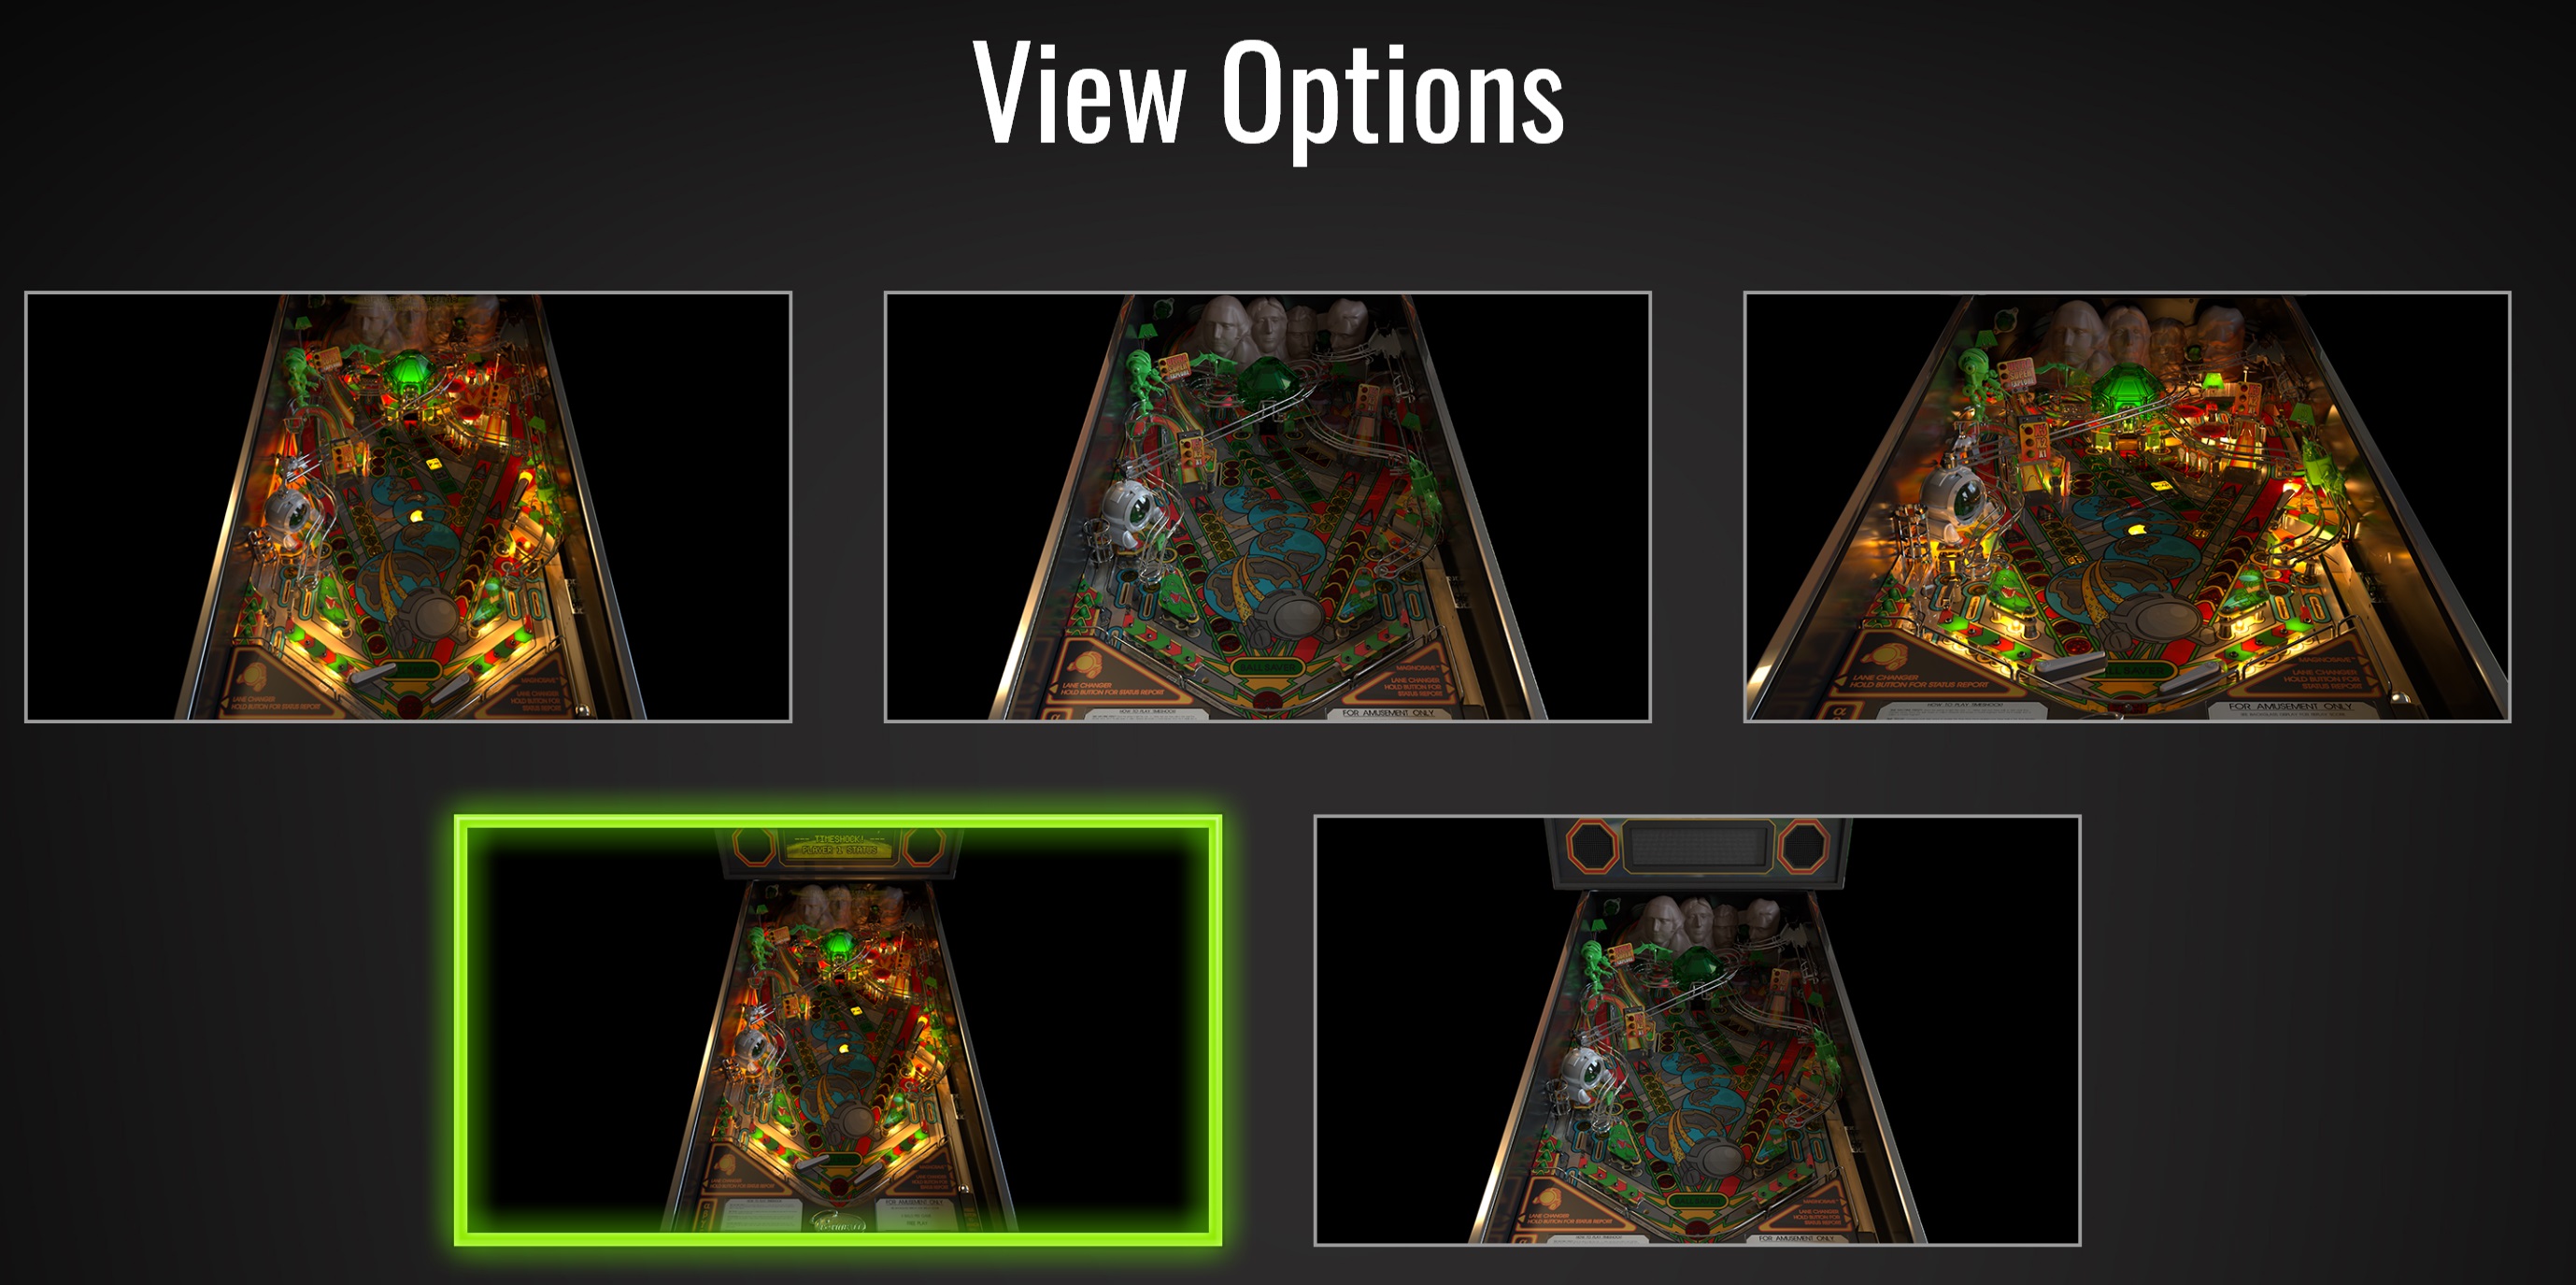
Timeshock has explicit cabinet support in the settings and via command line tweaks. Also, in cabinet mode, when choosing table view, you want the bottom left one. Trust me on this! It supports maximum height for portrait cabinet mode.

Position each window as necessary, then enable fullscreen for each one and it'll snap to the monitor you placed it on. It's "only" one table, but arguably the most classic of all pinball sims. I sincerely hope they continue to reboot the rest of the Pro Pinball series, including Big Race USA which is my favorite.

I've always loved pinball machines, even though they struggled to keep up with digital arcade games. In some ways I view my current project, Discourse, as a similarly analog experience attempting to bridge the gap to the modern digital world:

The fantastic 60 minute documentary Tilt: The Battle to Save Pinball has so many parallels with what we're trying to do for forum software.

Pinball is threatened by Video Games, in the same way that Forums are threatened by Facebook and Twitter and Tumblr and Snapchat. They're considered old and archaic technology. They've stopped being sexy and interesting relative to what else is available.

Pinball was forced to reinvent itself several times throughout the years, from mechanical, to solid state, to computerized. And the defining characteristic of each "era" of pinball is that the new tables, once you played them, made all the previous pinball games seem immediately obsolete because of all the new technology.

The Pinball 2000 project was an attempt to invent the next generation of pinball machines:

It wasn't a new feature, a new hardware set, it was everything new. We have to get everything right. We thought that we had reinvented the wheel. And in many respects, we had.

This is exactly what we want to do with Discourse – build a forum experience so advanced that playing will make all previous forum software seem immediately obsolete.

Discourse aims to save forums and make them relevant and useful to a whole new generation.

So if I seem a little more nostalgic than most about pinball, perhaps a little too nostalgic at times, maybe that's why.

[advertisement] Building out your tech team? Stack Overflow Careers helps you hire from the largest community for programmers on the planet. We built our site with developers like you in mind.

PHP Minify CSS and JavaScript

Package:
PHP Minify CSS and JavaScript
Summary:
Compact and group CSS and JavaScript files
Groups:
Compression, Parsers, PHP 5, Web services
Author:
Rogério Taques
Description:
This class can compact and group CSS and JavaScript files...

Read more at http://www.phpclasses.org/package/9969-PHP-Compact-and-group-CSS-and-JavaScript-files.html#2016-11-02-11:11:08

Connect to MySQL, PosgreSQL, Oracle, ODBC

Package:
Connect to MySQL, PosgreSQL, Oracle, ODBC
Summary:
Connect and execute queries in different databases
Groups:
Databases, PHP 5
Author:
Andres Ferreira
Description:
This class can connect and execute queries in different databases...

Read more at http://www.phpclasses.org/package/9994-PHP-Connect-and-execute-queries-in-different-databases.html#2016-11-02-07:52:52

PHP Array into HTML Table (New)

Package:
PHP Array into HTML Table
Summary:
Generate HTML tables from data in arrays
Groups:
HTML, PHP 5
Author:
Alexandre Sinício
Description:
This class can generate HTML tables from data in arrays

It can take arrays with data for the headers and body and generates HTML for a table...

Read more at http://www.phpclasses.org/package/10003-PHP-Generate-HTML-tables-from-data-in-arrays.html
Powered by Gewgley