When creating a new digital art project, it’s vital to have the right tools on hand to complete the job. Sometimes, that means software. Other times, that means specific tools within said software. And if you’re looking to create 3D effects in your work, Photoshop actions might just be the thing you need most.
What follows is a concise collection of Photoshop actions that streamline the process for creating 3D effects. Add depth to text. Add shadows and depth of field. Create isometric effects. No matter what end goal you have for your artwork, these actions simplify creating a 3D look, which could very well free up your time for other important tasks.
No more delays. Let’s get into the collection.
More Photoshop Actions:
Free Photoshop Actions:
This 3D Isometric Photoshop action makes it easy to transform text, vector-based shapes, smart objects, layer groups, and pixel layers into images that appear as though they are real 3D objects. This action works in two different directions and includes 12 shadow sizes, 10 extrusion sizes, a choice over light and shadow directions, and more.

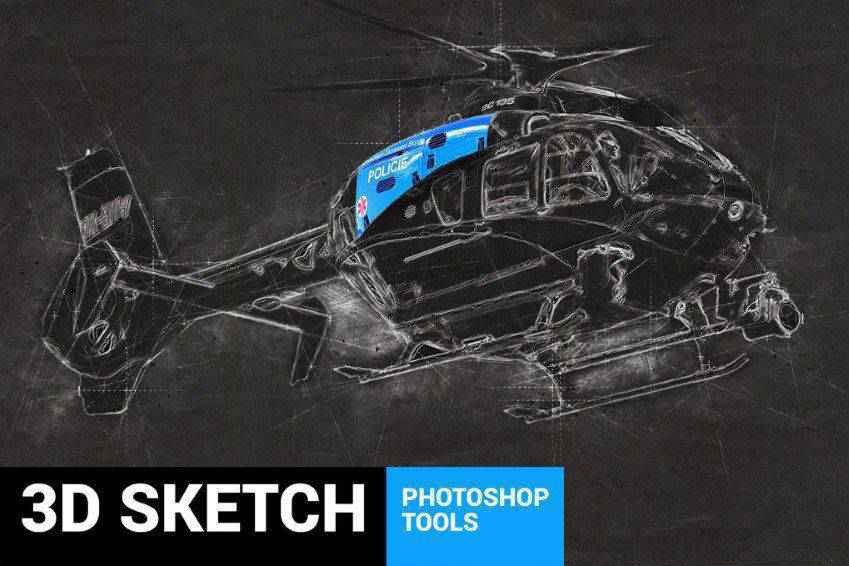
Here’s another fantastic option. The Concept 3D Sketch Photoshop Action turns any photograph you want into a technical sketch that preserves 3D elements. It can work on any image of an object and creates a highly-detailed graphic that you can use in any number of situations. It comes with a full tutorial as well.
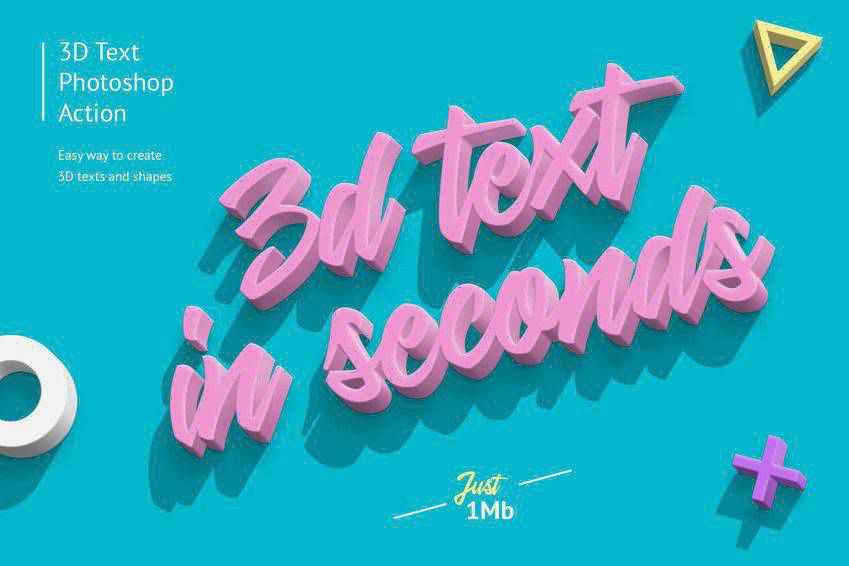
The 3D Text Effect Photoshop Action is another text effect that works to transform your graphics into realistic-looking 3D objects. The results preserve full detail and color and can be tweaked based on extrusion direction and size, shadow and light direction and size, custom colors and fonts, and more. A full PDF help file is included so getting started is easy.
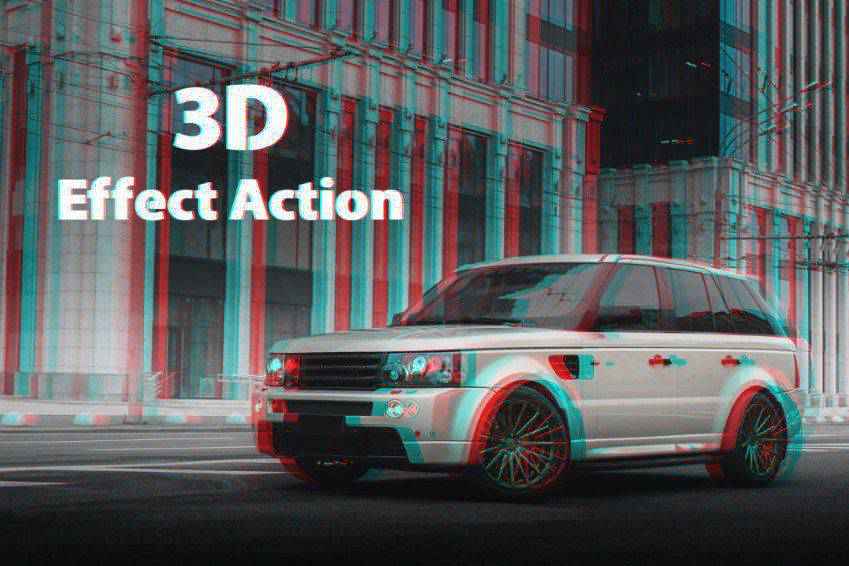
Give your artwork an old-style stereoscopic 3D look with this Anaglyph 3D Photoshop Action. It adds this effect to your photos with a single click and the end result actually works with real 3D glasses. It comes with 8 different actions and it doesn’t destroy your original image in the process.

Here’s another great option for adding a 3D effect to your images. This one gives your image the appearance of stereoscopic 3D with just a few clicks. It automatically creates layer groups and is non-destructive so your original image remains intact. It also comes with a text file that guides you through the whole process.
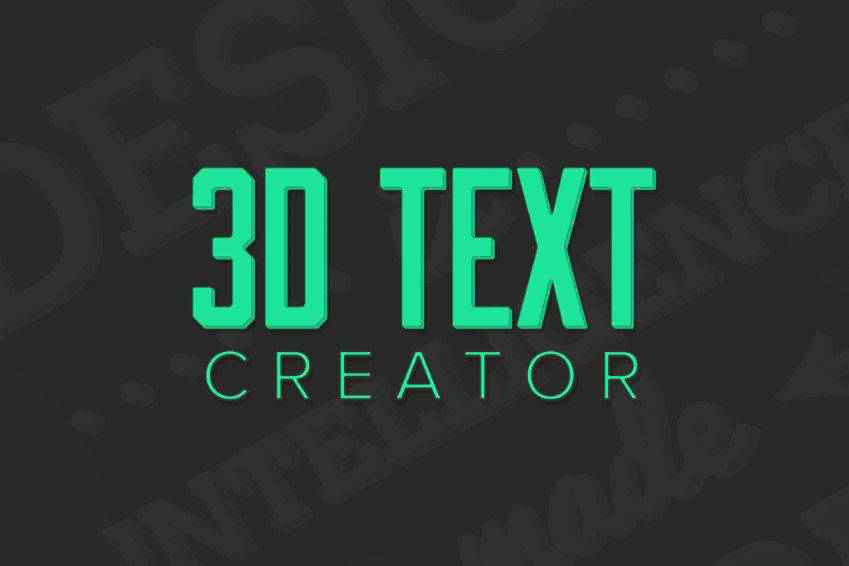
The 3D Text Creator Actions consists of a whopping 65 separate actions you can use to turn text layers into 3D text graphics. They work in four directions, can be used to create solid, flat, or translucent 3D text, and include five outline styles. All layers are fully editable and these actions are non-destructive.
What an interesting effect this is! The 3D Dispersion Photoshop Action works by taking your images and making them appear as though they’ve broken apart into tiny three-dimensional pieces and said pieces are flying away. This dispersion effect can be applied quickly to your photos and you can select from four different directions of movement.

The Animated 3D Parallax Duotone Action works by creating a 3D stereoscopic GIF. It works by creating a looping animation out of two layers. Other features include 25 colorscripts, a thumbnail color preview, fully editable layers, and a quick start guide.
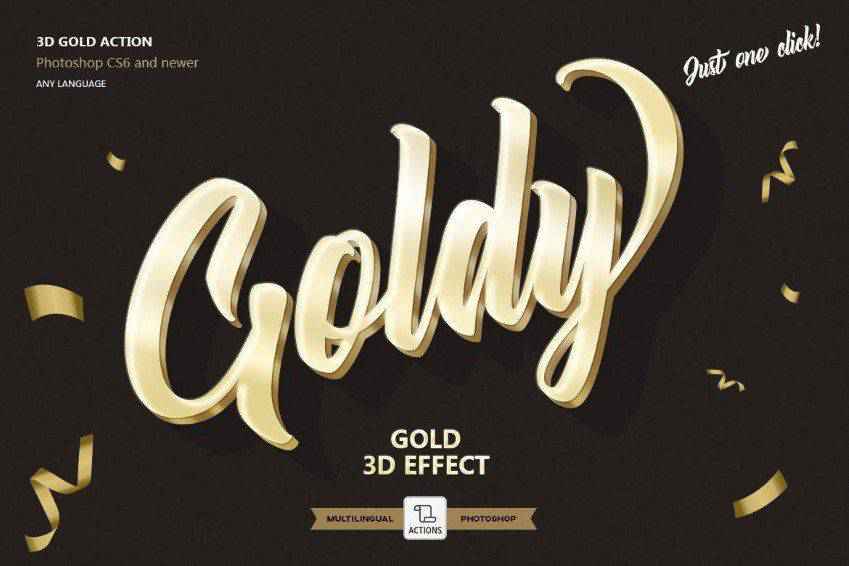
Giving your text a shiny gold effect has never been easier thanks to the Gold 3D Text Effect Photoshop Action. This one provides a realistic result that’s super easy to implement. With just one click, you’ll have the finished layers. It works on text, vectors, pixel layers, smart objects, and more. It also has a smart shadow you can play with. And a video tutorial is included.
Here’s another fantastic option for adding 3D effects to the text elements of your graphics. Just a few clicks and you’ll see your results. You can use it in backgrounds and more. It comes with 6 PSD files with the effect in Smart Objects. It also comes with a help file that includes instructions and fonts.

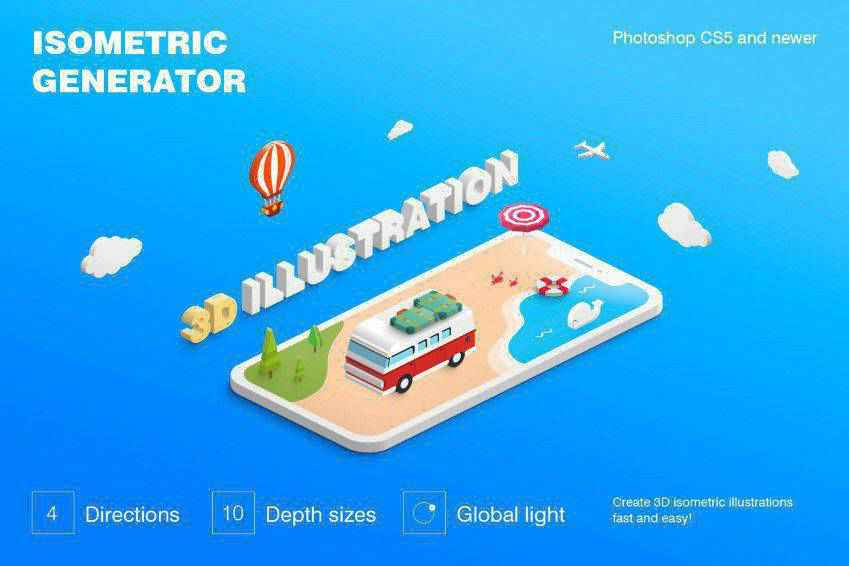
Now this is a fun one. The Isometric Illustration 3D Photoshop Generator makes it easy to create isometric illustrations from all types of illustrations. Apply it to shapes, vectors, smart objects, group layers, pixel layers, or text. It works in 4 directions, you can select from 10 depth sizes, and it comes with a total of 40 different actions.
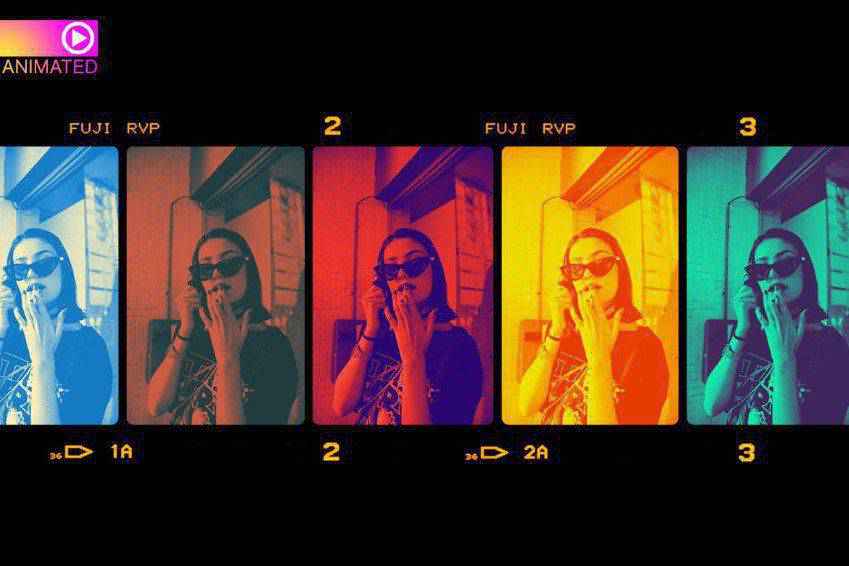
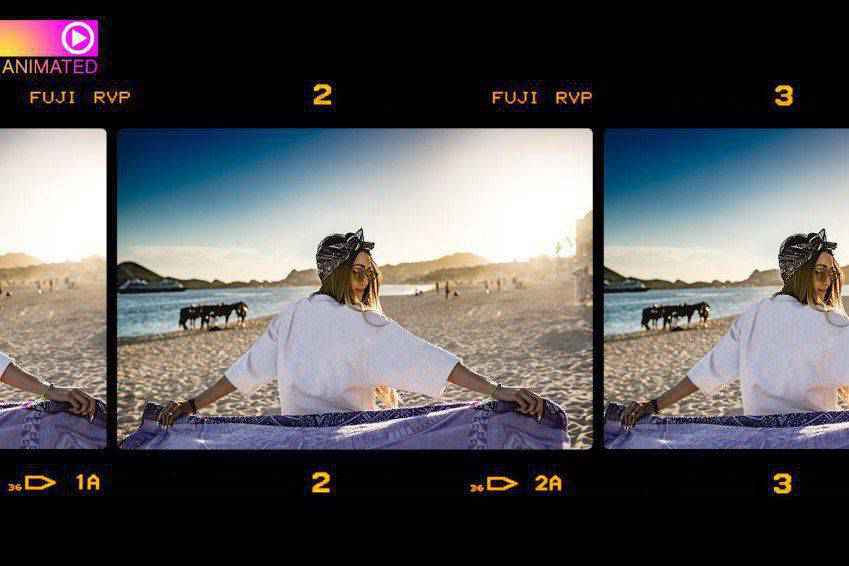
Last on our list is another animated option. Great a 3D animated GIF from one images with just a few clicks. It uses a parallax effect to create a shift in the image layers. When played on a look, it creates the illusion of 3D. It comes with 3 different vintage-style color presets, a help file, and a video file.
How to Install Photoshop Actions
- Download and unzip the action file
- Launch Photoshop
- Go to Window > Actions
- Select Load Actions from the menu and go to the folder where you saved the unzipped action file to select it
- The Action will now be installed
- To use the newly installed action, locate it in the Action panel
- Click the triangle to the left of the action name to see the list of available actions
- Click the action you want to play and press the play button at the bottom of the Actions panel
Though the prospect of creating 3D images might seem daunting at first, it’s actually fairly easy so long as you have the right tools in your toolbox. This selection of Photoshop actions for creating 3D effects ought to shave hours off your workflow time, and the results will be sure to please. Happy creating!
The post The 12 Best Photoshop Actions for Creating 3D Effects appeared first on Speckyboy Design Magazine.
I have a confession to make. I’m not actually a pastry chef. But I did work in a professional kitchen once upon a time, and baking is one of my favorite hobbies. I just love the awesome sights, sounds, and smells of a kitchen full of baking goods. The brilliant red of cherry pie filling, the magical crackle of pastry crust, the heavenly aroma of cinnamon and pumpkin pie spices…
Sigh.
I’m sorry, what were we talking about? Oh, right. Regardless of whether you bake or not, you can use a lot of the same knowledge pastry chefs and bakers draw upon every day to improve your design work. How can you do this, you ask? Well, sit back, dear reader, and I’ll tell you!

Thing №1: Use your hands
The most important tool of any pastry chef are his or her hands. They’re what allow him or her to mold and shape dough, fruit, sugar, whipped cream, and other ingredients into scrumptious confections enjoyed by customers and appreciative friends.
I’m going to go out on a limb here and assume that you, as a designer, have a pair of hands of your own. Step away from the computer screen from time to time, and put those babies to use! I find that when I’m stuck on a design challenge that’s requiring a lot of Photoshop or Illustrator-hours, the best solution is to get up, step back, and hit the craft supplies.
That’s right – break out the colored paper, scissors, glue, and have at it. Recreate your design idea as a crude arts and crafts project, similar to what you might have done in elementary school. Go back to your sketches, if you have any. If you don’t have any sketches… well now’s the time to make some!
If you’re not the cut-and-paste type, try other methods. Clay, sewing or needlework, or hey – even baking! You’d be surprised how inspiring a freshly baked plate of cookies can be. Or maybe you already know this and aren’t surprised at all.

Thing №2: Create, test, and evaluate
Do you know how many times I had to bake my famous lemon scones before I finally perfected the recipe? Let’s just say my friends were eating a lot of lemon scones at one point.
In an industry that relies on creating that perfect, flavorful bite over and over and over again, it’s vital to “lather, rinse, and repeat,” testing and evaluating your work with a critical eye and narrowing the entire process down to an exact science.
You probably don’t want to get too narrow and caged-in with the creative part of your work as a designer, but there’s a lot of your process that can, over time, be improved and executed without error. Like that perfect dollop of frosting on top of a cupcake.
Thing №3: Get the good stuff
The very best and most innovate pastry chefs (and home bakers) procure the freshest and finest ingredients they can afford from local vendors such as farmers’ markets and local growers’ co-ops.
If you’re serious about your career as a designer, particularly a freelance designer, there’s no excuse for you not to have the best tools and resources at your disposal. Everything from your software and hardware to your printer should be hand-selected to help you work at your 100% best all the time.
Anything less is just…unsavory.

Thing №4: Impart your knowledge
Many chefs in the professional culinary arena have at least a couple of students to whom they’ve given lessons, tips, advice, or criticism in some way, shape, or form. Teaching is the best way to continue learning – it keeps you on your toes and allows you to have a vital connection with the up and coming world of creative professionals. And before you ask: no, you certainly don’t have to be an established professor at a college or university to teach.
There’s no reason you can’t take a student or two under your wing while you’re still learning your craft. As I said, teaching is the best way to keep learning, and I personally have never learned so much as when I’ve taught others.
Give back to the community and gain more than you ever dreamed you could in knowledge, connections, and good karma.
Thing №5: Cross-pollinate ideas
In a professional fine dining kitchen, chefs in all the different departments (hot foods, cold foods, pastries, etc.) must work together to create a culinary experience that will make customers want to come back again and again. They must discuss meal plans and recipe combinations with the head chef and/or the restaurant management, and rely on their wits and creativity to make sure the meal breaks the mold of “normal” or “boring.”
As a freelance designer, you may not have the opportunity to consort and collaborate with other designers on too many of your projects. Nevertheless, it’s important to get at least occasional feedback and input from others that you can use to adjust your creative process and stay on top of the heap. Of course you should make friends with designers, if you haven’t already, but don’t leave out other creative professionals in adjacent industries.
Do you use a lot of photography or illustration in your assignments? Find a photographer or illustrator and talk shop to learn the finer points of how they produce their work. Printers are especially great people to have in your social network, even if you’re not a print designer. I could write a whole article on why there needs to be more communication between web and print designers (and I probably will), but for now I’ll just say: it’s much more important than you think.
Thing №6: Keep it clean
Neat freaks, feel free to skip over this one. But if you’re one of “those” designers (you know. The ones with candy bar wrappers and empty Red Bull cans littering their desks and floors of their offices), then you should probably listen up. Being a chef in a professional environment comes with its own built-in motivation for cleanliness: sanitation laws.
You just can’t be a slob in the kitchen and expect to stay in business for long. Sooner or later, those bad habits are going to catch up with you and people will find out what a Messy Bessie you are. And then you’ll get fined and possibly sued, which, from what I hear, isn’t much fun at all.
Designers can technically “get away” with being more lax about their cleaning habits, because the end product is generally unrelated to the surrounding environment in which it’s produced. But it’s a well-known fact that artists, designers, and even corporate office workers are significantly more creative when they work in cleaner surroundings.
So, clean up that mess. Your right brain will thank you.
Thing №7: An assistant from the audience
Obviously, the most successful and highest-paid chefs have assistants to help them prepare ingredients and handle the tedious jobs of doing things that don’t require a lot of skill (like, say, coring apples or dicing peaches), but you may be surprised to learn that even lower-level chefs and cooks outsource a lot of their prep work to other cooks, assistants, and even different departments. In a larger restaurant, for example, there may be an entire department devoted to removing the skins and pits of fruits and vegetables.
As a freelance designer working today, it’s easier than ever to outsource necessary but time-consuming tasks that you may not have the interest or skill level to do yourself. I’ll tell you that the first time I outsourced a difficult bit of coding work to a professional programmer, I was completely hooked.
Yes, there’s a certain sense of pride and accomplishment that comes with doing something yourself, but if you’re feeling pressured to meet deadlines on your own and your client base is swelling to higher numbers than you can handle alone, there’s definitely no shame in hiring someone to share the load. Besides, you’ll free up more time to focus on whichever aspect of your work is the most interesting to you. Sweet!

Thing №8: Learning is hard work
Obviously, since you’re here reading this article, I don’t need to tell you that educating yourself is a vital part of your development not just as a working designer, but as a creative person in general. But you shouldn’t just be learning things in your off hours. Pastry chefs are constantly discovering new ingredients and flavor combinations on the job. If something accidental turns out to be a success, it may just become the new house specialty in the kitchen.
Learn from your mistakes, and see if you can’t turn them from outright failures to “happy accidents.” Learn the art of repurposing things you think won’t work; examine them from different angles and find the kernel of brilliance hidden just under the surface.
Then again, sometimes things just plain…um…suck, and it’s good to know when to stop working on something as well. Refer back to #5 and get feedback from your friends and colleagues to help you figure out where the line should be drawn.
Thing №9: Support the local industry
The culinary industry isn’t just chefs and cooks slicing and dicing it up in a restaurant. It’s also the farmers who grow the produce and raise the livestock; it’s the vendors who sell it fresh at wholesale prices; it’s the food critics and bloggers who rave about the newest delectable creations coming out of the kitchen. Support for the local surrounding industry is something that’s beaten into the heads of aspiring cooks in culinary school, and it’s an important thing for designers to consider as well.
Find out who’s working in the printing, manufacturing, bookbinding, and other industries in your immediate area. If you need to outsource some part of your design project, consider looking locally first, and building relationships with small business professionals in your area.
Also, this might be sacrilegious to some more financially driven designers, but try to find ways to support your clients as well. If you’re lucky to get a job from an awesome small business or individual, don’t be afraid to spread the word. Try out the product or service they’re offering – if you like it, let people know (in, you know, a non-obnoxious way, of course).
In today’s economy, we all need to help one another to succeed. For designers, that means building up the industry around you and doing what you can to nurture it.
Thing №10: Be awesome!
I probably don’t have to tell you this, but I will anyway. Everyone, no matter what industry they’re in, should strive to produce the best work they possibly can – every single day. I say this a lot, but if you don’t put your best foot forward for the little things, you’ll never be truly successful at the big things.
It’s one thing to get lazy for Aunt Millie’s dog grooming website; quite another to drop the ball on a branding assignment for a multinational corporation or a celebrity client.
If you get into the habit of slacking off, you’ll have a harder time keeping up the pace when your clients get more and more significant.
The post 10 Things Designers Can Learn From Pastry Chefs appeared first on Speckyboy Design Magazine.
Social media icons are a necessity for every website. They’re instantly recognizable and useful for encouraging users to share your content or to visit your Facebook or Twitter profile.
Yet, these visual assets have become so common that we sometimes leave creativity out of the equation. And while there’s nothing wrong with using a more conventional look, there’s much to be said for standing out.
That’s why we went on a search for unique social media icon implementations. Ones that feature different takes on layout and even the icons themselves. Then there are those that look a bit more mundane – that is, until you interact with them.
Ready for something different? Then check out our collection that takes social media icons to another level.
Take a Profile
City-dwellers will recognize the inspiration behind this UI. Links to various social media profiles look similar to the “take a number” flyers often seen on community bulletin boards and telephone poles. The paper-like look, complete with creases and shadows, make this a can’t-miss feature.
See the Pen
“Take a number” contact list by Suzanne Aitchison
Fancy Box
This example is different in that it requires the user to hover over the element to reveal a set of social media icons. True, it does make for a little more work on the user’s end. But with the right labeling, it could add a bit of fun to a personal portfolio or resume site.
See the Pen
Social Icon Hover Effect by Mike Young
A Simple, Yet Familiar Look
These are not your standard social media logos – they’re not logos at all. Still, these simplistic letter icons are intuitive. That’s in part because they use each service’s primary color as a background. Upon hover, they also display the service’s name as part of the “Follow us” headline at the top. CSS and jQuery power this attractive set.
See the Pen
Social media minimal icons by Anton Petrov
Exploding Layers
OK, maybe that headline makes you think of some crazy action movie sequence. This example doesn’t go quite that far. But it does offer a beautiful hover effect that brings each icon to life with 3D-colored layers. Perhaps the only tweak would be to have the colors reflect those of the services – but that’s a minor quibble. Otherwise, this one is sure to grab some attention.
See the Pen
Code Challenge 2020 || 3D Social Media Button by Nour Ibram
Peek-a-Boo Profiles
Here we have a set of social icons that are just begging you to interact with them. Each one peeks out just above a flat border and are fully-revealed upon hover. It nicely straddles the line between usability and the element of surprise.
See the Pen
Social Media icon reveal with transition by Stefan Göllner
Founder Cards: Collect Them All
Would you like to have a picture of Mark Zuckerberg or Jack Dorsey on your site? No? Well, this is still an attractive way to display social sharing cards. You could always swap out those images for something a little more relevant. Even better is that the cards in this demo link to a YouTube video tutorial. And don’t worry about those social media titans. They likely know everything about your website anyway.
See the Pen
Social Media Share Cards by Himalaya Singh
SVG Rainbow Paradise
There’s nothing like a blast of color and slick animation to get a user’s attention. These animated SVG line icons have it all. Each icon features a unique color gradient. From there, a draw-and-fill effect takes place when hovering.
See the Pen
Creative Social Media Icon by Chouaib Belagoun
Etched in Glass
Glass effects and neumorphism offer subtle beauty to any design element. It was only a matter of time before they were applied to social media icons. This pure CSS UI falls more into the former category, with a cool frosted effect. The neon “glow” of each item makes them reminiscent of a set of fancy wall lights.
See the Pen
Glass effect social media buttons with neon glow by Kevin Miranda
Uniquely Social UIs
It’s amazing what some creative use of CSS and JavaScript can do. They can turn some the most recognizable logos on earth into a new and fun experience. The examples above offer just a few ways to achieve it.
If you’re looking for even more inspiration, check out our full CodePen collection!
The post 8 Unique Ways to Implement Social Media Icons with CSS & JavaScript appeared first on Speckyboy Design Magazine.

