Brooke is on her way to a biochemistry class at her university. As she makes her way to her usual classroom, she finds it filled with maintenance workers trying to repair a ceiling leak.
Then she spots a note on the door that says, “Class moved to room 314.” Following the note’s lead, she reroutes to room 314 and joins the rest of the class there.
The above example takes place in a physical space, but relocating and rerouting can happen online too. When it does, it happens through a redirect. Redirects are common, and they also significantly impact search engine optimization (SEO).
But what are redirects, and how can they impact your site’s SEO? Read on to learn more. Then try out our SEO checker to see where your site currently stands regarding redirects!
Put simply, a redirect is a line of code used to make browsers send users to a different URL than the one they were originally trying to visit. The new URL should contain similar information to the original, so it can fulfill a similar purpose.
For example, let’s say you sell mattresses, and a user wants to visit your website to learn about your queen-sized mattress options. They start on your homepage, where they click a link to your “Queen” page. The URL for that page is:
However, that page is currently down for some reason, and until it’s back up, you need to send users to a different page. So, you create a redirect on that page. The result is that whenever a user tries to visit that URL, it automatically redirects them to:
On the redirected page, users should still be able to find similar information to the original, and they can do it without the annoyance of encountering a page outage.
When should you use redirects?
Redirects are useful tools for several situations. Here are some of the most common instances when you might use redirects on your site:
Temporary page maintenance: When you temporarily take down a page to rework or improve it, you can use a redirect to take users somewhere else in the meantime.
Permanent page deletion: Sometimes, you may completely remove a page from your site, but you’ll still want the links that lead to it, so you’ll redirect to a different URL.
Page merger: Another good time to use a redirect is to merge two separate pages into one. At least one of the original URLs won’t survive the merger, so you can redirect from it.
Domain change: If you create an entirely new website on a different domain, you may want to use redirects on a large scale to preserve the inbound links from the original.
All these situations could call for a redirect.
How do redirects affect SEO?
Redirects are often useful tools. In general, however, it’s a good idea to avoid using redirects when you can.
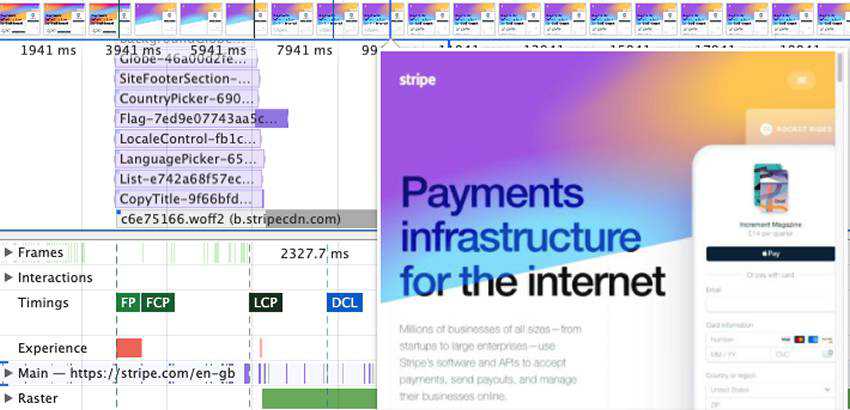
Redirects take longer to load than normal ones, slowing down your page load speeds. For that reason, try not to use them when you don’t have to — at least not permanent ones.
For example, if you want to create a new version of a page, try to simply update the original URL instead of creating a whole separate page. Keeping the original URL will ensure faster page speeds, leading to happier users and higher rankings.
Types of redirects
Not all redirects are made alike. Some serve different purposes than others, whether based on how long they’re in use or based on how they function.
Here’s an overview of the different redirect types you should know.
Permanent vs. temporary redirects
One of the major distinctions between redirect types comes down to whether they’re permanent or temporary. If you’re just doing some maintenance on a page for a few days, you’ll only want a temporary one — but a domain change is much more permanent.
When search engine crawlers encounter a temporary redirect, it essentially says to them, “Go to this other page for now.” The crawlers don’t memorize the temporary URL, so they’ll aim for the original URL next time they try to visit that page.
With permanent redirects, though, the old URL is done being used for good. The redirect tells the crawlers, “This is the new URL. Forget about the old one. Memorize this one, and visit it from now on.” That means that on subsequent crawls, things will run more quickly.
Server-side redirects
Server-side redirects are those that occur directly on the server.
What does that mean? Whenever you use a browser to visit a URL, the browser sends a request to the server, which then directs the browser to the corresponding page.
So, with a server-side redirect, the server handles the redirect itself — the browser asks for URL A, and the server will intuitively send it to the new URL B instead.
The majority of redirects fit into this category, including the two most common:
301 redirect: Permanent redirect used for deleted pages
302 redirect: Temporary redirect used for pages under maintenance
For more information about 301 redirects, take a look at this helpful video introduction!
The distinctions between the individual redirect types listed above can be subtle and technical, but they all qualify as server-side redirects.
Client-side redirects
While 301 redirects and 302 redirects are the most commonly used, not all redirects happen on the server. Client-side redirects exist as well, where the browser — the “client” — has to handle the redirect itself.
With these redirects, the server doesn’t automatically redirect the browser to the new URL. Instead, when the browser makes its request, the server basically tells it, “Try asking for this other URL instead.” Then the browser has to ask a second time.
Because client-side redirects involve a lengthier process, they tend to be much slower, making them inadvisable to use. That said, there are two main types of client-side redirects:
Meta refresh: Refreshes the original page to a different URL
JavaScript: Changes the window’s URL after the code is run
Again, these both involve some technical know-how to fully understand, but you generally want to avoid using them anyway.
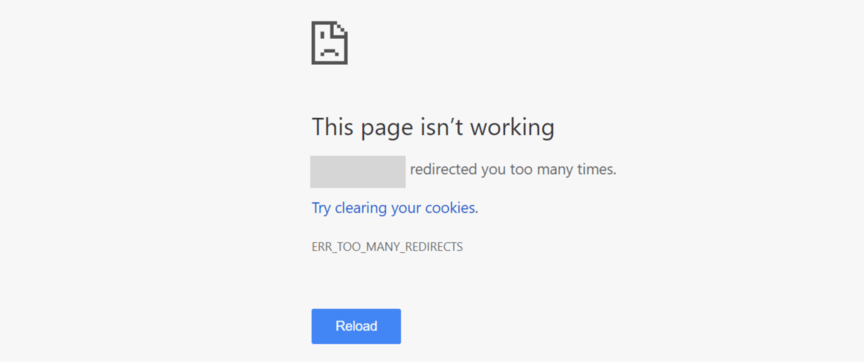
Redirect loops
A final problem to look out for when using redirects is the redirect loop. Redirect loops occur when a browser has to follow too many redirects to load the page at all.
Sometimes this happens because an old URL redirects to a new one, but the new one ends up redirecting back to the old one, causing an endless cycle. Other times, it happens because you move a page’s location multiple times, forming a whole chain of redirects.
When a browser has to follow too many redirects in a row, it will return an error message telling users that there is a redirect loop. The result is that users can’t access either the old or the new page.
To avoid this problem, be sure to check for loops whenever you set up redirects. Tools like Screaming Frog and Ahrefs can provide you with reports that will alert you to any redirect loops on your site!
Time To Level Up Your Sales
Our long list of services helps you make waves in your industry and increase metrics that matter most - like sales.
IN THE PAST 5 YEARS, WE'VE MANAGED MORE THAN 11.5 MILLION TRANSACTIONS ACROSS OUR CLIENT BASE.
WebFX can help you use redirects to your advantage
Need to use redirects on your site, but scared of how it will impact your SEO? WebFX can put your fears at ease. We’ve been driving results through SEO for over 20 years, so we’re well-versed in using and optimizing redirects.
With our SEO services, you’ll get help with setting up all the redirects you need and optimizing all the other elements of your site to achieve high Google rankings. You’ll even receive a dedicated account representative to keep you informed about all that we do.
To get started with us, just call 888-601-5359 or contact us online today!
tiptap Headless WYSIWYG Text Editor – It’s customizable, comes with a ton of extensions, is open source, and gives you full control over every single aspect of your text editor experience.
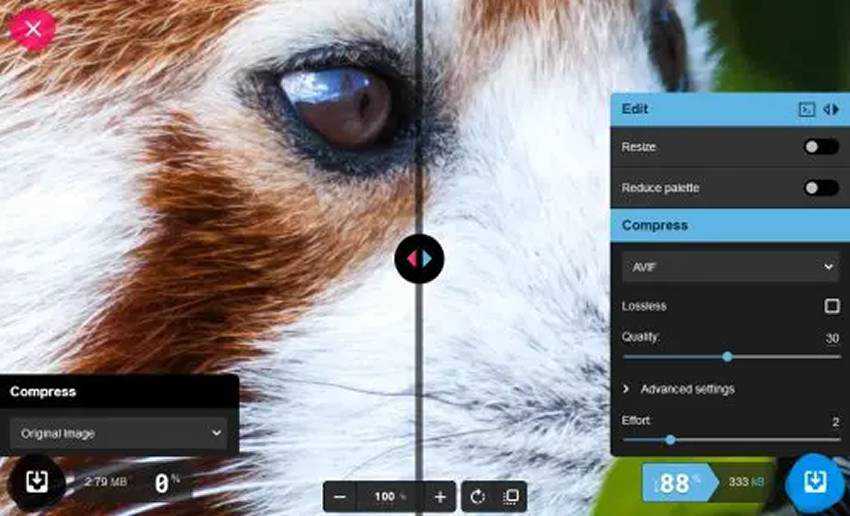
Web Developer’s Guide to AVIF Images – AV1 Image File Format (AVIF) is a royalty-free image format that typically performs better than other popular alternatives like JPEG, PNG and WebP.
Web Interface Handbook – A free book about the fundamentals of creating a good web interface. Covering how to create effective forms, typography, grids, and many other components of web design.
Content-Aware Image Resizing in JavaScript – This tutorial provides you with an interactive content-aware resizer so that you could play around with resizing your own images.
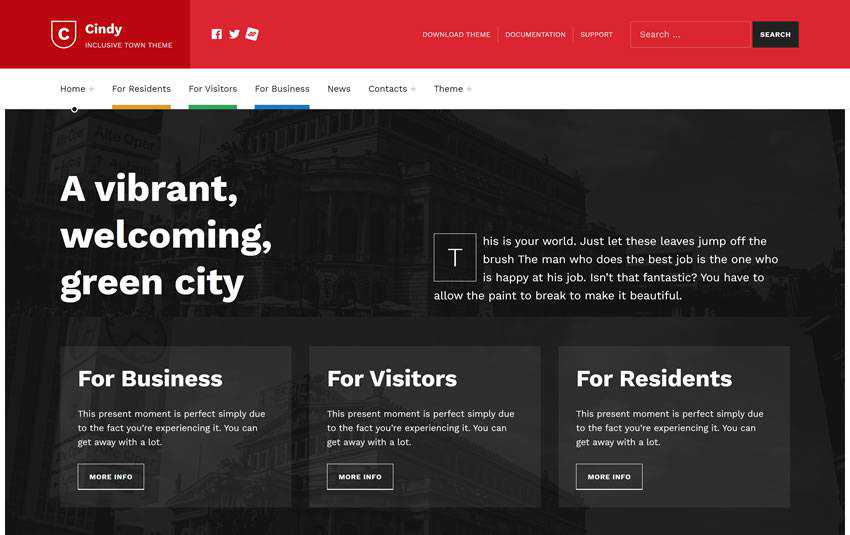
Cindy Free WordPress Theme – A free WordPress theme for building an accessible, inclusive website for your hometown, city, village, community, local government, or politician.
Not Your Typical Horizontal Rules – Learn hot to get a little bit creative with an HR that will add a nice little personal touch to your content and designs.
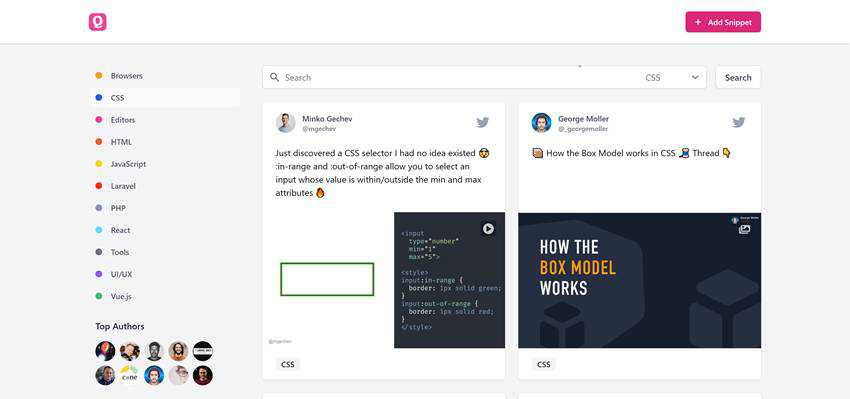
QuickSnippets – Collections of code snippets that have been shared on Twitter.
50 Free High-Resolution Texture Packs – A huge collection of free high-resolution texture packs that are just shouting out to be used in your next design project.
A new program has been added to the
Free Font Editors
page. This software lets you create your own TrueType or SVG fonts, and it runs on Windows, macOS, Linux,
OpenBSD and FreeBSD.
In the latest episode of the Digital Marketing with Bill Hartzer, I talked about some basics of video SEO, but also discussed how to get Key Moments In This Video in the search results. I go over generating Video Schema and a show you a good site for generating schema markup code. As an extra bonus, I also show an example of a website that has a featured snippet but it cloaking their page.
Here is the full transcript from this podcast episode:
Bill Hartzer(00:01):
Hi, this is Bill Hartzer, and this is the digital marketing podcast with Bill Hartzer, for April 29th, 2021. And today I’m going to talk a little bit about videos doing some optimization and a couple of different options here,
Bill Hartzer (00:20):
Or we’re actually doing some video audits
Bill Hartzer(00:27):
I’ve talked a little bit before about optimizing videos and so forth and, and there’s a lot of SEO, you know, things that you can do, but there’s a new feature is a feature that I think that is starting to show up in the search results. And I’ve noticed it a little bit more often. I’m going to give you an example in particular and I’m, if you’re listening, you’ll probably have to just listen through and on the podcast. I do have, I am doing this on video and my, all my videos and all my podcasts, actually. So all my podcasts are actually also videos that I put on the YouTube channel. So if you are listening on maybe desktop or something, you might want to go actually and see the video and do it that way and subscribe that way. But regardless, I think there’s some good information here that that you
Bill Hartzer (01:29):
Can listen to
Bill Hartzer(01:32):
And, and gain from this. So that said, I’m going to share my screen and
Bill Hartzer (01:42):
Yeah,
Bill Hartzer(01:42):
Move a few things out of the way. And so this is we’re working right now at the Google search results. And in this particular case, this is a B2B business to business type of search where steam as a service. And this is a good example because
Bill Hartzer (02:04):
It’s a B2B keyword
Bill Hartzer(02:06):
Phrase and there’s not a lot of searches for this per month. So it’s, it’s interesting that this feature in Google is showing up on desktop. And typically it shows up on the search results for mobile, but they rolled this out maybe in 2019 or so for mobile. And then now we’re seeing it on, on the desktop search results. And so something you’d probably want to add to your videos. So steam is a service we have here, the search results. And
Bill Hartzer (02:44):
This is
Bill Hartzer(02:45):
Interesting because the first search result is obviously Google ad. Second result is a, what we call a featured snippet. So this featured snippet in particular is interesting because this company is cloaking and which is against Google’s guidelines. We meaning that when you click on the search result which is a featured search result, you actually are redirected to another page. And that is against Google’s guidelines. When you click on this result, you need to be, you need, we as visitors as, as we expect to go to the page, we click on it. We don’t expect to be taken to some other page. I investigate this in particular and that page still exists, but they decided to do something weird. And by weird, I mean, adding some code that takes video, takes people to the homepage when you click on it. And again, it’s how are we against Google’s guidelines?
Bill Hartzer(03:49):
And they could actually for cooking, they probably get a manual option and the whole site will be penalized as a result. So you probably don’t want to do that, but with scroll down the search results, though, we’ll start, we’ll see we have a few search results for steam as a service, then we have some videos. The first video actually is from Mira America company limited. And we’ll put it uploaded back in January, 2020. So, but what you see Google is actually showing. So a blue box, which is pretty big, pretty prominent. And at the fact is right under the video it’s as five key moments in this video and what it shows is five different different excerpts, if you will, or five different moments in the video as they describe it 29 seconds and one minute and 49 seconds, two minutes and five seconds and so forth.
Bill Hartzer(04:53):
Okay. And the video. So you could actually click on that. New would bring you right to that point in the video. Now I started to investigate fairly recently, you know, how this particular company or this video got this snippet. And it’s interesting is because, you know, or this call-out now, if you notice that there’s two more videos here and it’s the box is not a large it’s just, there’s also for these others three key moments of this video, the first one. And there’s also four key moments in this particular video, but like I said, Google actually makes this larger. So the users are, you know, would tend to click on this particular video. Most likely, probably more even, even because they probably more, because they have this call-out since they, since these other ones have it, these these other videos might be more relevant.
Bill Hartzer(05:57):
But again, people may probably cook on this because it’s called out and has this blue box. Now, if we look particularly at the video itself, okay. Now normally when, if you want to get these particular if you want to get these particular call-outs key moments in the video, you would do w do what I’m going to show you in a minute, which is call out those times and decide for yourself, okay, what are the key moments and at, and so forth. Now, one of the key moments here, this particular video is that two Oh five Armstrong as a fi a fifth generation family. I was taking note of that because if we look at this, okay. At two Oh five here, and this, I turn on the closed cat, they’re not getting that phrase from the Google, from the coast. Let me turn that off.
Bill Hartzer(07:01):
They’re actually getting it from hacks. It appears they’re getting it from text that’s in the video itself. Okay. That’s an, essentially an overlay in the video. Okay. So that indicates to me right there, that, that shows in particular that Google is probably reading that text in the video, which is pretty interesting to me. Okay. We know Google reads text in images, and we know for Google my business, there are, you know, they read that text there in, in images, but for example, a sign, okay, they’ll be able to read the sign and the video, or rather good Google my business. If you upload a photo of a location or a restaurant and the restaurant sign, they’ll be able to re you know, they do read that too. If there’s a, if there is a sign in the video, for example, or in the image, rather, same thing with the video, this is, this is new to me, but this is kind of proof if you will.
Bill Hartzer(08:14):
The Google actually reads that because the fact that they’re not getting it from the description, and normally what they recommend is to do this when you edit your video. Okay. In your video description is to add the key moments. Okay. And I’ve added here, this particular video, I’ve added one, two, three, four, five, six different key moments. And when I edited it and when I edited it, okay. In particular, when I edited the video, that description, I just put in to colon forties space companies merging and rebranding, that could actually be on the other side. It doesn’t matter where that is, but when you save it instantly becomes a link and Google or YouTube essentially makes these links and will jump people there. So when this video is then read on, or, you know, if Google looks at the video again, that they actually will see those key moments and we’ll actually pull fully get that, those key moments in there.
Bill Hartzer(09:34):
Okay. So that’s how you actually get them is you edit your description from now on. I’m going to actually be doing that. And all my videos, this particular video itself, as I talk about different subjects for different topics, I’m going to be adding as I go through and do the transcription and so forth. I’m going to actually be adding these as well to all my videos from now on, I may go back and to other videos and do that, do this as well. So that said, I also want to talk a little bit on another subject that’s related is once you have done that video I do recommend transcribing it. So, you know, use the company rev.com or something like that, or, or just transcribing it by listening to it. There’s different options for transcription. What I do recommend though, is transcribing it.
Bill Hartzer(10:32):
And then what I do personally is I do a blog post. So in this case, once this video is recorded, I will transcribe it. I will go through the video and pick out some key moments and I’ll add those key moments. But then when I actually make the blog post with the transcription I’ll and an, a screenshot of that. So actually and put that embed the video in the blog post, and then I’ll add video schema. So technical seo.com has a schema markup generator, 10 of us ceo.com was by the company Merkel. This is actually free. They have a schema markup generator, there’s different types of schema code. You can from an AR article law, posting bright crime. Thank you page. And so some, you know, local business, but let’s talk about a video schema. We want to add this, we want to fill this out as much as we can.
Bill Hartzer(11:32):
And then once it’s filled out, like I put in the, you know, in that particular case to put in, you know, put in the the name of the video. I put in, put in the all of that text in there. I also actually did add that particular text as well and put that into the description. And so what happens is once you fill this out and you put the, you know, the, the upload date and put all this, you know, and, and, and, and everything about the video, it automatically generates the schema markup code. So if you’re doing like a blog post in WordPress, you actually just, once you take the embed code from YouTube, put it in the blog post, then right after that, or somewhere in the video, you also want to copy that this Java script. Okay. And then put that also, I recommend putting it right next to the or right after the embedded video code
Bill Hartzer(12:40):
That code. Okay. This code here that I’m showing here, I thought hop how I, it’s not going to show up in the, in the, in the S in, is not going to actually show up in the blog post itself. Okay. Because it is JavaScript. However, what it’ll do is it’ll, it’ll give the search engines more information about the video and there’s more likely that they will pick up on things. Like the thumbnail, like the upload date, it just, and the description and the, yeah. It’s Mo it’s just best practice to actually add it in there. It’ll, it probably will help you. And so that’s one of the other things that I add, obviously when you’re adding a video you know I try and add certain number of tags to, but seven tags. If it’s rebrand, I’m going after a keyword, rebranding or business.
Bill Hartzer(13:40):
I want that at the beginning of the, I want it in there. I do want in an in description. But again, my point here today is to understand that this key moments where you can get these actual call-out ALS are important to add in the description. For some reason, this particular video got those call-outs, but I’m not sure where they’re coming from. So, but we know because Google has told us that you can put them in the description and that’s where they pull it from. So that said that don’t have any other particular points I want to make today. However thanks for listening this afternoon. This is the digital marketing podcast with Bill Hartzer for April 29th, 2021. Thanks again for listening. And we will see you online.
As the name suggests, the WordPress Design Library is a library of WordPress design assets, enabling anyone to quickly create design prototypes for WordPress UI in Figma.
These tools are useful for designers when creating new UI and for anyone looking to contribute ideas, enhancements, or even solutions to bug reports. Sometimes pictures really do speak a thousand words.
In this post, we’ll talk about some key features of Figma before diving into a practical example that demonstrates some of the WordPress Design Library utilities.
What Is Figma?
Figma is a collaborative design tool that members of the WordPress project’s design team have been using for several years to work on and share design concepts. It offers a variety of handy features such as: in-browser access, rich prototyping tools, component libraries, code inspectors, live embeds, inline commenting, plugins, and much much more.
Perhaps best of all, it is totally free to sign up and start playing around. If you join the WordPress.org Figma organization (instructions below), you’ll gain access to the WordPress Design Library enabling you to design WordPress UI in no time.
What Is the WordPress Design Library?
In Figma, you can share components and styles by publishing them, transforming your file into a library so that you can use instances of those components in other files.
It may be easiest to think of the WordPress Design Library as a visual representation of all the javascript components that compose UI in the WordPress codebase. As an end user of the library, you can use those components in a self-contained environment to create new interface designs. It’s kind of like a big LEGO box containing all the UI pieces (buttons, form inputs, etc.) that you can use to create and try out new designs.
Creating designs with these assets enables rapid ideation on new interfaces by removing mundane processes that one would ordinarily have to work through. Nobody wants to repeatedly double-check that the button they made perfectly matches the buttons rendered by the code! And on the flip-side of that coin, anyone sharing a design with others will generally endeavor to make specific elements (like buttons) match what exists in the code as closely as possible. The WordPress Design Library solves both these headaches and more.
An additional benefit to these assets visually matching what exists in the codebase is that any designs you create with them will inherently make use of the latest WordPress design language and consequently feel like WordPress with almost no effort required. Passing such designs on to developers makes them easier to interpret and implement too.
Figma Fundamentals
Before getting into the practical section of this post, let’s quickly cover some of the fundamental features of Figma libraries. This will help prepare us for working with the WordPress Design Library.
Components
As we touched on above, the library consists of “components” that serve as visual counterparts to their code-based equivalents. That is to say, there is a Button component in Figma, and a matching Button component in the WordPress codebase.
But what is a Figma component?
Components are elements you can reuse across your designs. They help to create and manage consistent designs across projects.
Let’s quickly explore some of the properties of Figma components to understand the ways they help when working on our next design.
Variants
Some Figma components offer variants. One example is Button(s) which all have the following states:
Resting
Hover
Focus
Disabled
These can be manipulated via the variants interface in Figma:
Other examples of components with variants are form inputs and menu items. Variants are a new feature in Figma, so we’ll be adding more over time.
Overrides
Although any components you insert are intrinsically linked to the master component in the library, it is possible to override some properties.
While working with an instance of the Button component, you can change things like the label, or even the background color, while maintaining the link to the master component in the library. If you’re familiar with git workflows, this is kind of like creating a local branch. Any changes you make can easily be reset in a couple of clicks.
Overrides made to your local instance will persist even when the master component is updated. So if your design calls for a button with a green background, you can apply that override safely with the knowledge that even if the master component is updated, your button can inherit those updates and remain green.
We’ve only really scratched the surface of components here. So I would recommend the official Figma documentation for more advanced information.
Figma Styles
In addition to components, styles are also published as part of the WordPress Design Library. They have similar properties to components in that a master style exists in the library and can be utilized in your local Figma file. Just like Components, Styles will receive updates when changes to the library are published.
Styles are used to define colors, typographical rules, and effects like drop-shadows present in the WordPress codebase. They enable you to apply things like text or background colors that will match other UI parts.
Using Styles from the library, you ensure that your creations match existing UI elements, making it easier to implement.
“Stickers” are simply arrangements of Components and Styles that have been combined to represent common UI elements. They are not good candidates for full componentization due to their frequent customization needs. Examples of Stickers include the Inspector sidebar and the block inserter:
Their utility is simple: find the sticker you need, peel (copy) it from the WordPress Design Library, and stick (paste) it into your local file before customizing as needed.
Stickers are not Figma features like Components and Styles, but any stickers you copy to a working file will stay up to date by virtue of their underlying assets.
Views are arrangements of components, styles, and stickers.
Designing a Block Using the WordPress Design Library
Okay, now that we have a handle on the basics of Figma libraries and their features and the utilities of the WordPress Design Library like Stickers and Views, let’s work through a practical example – designing the UI for a brand new block.
Getting Started
All you need to get started is a Figma account added to the WordPress.org Figma organization.
Once you’ve signed up at Figma, simply join the #Design channel on the community Slack and request an invite. Include your Figma username, and a friendly community member will help get you set up in no time.
Now the fun begins!
To create a fresh new design file in Figma, visit the Gutenberg project and click the “+ New” button.
Now let’s include the WordPress Design Library in our working file so that we have access to all the goodies we’ll need:
Open the “Assets” panel and click the little book icon to view the available Team Libraries.
In the modal, toggle the WordPress Design Library on. You can leave the others off for now.
After closing the modal, you’ll notice a number of components become visible in the assets panel. To insert them, they can be dragged on to the canvas:
It’s kind of like inserting a block
Creating a Pizza Block
I love to eat pizza, so for fun, I’m going to design a new block that simply allows the user to display a delicious pizza in their posts and pages. I want the block to include options for a total number of slices and different toppings.
Work Out the Flow
I always like to concentrate on individual flows when designing blocks. That is to say, the linear steps a user will take when working with that block. In this case, I want to create visualizations of the following steps/views in our Figma file:
Inserting the block from the Block Inserter
The Pizza Block placeholder state including options in the block, its Toolbar, and the Inspector
The configured Pizza Block settings
The end result – a delicious pizza sitting comfortably on the canvas
Sketch the New States
Thanks to the WordPress Design Library, I’ll be using as many existing UI components as possible, but I still need a rough idea of how they will be composed in the new interfaces that my Pizza block will require. I normally find it helpful to sketch these out on paper.
Here’s the placeholder state which users will see when they first insert the block. This should be all I need:
Prepare the Views and Stickers
Helpfully, there are Views in the WordPress Design Library I can use for each of the steps in the flow outlined above.
I open the library, navigate to the Views page, find the views I need, copy them, and paste into my working file.
It is very important to copy (not cut) Views from the library so that they remain intact and other people can still access them. If you cut them, they’ll be gone forever, so please don’t do that
I’m also going to need a block placeholder sticker, so I navigate to the Stickers page, copy the one that most closely resembles my sketch from before, and paste it into my working file.
As with views, please only copy stickers; do not cut them.
Gather the Components
Referring back to the placeholder state I sketched out on paper (it can be helpful to import this into your Figma file), I can see that I’m going to need some form elements to realize the design.
I navigate to the Assets panel, locate the components I need, and drag them into my file:
Helpful tip: Once a component has been inserted, you can transform it into another component via its settings panel. Sometimes it is easier to copy/paste a component you already inserted and transform it this way, rather than opening the assets panel over and over.
Arrange the Views, Stickers, and Components to Create a Coherent Design
Now that we’ve gathered all the individual pieces we need, it’s simply a case of arranging them so that they resemble each of the steps of the flow we outlined before. This is done with simple drag and drop.
If you’re familiar with software like Photoshop, Sketch, and others, this should feel very familiar.
Once everything is in place, our flow is complete:
I still find it incredible that we’re able to do this in just a few short moments.
Hook up the Prototype
With each step of our flow created, the last piece of the puzzle is to connect them and form a clickable prototype.
I switch to the Prototype panel and create click behaviors by selecting a layer, then dragging the white dot to the corresponding frame.
There are a variety of behaviors that the Figma prototyping tools support, such as a hover, drag, and click. It is even possible to create smart animations. Perhaps that’s something we can explore in another tutorial, but for now, I will refer you to the Figma documentation for more advanced prototyping.
Now that I’ve connected all the appropriate elements, I am able to take my prototype for a test drive by clicking the Play icon:
I tried to keep this tutorial fairly simple and concise; even though we only really got to grips with the basics here, you can see the power of Figma and the WordPress Design Library when it comes to trying out new designs.


 icon:
icon: